Some insight into my new sub-rail tooling.

realkingcobra

Well-known member
Silver Member
First of all, I'm working on 2 sets of GC2 rails. Of the 12 rails, 10 of them have sub-rails thicker then they're suppose to be, 2 of them the sub-rails are shorter than the needed thickness.

Then, even though all of the sub-rails are wider than they're suppose to be, 4 of the 12 were really wide.

2 of the rails had wood come off the face of the sub-rail with the removal of the cushions, but one was real bad, I didn't remove the cushions, Clark did, the room owner, but that's OK.

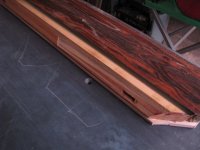
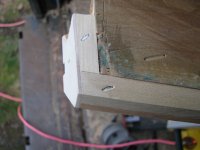
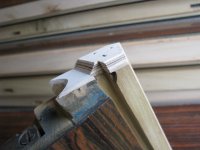
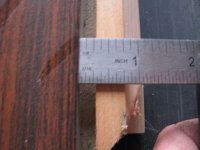
In the first picture, that's the factory edge on the top of the sub-rail. In order for GC's to play correctly, this height from the playing surface of the slate needs to be set at 1 11/16"s of an inch.
Correcting sub-rails 003.JPG

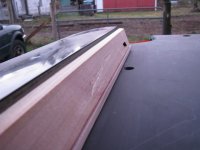
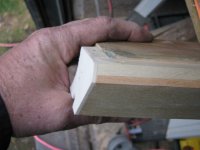
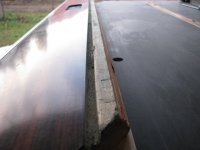
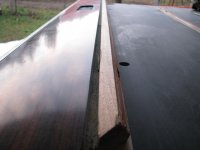
After correcting the thickness of the sub-rails, as I said, 10 out of the 12 rails were to high at sub-rail thickness which means inconsistent nose height of the cushions. In the next 2 pictures, you can see my tooling took off the extra height of the sub-rails to make them all a consistent height.
Correcting sub-rails 006.JPG

Correcting sub-rails 007.JPG

When you're installing K55 cushions that are 1 1/4" wide, the sub-rail width from the bevel down angle to the Formica finish has to be 3/4" in order to add up to 2" so that the playing surface will be a consistent 50"x100" and for the rails to line up with the pocket casting corners, that also means that if the cushions are at the correct width, then the Formica is correct at 54"x104", which is what you need in order to line up the rails in the pockets with the points of the corner pocket castings, and straight across the side pocket castings.
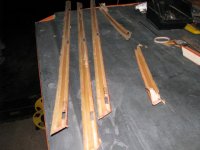
Correcting sub-rails 013.JPG
 
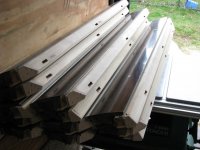
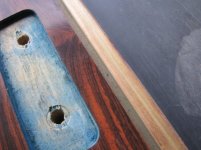
And as evidence that Brunswick GC rails are inconsistent, in this picture, you can see how thick the cut off was from 4 of the rails, where as the extra width of the other 8 went up in dust.

Correcting sub-rails 027.JPG

You can see in this picture how much wood broke out with the cushion being removed.

Correcting sub-rails 016.JPG

And in this picture, you can see how much wood was actually broke out once the rail was cut down to the correct width. The little bit of missing wood is in the cavity area behind the cushion so I'm not going to even bother filling it in with anything as it has no effect.

Correcting sub-rails 019.JPG

That slate you see in the pictures is in the back of my truck, and that is the slate I bolt the rails down to when I make the changes to the sub-rails.

Glen
 
Gc

Nice work!
The owner is gonna freak out on how well the table plays when you are all done..
-
Rob.M
 
These are tables 3 & 4 of 11 GC1's & 2's. The first one I rebuilt gets an average of 15 hours a day of play on it, don't know what the second one gets played, I imagine pretty much the same;)

Glen
 
I do the same thing as you do, the same way, and the same turn out of the job......only I have my slate in the apartment. LMAO
Thanks to you the rails come out better than factory.

Glen, you really go the extra mile on everything, that's why you're the best at it.
Thanks for all the help you've giving me.

Mark Gregory
 
Ya know what Mark, I never really saw how inconsistant rails are built until I came up with this new tooling. When you start doing multi sets of GC's you really get to see the difference between all the rails. You're going to have a blast with your new tooling Mark, and I guarantee you, it's going to make being a mechanic fun again:grin:

Glen
 
Hey Glen you gonna be at Valley Forge this year? I would like to say hello in person. I am not a mechanic I just like to tinker and thanks to you posting here, I have a great playing gold crown 3. It is nothing like what you do but its good for me and the guys.

If I don't get to shake your hand, Thanks keep doing what you do.
Dino
 
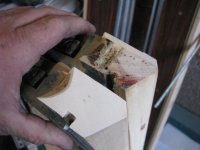
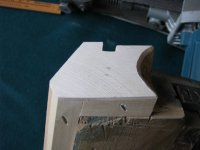
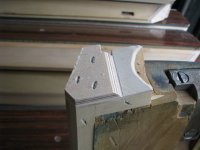
OK, now that the cloth relief is all cleaned up, ready to start on the pocket miters and down angles now. As you'll see in the pictures the new stappling wood turned out great as well as the backward angle on the bottom of the sub-rail...everything blended perfect. But like normal, one of the side pockets was cut a little shorter than all the rest of them at the factory level in production, so I had to first restore it to the factory spec's before I could extend the rails. As you can see, fixing the factory screw up turned out great.

Pocket angles 009.JPG

Pocket angles 011.JPG

Pocket angles 015.JPG

Pocket angles 016.JPG

I'm just in mechanic's heaven with this newly designed tooling:D
 
Man, after all the years off cutting the sub rail off and making new sub rails. (THE CAVE MAN DAYS OF WORK ARE OVER NOW) 100 times faster, with the same results. THANK YOU-THANK YOU-THANK YOU!!!!!!

The fun in the job is coming back, well not totally, but a lot more pleasant to do the job.
As long as work stays good, I think I'll be able to keep up with all the jigs you want me to build, and buy. LOL

Good job Glen, things are looking up for the perfect table. LMAO

Call ya later man

Mark Gregory
 
Wait until I get the next tooling designed, you'll be able to take the rails, slide them into the jig, and the tooling then cuts back the pocket miter and down angle at the same time. If the rails were not cut right from the start, all you'll have to do is add extra wood to the end of the rail, turn the machine on, insert the rail...push it in until it hits the stop block...and when you pull it back out...the miter and down angle will all be corrected. If you want to tighten up the pockets to what ever, all you'll have to do is place the correct thickness spacer between the end of the rail and the positive stop block...and in about 5 seconds you just extended the sub-rail and cut the cushion back flush with the end of the bevel...ready for facings:grin:

Glen
 
Glen, I love all your new idea's, and they all work perfectly as we knew they would....but how much is it going to cost me this time.....LOL

I can't wait on this one....I need this one really fast.....but you got to slow down, I can't keep up with you. LOL

We need to build this jig yesterday....that's how fast I want that one.

Let's get it under way.

YOUR THE JIG MASTER........I LOVE IT>>LOL

Mark Gregory
 
Unless the sub-rail is split away from the rail cap, there is no need to ever replace the complete sub-rail liner. The strongest bond of the sub-rail to the rail cap IS the natural wood to begin with. Why anyone would think that the glue used to bond a complete replacement sub-rail liner is stronger than the glue I use to add in new wood is beyond my line of thinking. As long as you have something to build on, you're going to maintain the real strength of the natural wood through out the rail, what glue is stronger than that?

Glen
 
You can hack my table anytime. I don't think you can do worse. :grin:

I've rebuilt enough rails now to tell you with 100% confidents, there isn't a set of GC rails I CAN'T rebuild, unless they're totally destroyed, and that goes for pretty much ANY other kind of rails as well, including antiques. I'm correcting the sub-rail liners on a set of antique rails for a friend of mine this sunday, that someone had replaced the cushions on, and used a table saw to recut the bevel for the new cushions, and of course, didn't cut them straight. After I correct the rails, I'll post the pictures here for everyone to see....just how good this new tooling really is;)....OTLB!

Glen
 
Back
Top