Chris about razor blades
Chris,
I don't know a thing about your tips but I tested utility knife blades and wrote an article back a few years ago. The magazine folded and the article went unpublished but the results were pretty simple:
The heavy duty blades: They are heavy duty, thicker than regular blades and also a lot duller from the very beginning. Anyone trying to put your soft tip on with one of these blades is likely to have issues.
The standard blade sold bulk is substantially sharper than the heavy duty blades, I still wouldn't shape more than three tips with each end, maybe only one of the tips that can be difficult.
The bi-metal or cobalt tips are sharpest of all and last longer. Probably can do two or three tip shapings per end using them only for shaping.
The full article, less the pictures, they didn't come across from Word. I think this is the latest version or close to it. Notice what I said about laying the blade on the relief of a standard cutting tool which I think is about nine degrees. This will take away much of the negative rake created by the bevel on a razor knife blade. The optimum cut is when the top of the bevel is at 90 degrees to the tip, not the main body of the razor blade. When scraping the tiniest differences in angle can mean the difference between a smooth peel and the fuzzies.
(Included text)
Shop Talk, Utility Knife Blades and Tip Work
We all use and abuse them but a little thought about these simple shop items can help us work safer and more effectively. First, utility knife blades are like files, they should always have a handle on them. The right handle that is, something we will discuss later. Also a given, anytime we are cutting under power or great pressure with a blade that breaks easily safety glasses are a must.
The first thing worth noting about utility knife blades is that they are not all created equal. Heavy duty blades are thicker and less likely to break. They also have a steeper bevel than standard utility knife blades. This means that they start off duller than standard blades, dull faster, and have more of a tendency to push off when using them as a scraper such as when shaping a cue tip. Except for rough work where the strength is needed, the heavy duty blade is the worst of all utility knife blades to use.
Standard knife blades work reasonably well. I shape three tips with a standard utility knife blade putting a small mark on the blade with a sharpie before I shape the next tip with it. I’m human, if I don’t mark it first and a sharpie isn’t handy when I am through I’ll set the knife down and forget to mark the blade. My personal rule of no shaping until the blade is marked keeps me better organized. After three tips are shaped I save the blade for other work that isn’t as demanding.
I have tried two specialty utility knife blades. A Ti coated one and a triple layer blade. Both blades were sharper than the standard blade and stayed sharp longer. I recommend trying a small pack of the more expensive blades, you may find that the quality easily justifies the price. I have decided that I will at least try every different type of utility knife blade I come across in my never ending search for better tools and tooling to work with.
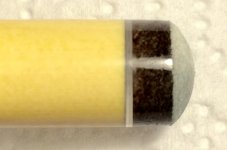
Here are three different specialty blades:
The Lenox is a bimetal sandwich blade with more flexible metal on the outside to resist breakage and harder metal that takes and holds an edge better in the center, then the edge has been titanium coated for better life.
The Irwin is a bimetal blade without the titanium coating.
The Kobalt is totally titanium coated, a single layer blade I believe. The titanium coating keeps the edge sharp longer. Little purpose to titanium coating the entire blade, just gilding the lily for sales purposes.
Getting back to handles, a handle needs to hold the blade firmly or it is useless for much of our work. Retractable bladed utility knives are best given to people that cut cardboard for a living and cue mechanics that we don’t like. I keep three to six fixed blade utility knives around my shop. One is my tip knife that only does tips. The others are positioned various places I work, I hate stopping to chase tools. Some fixed bladed utility knives still let a blade move a little. Make a shim from an old utility knife blade or file one side of the knife handle, whatever it takes to be sure it holds the blade very securely without a twitch under pressure.
Fixed blade handle above, retractable blade handle below. Using the retractable blade knife with a lathe leads to gouges and ruined components, broken blades, and hurt cue builders. Using the fixed blade knife is far safer than using a naked blade as cue builders often do.(yes, I have been guilty of this practice!)
Now that we can hold the blade securely and guide it properly one simple trick involves using a cutting tool on the lathe as a tool rest. I think most do that, but once you can control the blade a little better a nice trick is to hold it on the relief area on the top of a cutting tool. When we lay the knife blade flat on a surface 90 degrees to the tip the bevel causes the cutting edge to be less than 90 degrees to the tip increasing push off. By taking some of this angle away we reduce push off and get a cleaner cut while a blade in a handle is still easily controlled.
The utility knife has many other uses around the shop, all better served with a fixed blade utility knife. It is a simple little tool but a handle that lets a blade move around often damages a project. No handle at all often damages a project or a hand.
In south Louisiana we believe in lagniappe, giving a little something extra. Here is a quick and simple tip to be able to organize many of the small items around your workbench, lathe, or mill. Take a piece of two by six white wood the length of your work bench or just shorter than the drain pan of your lathe. Lay out four rows of holes an inch and a half apart down the length of the board. Drill one row of holes just over an eighth inch diameter, one just over three-sixteenth, one just over one-quarter, and one just over three-eighths. I also drill a few specialty holes to hold certain tools I use often.
The board can lay loose or be c-clamped at one end or both to provide a handy organizer for Dremel bits, screwdrivers, scratch awls, the drill bits you swap out constantly, anything and everything that fits in the holes. No more pawing through drawers and cursing when you are overlooking the burr or whatever that is right in front of you. I don’t mount the board permanently because I occasionally move it place to place without disturbing all of the things in it.
Hu


 CB jumped right off the table, when you went a tip height below center. I played just centerball to play it in, but honestly it was plain unplayable for me, had to cut it off after playing with it for 5 hours or so.