I've been pm'd many times asking about my technique when taking my photos of cues for the gallery and/or for sale sections. So I decided to try and explain it so others can benifit from my experience as a photographer. This is not meant to be a comprehensive guide, but rather just some helpful info to aid you in getting better results. I don't think my images I post here are all that spectacular because I only spend a few minutes setting up so I can post clean sharp images that show off the detail of the cue but I do appreciate the kind words from everyone.
Let me start by saying that it's not all about technique. If you don't have the right equipment and know what all the setting are, and how to use them, it's probably not going to help that much. What I'm going to try and do is talk about technique, but also touch on some equipment and how I personally use it.
Considering I derive some of my income from taking photos, I have to have pro level equipment. It's not necessary to have a professional level Digital single lens reflex (DSLR) camera, expensive lenses, and off camera lighting but getting good quality images without at least an entry level DSLR is very difficult to do. if you want to get better results and control over your images you'll at least need a basic DSLR. Don't worry if you don't want to spend $2000 on a pro level camera body. You can get very good results with a comsumer level body IF you learn how to use it properly. The biggest differences between a consumer level DSLR and a pro level is build quality and ease of access to settings. A pro level DSLR body will most likely be built out of magnesium and the most used of the settings are available right on the camera body as opposed to having to navigate through a bunch of sub-menus on the consumer camera body. Additionally, the comsumer bodies are usually made out of a high impact plastic.
When I set up to take photos for the gallery or for sale section, I use my backup DSLR, a semi-wide angle zoom lens, and 2-3 off camera strobes (lights). Here is the gear that I use.....
Nikon D300s DSLR
Tamron 17-35mm f2.8 lens
Nikon SB-900 speedlights (flashes)
The settings I use to get the results I do could be a little techical for those of you who are not familiar with photography so I'll list how my camera is set up and what each setting does.
I usually set my ISO at around 800. The ISO setting on the camera is what we used to refer to as the "speed" of the film. The higher the number, the more sensitive the sensor (or film in the old days) is to light. So if you have the ISO set to 800 as I do, it would be more sensitive than if you had it set to say 400. If you start playing with the ISO setting, you'll notice that your camera may have settings from 100 all the way up to 1600, 3200, or in the case of pro level bodies up to 6400+.
At this point, you may ask why I set the camera at ISO 800. The reason is that although my camera is capable of much higher settings, there is a trade off as you make the sensor more sensitive. As you move the ISO setting up, the image quality decreases. In the case of pro level gear, it's usually not a problem and you can still get very high quality images at very high ISO setting. With lower level DSLR's and basic point and shoot cameras, you will notice that the image quality drops off dramatically at anything over ISO 800-1000. My pro body DSLR is capable of very high quality images at up to 6400 ISO but I usually leave that in the case when I take photos of cues as it's a bit too big and bulky and I don't NEED the images to be the same quality as when I'm shooting architecture, landscapes, or a wedding for a client.
The next setting to consider is the f stop. Depending on the lens you're using, you may be limited here if you really want to get creative. The f stop (aperture) is the size of the diaphragm opening in the lens that allows light in and has an effect on how light or dark your exposure will be. This setting is as important as your ISO setting when determining how light or dark your image will be. In addition to how much light is allowed through the lens, your f stop setting also determines your depth of field. Depth of field is how much of the image is in focus. The smaller the f stop number, the larger the diaphragm opening is but the shallower the depth of field. The reason you may want to have control over depth of field may be for artistic reasons, or you just may want to isolate a part of the image to call attention to it.
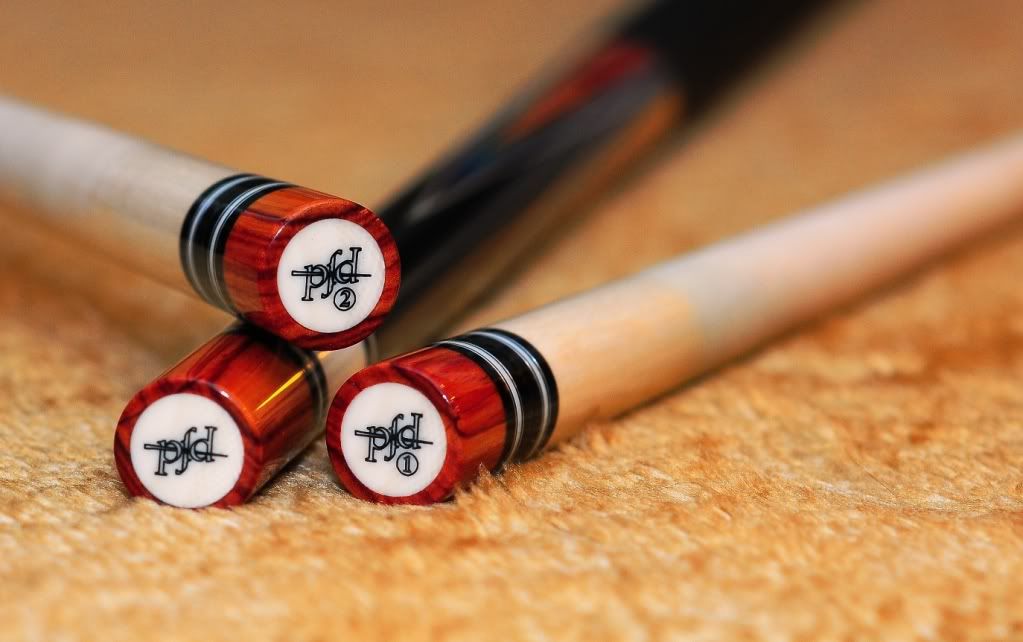
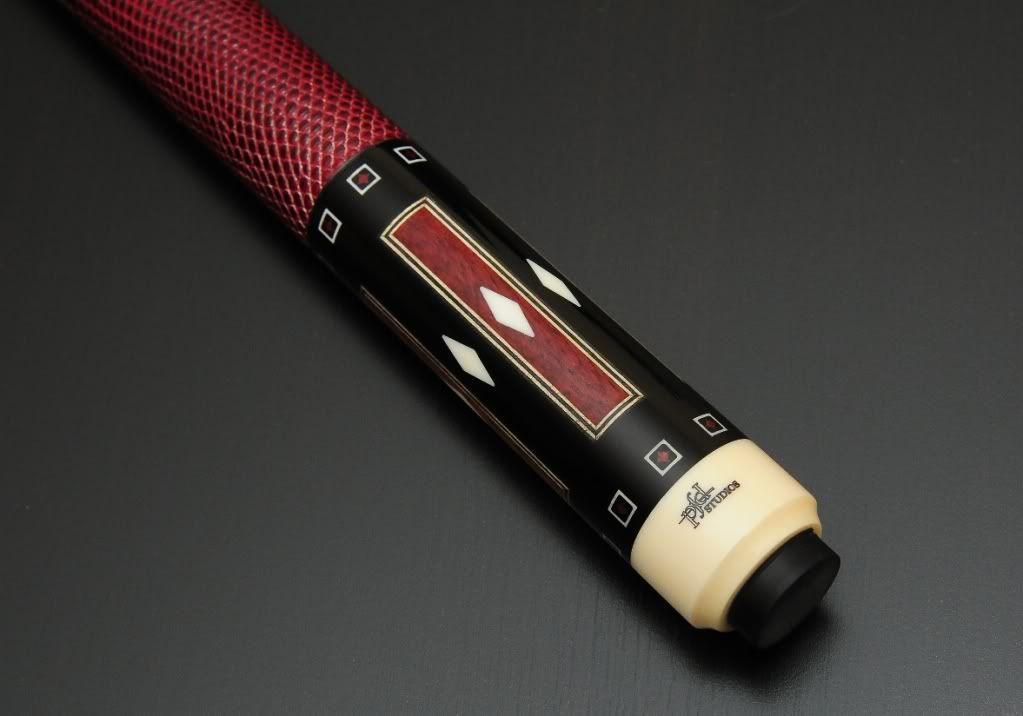
Here is a good example of shallow depth of field. You'll notice that forward parts of the image are in focus, but as you move back through the image, it becomes out of focus very quickly. If I recall correctly, I set the f stop at f-2 to really isolate the front part of the image.
Setting the f stop can be achieved in two ways. It can be done manually on the lens or electronically via the setting on the camera. I usually set it at f-11 electronically so I have a greater depth of field. More on this in the next section....
As important as the setting are on the camera and lens, setting up the lighting can make or break a shot. I'm sure all of you have seen photos of cues with large light reflections on it making it hard to see the details of the cue. Because cues are cylindrical and tapered, it is very difficult to light them without any reflections or glare. I have several off camera speedlights (flashes) so it's considerably easier to create a nice well lit shot.
The key and most important thing when shooting a cue is avoiding the glare or reflection from lighting in a room, the sun, or an artificial light triggered by the camera. This is why the f stop I discussed in the previous section is so critical. You can't just point the lens at the cue, focus, and shoot the shot because you may get a reflection. You may need to take the shot from an angle either slightly from the butt of the cue or from the joint end to avoid a large glare when the flash is fired. Because of this, you may need to use a larger f stop (smaller aperture opening) to increase the depth of field so the entire cue is in focus. Using a smaller f stop may make the end of the cue you focused on in focus, but the other end of the cue may be out of focus.
When using a flash (whether on the camera or fired remotely) this is even more important because of the amount of light needed to create an even exposure. When using a flash to light an image of a cue, the trick is to angle the lighting in such a manner that it does not directly reflect back into the lens from the highly polished finish on a cue. Because I use off camera lighting that is fired remotely, I can aim the lighting in almost any direction and thus avoiding the direct reflections. My technique is to fire the flashes up, and into the corners of the room I'm shooting in. That way, the room gets filled with light but the direct light is diffused when bounced off the ceiling and the walls.
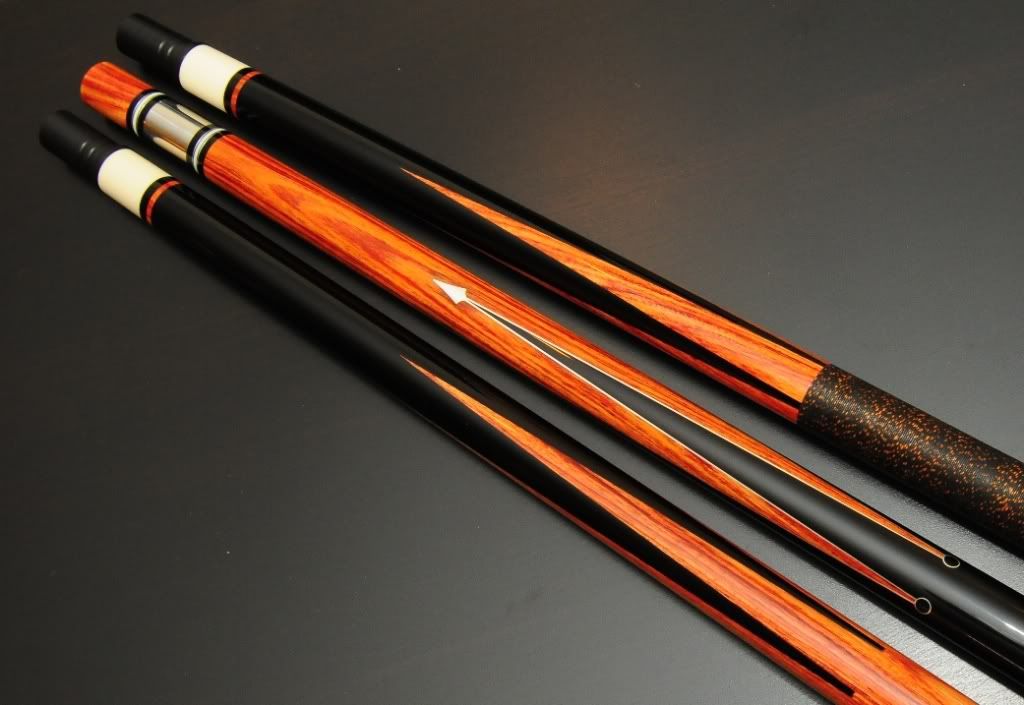
Here is an example of what a cue should look like when you almost completely remove any reflections or glare.
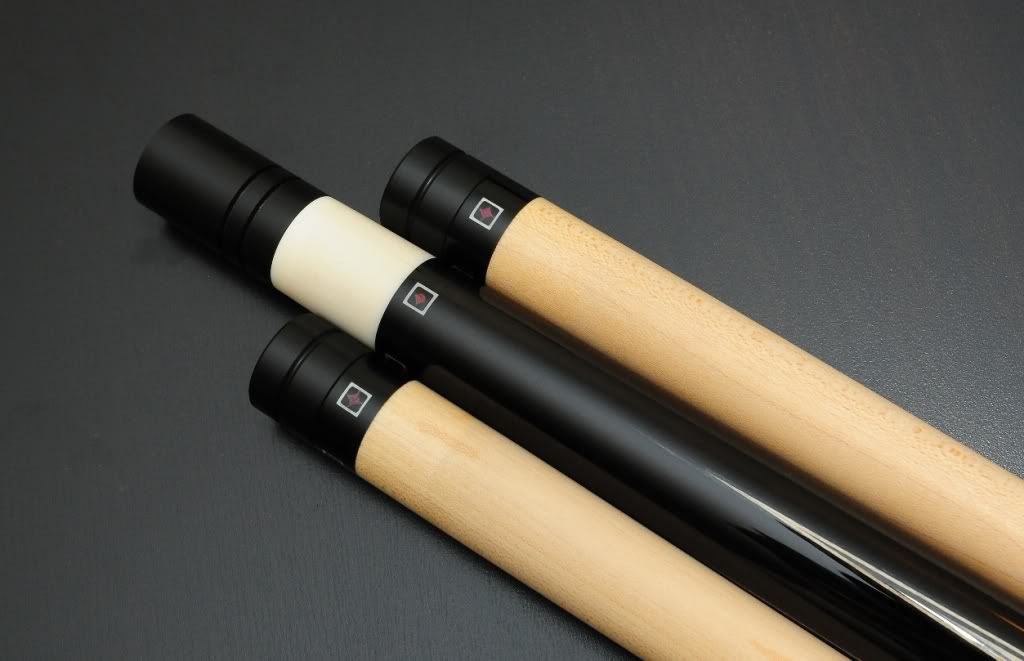
As you can see, with the glare and light reflections removed, it is easy to see all the details of the cue.
The last setting I wanbt to touch on is white balance. The white balance setting is used to acheive a natural color in your images. Not all light is 100% white but have a different color temperature expressed in Kelvin. Failing to set this properly can make you images look red or "hot", or blue and "cold". Without getting too technical, you could effectively make an ivory joint look pink or blue instead of the white as it should be. Finding the right white balance setting on your camera can be very frustrating and can take a lot of trial and error or years of experience to get it right.
My advice when using this setting is to just set it to automatic mode if shooting without a flash and if you are planning on lighting with a flash, just use the "flash" setting.
Of course there is a lot more to getting great images than I covered here but I was trying to make it easy so everyone could understand. If you really want to get better results and you have any questions after reading this how to guide please feel free to pm me with your phone number and I'll be happy to give you a call and answer them for you.
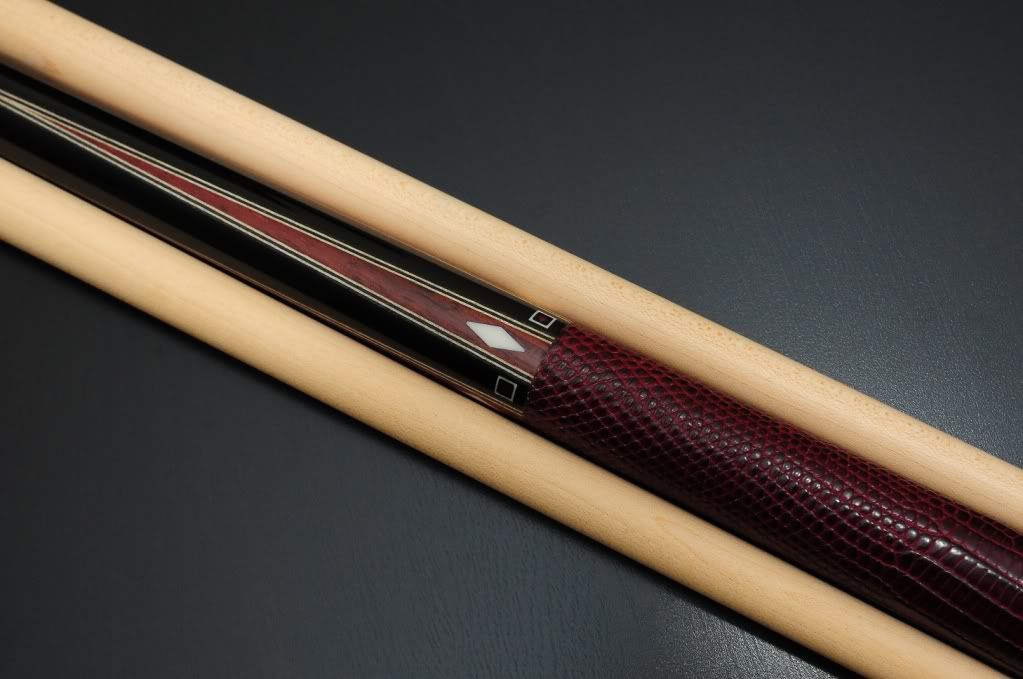
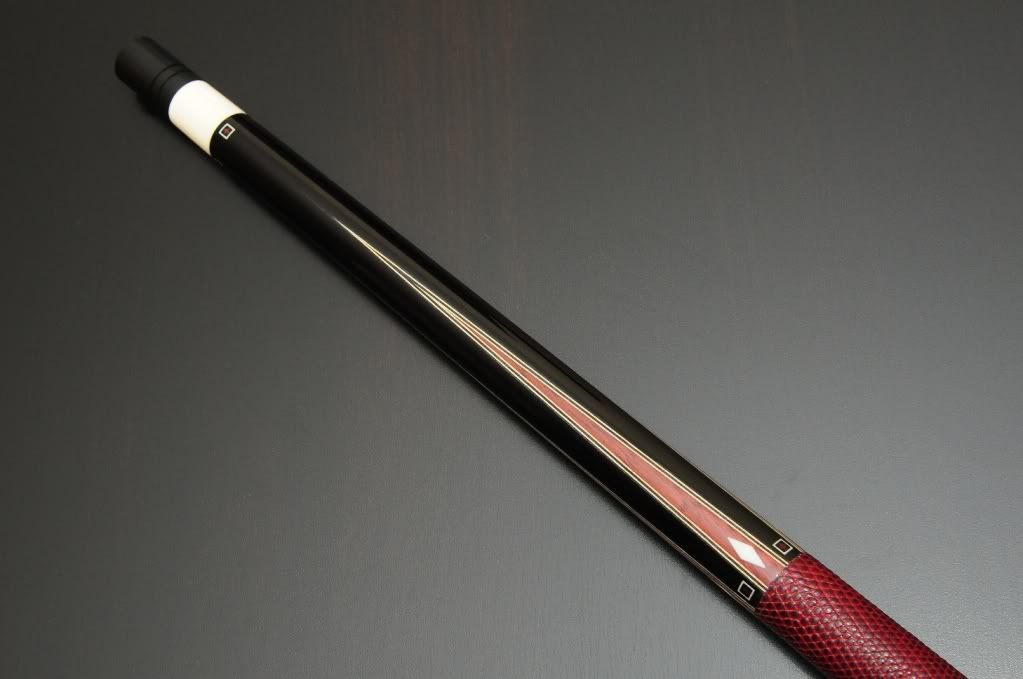
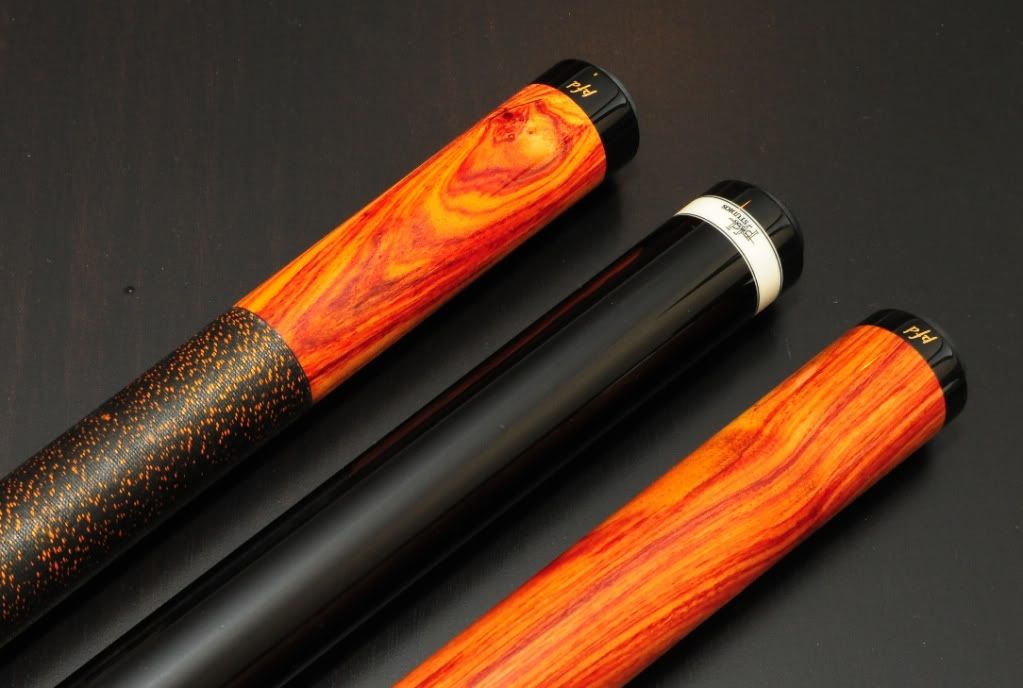
I'll leave you with a few quick and dirty photos of my lastest acquisitions. A set of three Ebony and Tulipwood cues from PFD Studios.
Let me start by saying that it's not all about technique. If you don't have the right equipment and know what all the setting are, and how to use them, it's probably not going to help that much. What I'm going to try and do is talk about technique, but also touch on some equipment and how I personally use it.
Considering I derive some of my income from taking photos, I have to have pro level equipment. It's not necessary to have a professional level Digital single lens reflex (DSLR) camera, expensive lenses, and off camera lighting but getting good quality images without at least an entry level DSLR is very difficult to do. if you want to get better results and control over your images you'll at least need a basic DSLR. Don't worry if you don't want to spend $2000 on a pro level camera body. You can get very good results with a comsumer level body IF you learn how to use it properly. The biggest differences between a consumer level DSLR and a pro level is build quality and ease of access to settings. A pro level DSLR body will most likely be built out of magnesium and the most used of the settings are available right on the camera body as opposed to having to navigate through a bunch of sub-menus on the consumer camera body. Additionally, the comsumer bodies are usually made out of a high impact plastic.
When I set up to take photos for the gallery or for sale section, I use my backup DSLR, a semi-wide angle zoom lens, and 2-3 off camera strobes (lights). Here is the gear that I use.....
Nikon D300s DSLR
Tamron 17-35mm f2.8 lens
Nikon SB-900 speedlights (flashes)
The settings I use to get the results I do could be a little techical for those of you who are not familiar with photography so I'll list how my camera is set up and what each setting does.
I usually set my ISO at around 800. The ISO setting on the camera is what we used to refer to as the "speed" of the film. The higher the number, the more sensitive the sensor (or film in the old days) is to light. So if you have the ISO set to 800 as I do, it would be more sensitive than if you had it set to say 400. If you start playing with the ISO setting, you'll notice that your camera may have settings from 100 all the way up to 1600, 3200, or in the case of pro level bodies up to 6400+.
At this point, you may ask why I set the camera at ISO 800. The reason is that although my camera is capable of much higher settings, there is a trade off as you make the sensor more sensitive. As you move the ISO setting up, the image quality decreases. In the case of pro level gear, it's usually not a problem and you can still get very high quality images at very high ISO setting. With lower level DSLR's and basic point and shoot cameras, you will notice that the image quality drops off dramatically at anything over ISO 800-1000. My pro body DSLR is capable of very high quality images at up to 6400 ISO but I usually leave that in the case when I take photos of cues as it's a bit too big and bulky and I don't NEED the images to be the same quality as when I'm shooting architecture, landscapes, or a wedding for a client.
The next setting to consider is the f stop. Depending on the lens you're using, you may be limited here if you really want to get creative. The f stop (aperture) is the size of the diaphragm opening in the lens that allows light in and has an effect on how light or dark your exposure will be. This setting is as important as your ISO setting when determining how light or dark your image will be. In addition to how much light is allowed through the lens, your f stop setting also determines your depth of field. Depth of field is how much of the image is in focus. The smaller the f stop number, the larger the diaphragm opening is but the shallower the depth of field. The reason you may want to have control over depth of field may be for artistic reasons, or you just may want to isolate a part of the image to call attention to it.
Here is a good example of shallow depth of field. You'll notice that forward parts of the image are in focus, but as you move back through the image, it becomes out of focus very quickly. If I recall correctly, I set the f stop at f-2 to really isolate the front part of the image.
Setting the f stop can be achieved in two ways. It can be done manually on the lens or electronically via the setting on the camera. I usually set it at f-11 electronically so I have a greater depth of field. More on this in the next section....
As important as the setting are on the camera and lens, setting up the lighting can make or break a shot. I'm sure all of you have seen photos of cues with large light reflections on it making it hard to see the details of the cue. Because cues are cylindrical and tapered, it is very difficult to light them without any reflections or glare. I have several off camera speedlights (flashes) so it's considerably easier to create a nice well lit shot.
The key and most important thing when shooting a cue is avoiding the glare or reflection from lighting in a room, the sun, or an artificial light triggered by the camera. This is why the f stop I discussed in the previous section is so critical. You can't just point the lens at the cue, focus, and shoot the shot because you may get a reflection. You may need to take the shot from an angle either slightly from the butt of the cue or from the joint end to avoid a large glare when the flash is fired. Because of this, you may need to use a larger f stop (smaller aperture opening) to increase the depth of field so the entire cue is in focus. Using a smaller f stop may make the end of the cue you focused on in focus, but the other end of the cue may be out of focus.
When using a flash (whether on the camera or fired remotely) this is even more important because of the amount of light needed to create an even exposure. When using a flash to light an image of a cue, the trick is to angle the lighting in such a manner that it does not directly reflect back into the lens from the highly polished finish on a cue. Because I use off camera lighting that is fired remotely, I can aim the lighting in almost any direction and thus avoiding the direct reflections. My technique is to fire the flashes up, and into the corners of the room I'm shooting in. That way, the room gets filled with light but the direct light is diffused when bounced off the ceiling and the walls.
Here is an example of what a cue should look like when you almost completely remove any reflections or glare.
As you can see, with the glare and light reflections removed, it is easy to see all the details of the cue.
The last setting I wanbt to touch on is white balance. The white balance setting is used to acheive a natural color in your images. Not all light is 100% white but have a different color temperature expressed in Kelvin. Failing to set this properly can make you images look red or "hot", or blue and "cold". Without getting too technical, you could effectively make an ivory joint look pink or blue instead of the white as it should be. Finding the right white balance setting on your camera can be very frustrating and can take a lot of trial and error or years of experience to get it right.
My advice when using this setting is to just set it to automatic mode if shooting without a flash and if you are planning on lighting with a flash, just use the "flash" setting.
Of course there is a lot more to getting great images than I covered here but I was trying to make it easy so everyone could understand. If you really want to get better results and you have any questions after reading this how to guide please feel free to pm me with your phone number and I'll be happy to give you a call and answer them for you.
I'll leave you with a few quick and dirty photos of my lastest acquisitions. A set of three Ebony and Tulipwood cues from PFD Studios.
Last edited: