I have played straightpool for many years, and have made a special effort to try to understand patterns. I wanted to make a youtube video on this subject, but I've put that project on ice for the moment. So I decided to start out with this post. If it's popular, I'll make more.
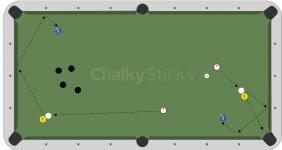
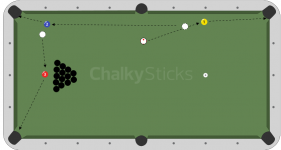
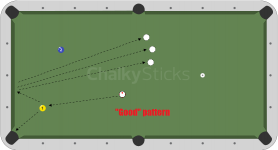
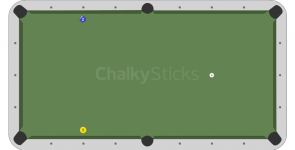
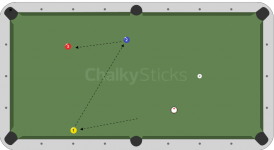
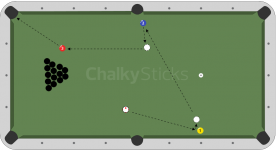
The ball I'm talking about in the title is the one and two ball in this picture. You will notice that the balls are slightly off the rail around the second diamond. They need only be in this general area and not EXACTLY on the diamond. Half a diamond up or down is ok.
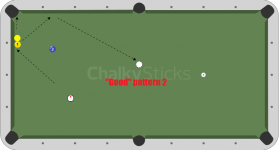
1. This ball will allow you to effortlessly move down to the rack area after clearing up table balls. Because it is slightly off the rail, the rail can be used to slow the cueball down, as well as to help with position.
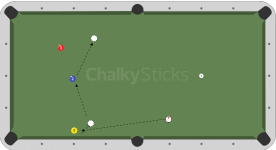
2. This ball will be an excellent key-ball for side-of-the-rack breakshots. Again, the rail helps control the cueball, and the ball is above- and on the same side as as the breakball, making it ideal.
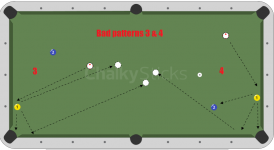
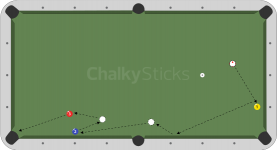
3. This ball is located in an ideal spot for getting to secondary breakshots. Quite often you will have secondary breakshots above- or below the stack. This ball is very nice as a keyball for those secondary breakshots.
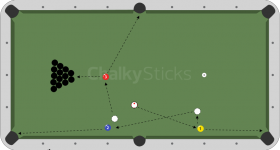
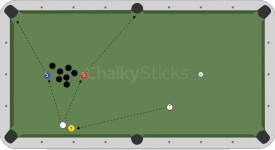
4. This ball is instrumental in many patterns, among them the classic triangle end pattern.
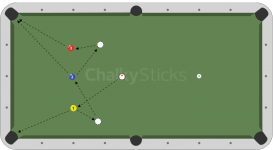
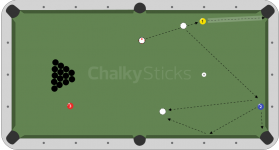
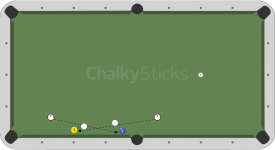
The ball I'm talking about in the title is the one and two ball in this picture. You will notice that the balls are slightly off the rail around the second diamond. They need only be in this general area and not EXACTLY on the diamond. Half a diamond up or down is ok.
1. This ball will allow you to effortlessly move down to the rack area after clearing up table balls. Because it is slightly off the rail, the rail can be used to slow the cueball down, as well as to help with position.
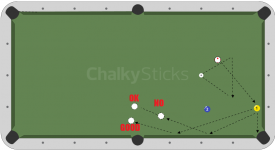
2. This ball will be an excellent key-ball for side-of-the-rack breakshots. Again, the rail helps control the cueball, and the ball is above- and on the same side as as the breakball, making it ideal.
3. This ball is located in an ideal spot for getting to secondary breakshots. Quite often you will have secondary breakshots above- or below the stack. This ball is very nice as a keyball for those secondary breakshots.
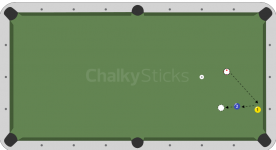
4. This ball is instrumental in many patterns, among them the classic triangle end pattern.
")