Diary of an antique Brunswick

OTLB

Banned
The two cups in front are break ball holders, the piece is great isn't it. I just found more info on Briggs that I will PM to you later. Yes the rubber is from England and it is considered the best by many. Probably start on the table next week just in case it sells as I have it on EBAY now.
Already have offers for the hutch and the balls. Cheers
 
Last edited:

Bigkahuna

It's Good For Your Game!
Silver Member
schitzngigglz said:
What radius did you use for the pocket shelves? Is the radius the same for side and corner pockets?


Rick

Rick,

I just copied the radius from a GC-3 and the sides were different. My pocket shelves ended up being a little too deep but this is easily correctable by taking a little more off the edges with a round over bit.
 

Bigkahuna

It's Good For Your Game!
Silver Member
I have a number of people who have contacted with questions and I made a long reply to someone this morning so I thought I would post as sort of an FAQ. Perhaps this might help some who Is digging for answers.

Hi, Its been awhile since I sent you the email and I seen your reply not long ago so it's taken me awhile to respond.

BK Sure has been a while I certainly don't remember emailing you.[/B]

I have a old I think a A.E. Schmidt table that was made in the early 1900's. It looks very much like yours, I think yours is a Brunswick if I remember right.

BK Well, I have found information since that would indicate it is other than a Brunswick. I guess back when these tables were put out it was quite common for Brunswick dealers to swap the labels on other brands with their own label making their market dominance seem bigger. So, it would seem I have a table that was made by a competitor with a similar look to a Brunswick. I am told my table is perhaps a JE Came or Oliver Briggs. There were several manufacturers around at that time that were employees of Brunswick that broke out their own.

This table also has the wooden pocket blocks and I think I have those figured out, I'm buying the blocks for all the pockets from Classic Billiards.

BK I know for my table buying those blocks would have been a waste of money as they would have needed to be modified so much that I would have been better off to just make something up. Apparently when these tables were made they did not have a tool to actually cut that radius properly, (at least that is what I have been told). So I really had to fit those blocks for each corner radius as I went being careful to ensure I had the pocket shelf at a constant depth. If you look at my post Diary of an Antique Brunswick in the AZB forums you will see how I used a router with an attachment to cut the blocks level with the table. This was very accurate to the point where when done I could see where someone in the past had done sanding and sanded into the slate causing a little bit of a gully from the pocket shelf out into the slate. I am curious if Ken has recommended to you how to adhere these blocks?

The cost of the bolts I need and the barrel nuts is killing me because of the cost, found some nuts for 3.00 but that's all so I have to give into the 7.00 a nut price.

BK I know the feeling I needed one bolt and one nut by the time it got to my door it was 30 bucks. If I ever bought another table I would not consider it a minor issue to not have the fasteners because some lost the box they were in! There are other people who do table restoration work around the country and I am sure they all have some parts laying around but just don't have them up on a website. Perhaps with a few calls you could save yourself a few bucks. I know Mueller's has some bolts but make sure they will fit. They may even be one to call as they do some table restoration work I think.

My main problem right now is what to do with all the staple and tack holes around the outside of the slate wood and also the areas where the pockets nailed into the ends of the rails mine is really chewed up and of course some of the wood is missing around the end of the rails where the pockets bolt in .

BK On the backer boards under the slate you can snap a caulk line a 1/2" back from the edge. Set your skill saw to a cutting depth very close to the slate like maybe an 1/8" or a little less and cut that edge off. Get some poplar wood and rip off 1/2" strips and just nail them on with some glue. Now you have some virgin edge to staple to.
My rails were a different story due to the balls hitting the facings the ends of my rails looked like a fence post that had been hit with a sledge hammer too many times. Also my pocket openings were well over 5" with quite an angle in the mouth of the pocket so I trimmed back the end of the rail changing the angle and then built it back out using plywood which was nailed and glued. As far as the areas where the pockets were nailed to I didn't really have to do anything.

As of now I'm using flexible epoxy for the areas where you have to tack into, as said this epoxy is flexible enough to take the tacks and a harder epoxy for the other parts of the rails. What did you do to take care of this. I had thought of doing that but ended up just not doing that repair and everything was fine.

Finally your table looks great and I hope mine turns out to look half as good. Thanks Dennis
BK Well everybody that plays on it loves it. The pockets are a bit tight but fair. When I recloth the table the only modification I will make is to shorten the pocket shelf as they are just too deep to the point that if a ball is hanging the cue ball just does not go in the direction you might expect because of the nipples. The other thing I am planning on is replacing the rubber. The rubber I used is the Championship Tour Edition and is just does not really bounce well. The cloth I used was very reasonable and a good value but I have had some issues with it so next time it is Simonis for me.
I had a lot of time into my table between the research and the extent and quality I was trying to obtain. I have talked to a couple of restoration pros and they have said that more work goes into making the table play correctly and correcting mistakes made over the years than anything thing else they do.

I hope all this helps and good luck with your project.
 

Bigkahuna

It's Good For Your Game!
Silver Member
Diary of an Antique Brunswick Redux

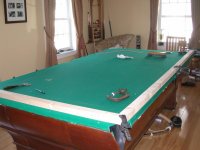
This is my update for the Diary of an Antique Brunswick, er ah, probably Oliver Briggs. I was never happy with the cushion response when I did all of the work a year or so ago. So, I bought some Brunswick Super Speed Cushions and decided to replace the Championship Tour Edition Cushions. After Jay from A-1 looked at my table, (Thank You Jay!), I figured while doing the cushion replacement I could make some more improvements while I had this apart. So, here we go again!

I pulled the first rail apart and made some measurements and mock ups. This when I found my concern. The sub-rail was not at the 20 degree angle it should have been and was at 23 degrees. I spoke with one of the members here in the mechanics section and he said I would be just fine at the 23 degrees I had. I just needed to get the cushion lowered so that I could mount the cushion centered on the sub-rail and still be at 1 7/16. I do not think that the 1/16” or so that the cushion mounted low on the sub-rail really effected the cushion response. So, if I am not changing the sub-rail angle and lowering the rails isn’t going to net anything then I am really depending upon the Superspeed cushions to do the trick.

The next part of this round of improvements is to do a better job with the angles of my pocket openings and if I am doing this I am taking the pockets down to 4.25”. When I did the sub-rail extensions before I just glued and nailed them on and thought I was pretty close on all the angles which I was, except, for the downdraft angle. I just did not use any sort of protracter to find and measure the angles. The one I have is from Home Depot and was only ten bucks. Really the pockets did not play bad at all but the facings I used were very hard. I suspect this really kills the speed and deflection of the ball when it hits the pocket facing making the balls easier to pocket.

I made measurements and although I did not have accurate points to measure from my rails had variations in length. One of my end rails was 1/4” shorter than the other for sure. This would account for why I had slightly larger pockets on one end of the table. Further inspection to make sure the sub-rails were not loose I could tell someone had replaced the sub-rails. These sub-rails would have to have been sawn after installation. The other discovery I made was that one of my side pockets was not centered on the table by 3/8” and one of the corner pockets was off by a bit as well.
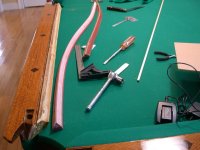
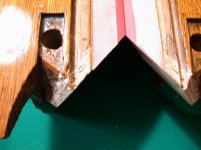
Pocket Tightening 002.jpg
 

Bigkahuna

It's Good For Your Game!
Silver Member
Jigging it up

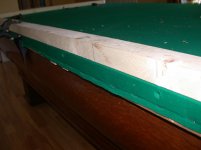
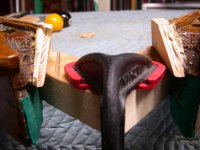
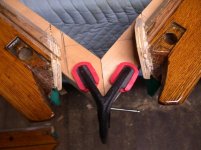
To shrink these pockets further and ensure I had correct angles, rail lengths and pocket centered I would have to figure out how to jig the rails up to be able to do accurate cuts. My first shot at doing this I tried to use my 8 1/4” slide compound miter saw. These t- rails were too tall to fit under the blade so I was out there. Flipping the rails upside down on a table saw was going to be the way to go.

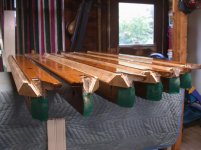
The jigs I made up were simply cut from 2x8 material I had in the shop already. First I squared them up on the table saw. My slates are 54”x 104” the feather strip on the rails are at the edge of the slate. From feather strip to nose is 2” so I cut my jigs 2” wide. I hope you could follow that! Then I cut them to length. I then laid these out on the table and marked off all the rail bolt holes so I could center these on the rails. This would be the beginning of centering the pockets.

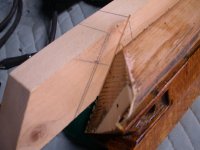
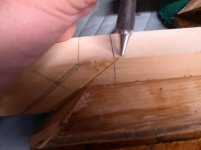
I just used sheet rock screws and large washers to attach these to the rails instead of through bolting that way I have no interference with the miter gauge. Once attached, I did a couple of layouts for cutting the old extensions off but at correct angles. Then I set my fence and miter gauge to do some cuts. I only made up three of these jigs and should have just made up six. It just did not come to mind that I was either going to have to keep setting the fence and miter gauge to do one complete rail or swap the jigs back and forth when I needed to cut the other end. If you did not get that try it and you will see what I am talking about.
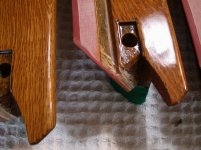
Pocket Tightening 016.jpg

Pocket Tightening 018.jpg
 

Bigkahuna

It's Good For Your Game!
Silver Member
Cutting it close

The angle that was changed the most is the downdraft angle so I was probably cutting off half of the old extension. The new extensions were slightly thicker than what I needed to net a 4.25" pocket by a 1/16” to allow for sanding the ends once the cushions were on. Once the new extensions were on I did some more measurements and was very pleased with how accurate this method was.
I would think anyone replacing sub-rails on an old table would have to go through a process similar to this. So, you may be asking why I went through all this trouble when I could have just put more extension on and cut it measuring from the facing in. The problem with this is that I have no idea if the pocket is centered and then I would have to cut and check with a mock up and cut again to make an adjustment. This way I just jig it make my calculations as to where my cut should end up and then make the cuts. The jigs serve to do a lay out as much as a jig. Bisect the pocket and measure equally from the center out. All the rails have equal length and perfectly centered pockets and exactly at 4.25" on the opening.

Pocket Tightening 021.jpg

Pocket Tightening 022.jpg
 
Last edited:

Bigkahuna

It's Good For Your Game!
Silver Member
Facing things off

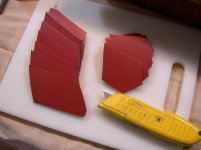
Once the cushions were on and rough trimmed I sanded them in my table saw like RKC does. I had some 8” red oxide fiber reinforced sanding discs that were adhesive backed already. I stuck that to an old 8 ¼” blade I had and put that in my table saw. In my Delta shop saw I couldn’t get the blade high enough. But, in my cheap Craftsman portable table saw I could get the blade just high enough that there was only a sliver left that I could trim with a razor blade. Probably that saw has a smaller motor so the blade just goes a little higher. Glen tells me you can get a 10” sanding disc to fit into a table saw which would certainly be a better set up.

The facings I used were made from 1/8” red rubber gasket material that plumbers use. I went to Lowes and got some from the plumbing section but was very concerned this stuff was too soft. It was much softer then what I remembered red rubber to be. I did a test to compare this material to my other facings that came with the Tour Edition cushions. I laid the red rubber and the old facings on the table. I then took a ball and dropped it onto the material from 12 inches. The red rubber from Lowes probably bounced 2 1/2 inches on the first bounce or better while the old facing were maybe 1/4 to 3/8”. So, I went and saw a friend that works at a plumbing supply house and he just gave me a seriously sized chunk of this stuff. This red rubber was more like what I remembered. Performing the bounce test this stuff probably bounced a 1/2 to 3/4” on the first bounce. All durometers aside this seemed to be not as hard as the budget facings just somewhat softer but not so soft to have a ball pin balling around in the pocket shelf.

Once I had these cut up I glued them on let them sit overnight and trimmed them using a single edge razor blade. The trimming will go easier and more accurately if you just use a sharp blade and gently pull towards you instead of using a sawing action on the blade. From there I just used the belt sander to finish the facings off flush.

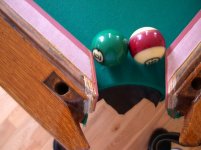
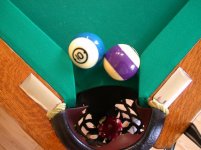
The end result with the pockets is I have what I think are very tough but fair pockets. I set my corner pocket angles at 139 degrees with a 15 degree downdraft at 4.25” between the points at the mouth and 3 3/4 to 3 7/8 at the throat (depnding on where you measure) and the shelves are 1 3/4” deep. My side pockets are 102 degrees 15 degree downdraft and 3/8” deep shelves. Tbeaux what is my pocket toughness rating here?

My cushion response is greatly improved but still a wee bit disapointing I think this is all I am going to get out of a t-rail table though.

Not sure if I have a table to practice pool on or practice table mechanics on!


Pocket Tightening 030.jpg

Pocket Tightening 031.jpg

Pocket Tightening 036.jpg

Pocket Tightening 040.jpg

Pocket Tightening 045.jpg
 
Last edited:

QuickEdward

New member
Silver Member
View attachment 78051
Now I had all the leather I needed and this was only $9.99. I cut out some chunks and then fashioned them into something that looks like a jockstrap. Once stapled on these jockstraps cover the nails and staples pretty well an keep my balls from getting nicked on the rivets. I then nailed on the leather using aluminum ring shank nails that I cut down with dykes.

You coulda just asked Glen for leather jock straps... I heard he keeps a dozen or so in his glove compartment.
 

TableTek

New member
Silver Member
Looks like you have forgot something important!

I like the work you have been doing on your antique. These tables used a U-23 cushions which is easily mistaken for a K-66 profile because it is just a sight bit smaller. From the work the hacker did on your table before, I would guess he flipped the rails upside down on a table saw or hand beveled the sub-rail with a door planer. Either way, this is trouble and below is why.

*T-rail rails bolt from the side, they MUST be cut in a fixture or they will be wavy.
*the subrail angle has to be matched to where the rail bolts to the slate, otherwise you will not have a matched rail nose down the length of the table.
* I have this fixture, no picture handy tonight or I would attach, it mounts on my milling machine for a dead accurate rail.

Just my two cents, continue with the excellent workmanship!
Rob
215-622-8899
sales@table-tek.com
 
Top