Cue Zero 3 axis touch plate

str8eight

AzB Silver Member
Silver Member
Due to a lack of 3 axis zeroing for arduino controlled cnc's a friend of mine made one and later adapted it for use in mach 3. He also wrote a program that adds quite a bit of different options in the zeroing the axis. this single script allows you to use multiple touch plates and zero to any offset. once you have set your zeros you can stop mid cut, take your work off the cnc and as long as you re-zero using the plate you can resume exactly where you left off. I told Larry Vigus about the touch plates and after a demonstration he bought 4. Just passing a message a long for a friend to see what the general interest is like. He may not be a CM but works with cnc's non the less.

aaded092eeeb2c3e40a0949c27e6fdf2.jpg

1bb2b54a3ee7f96c360ec114292435ec.jpg


Sent from my SAMSUNG-SM-G935A using Tapatalk
 
Last edited:

ELBeau

AzB Silver Member
Silver Member
More information would be helpful. You reference a demonstration- is there a link or video?
How is it different than the edge finder built it into Mach3?
Is this a VB script?
 

str8eight

AzB Silver Member
Silver Member
He can not post to the forum yet but here is his answer he posted on Facebook.

I had a question about this on AZBilliards.com and am unable to answer due to being a new member on their forum and haven’t been approved yet. Here is the question followed by my answer.
More information would be helpful. You reference a demonstration- is there a link or video?
How is it different than the edge finder built it into Mach3?
Is this a VB script?

Yes, my software creates VB script that is customized to the touch plates you actually use, and it is much more involved than script that is typically assigned to the Auto Tool Zero Button in Mach3. With Cue Zero, you will have the ability to load data for as many as 4 touch plates. That way you can keep the touch plate used on a specific project with that project until completed. This is not required but will assure absolute accuracy when repeatability is a priority.
The Offset Page in Mach3 is much more time consuming and relies on old school methods of setting Zero locations for X Y and Z axis. Each has to be done individually and is subject to errors even though they may be small.
With the Cue Zero Touch Plate, the process requires almost no calculations on the part of the user and once you have your measurements of the touch plate(s) fine tuned to match your machine, you can achieve a repeatable zero point that is as precise as your machine allows. If you machine is accurate to .0005 then your X Y Z axis will zero with repeatability to .0005. This will enable you to start work on a project, quit for the day, restart your machine and re-zero with the same touch plate. Your X Y Z zero will be exactly as it was the day before. This can also come in handy in the event of a power failure. When carving ultra detailed projects this is the only way to truly keep everything lined up as it was at the beginning. When changing bits, you can completely re-zero or just zero the Z axis.
You can also remove your project from your machine and put it on a shelf to work on later. When you are ready to resume, just remount the piece and zero it with the same touch plate. The only requirement is that the work piece must be aligned with the X and Y axis (not rotated) as it was in the beginning. However, it doesn’t have to be in the same location on the machine, just aligned the same.
Some people like to set their zero point to some location other than the left front corner. This can make the design process easier. For that reason I have incorporated offsets into the zeroing script. Simply click the button in the script to enter offsets and answer the questions regarding the distance along the X axis and Y axis you want the offset to be located and proceed as normal.
High precision zeroing has now been incorporated into the zeroing script. When selected, the script will probe the touch plate to find out where the bit is in relation to it. Then move to an exact location for probing the X Y and Z axis. This will give you the absolute same zero point on your material every time. Now that’s repeatability on steroids.
To further simplify the zeroing process, I make use of dialogues within the script. Rather than type values and answer yes or no questions, I have added buttons for common tasks and questions. This includes buttons for selecting bit diameters of 1/8 inch, 1/4 inch and 3/4 inch. There is also a input box on the same dialogue for entering a custom size bit. The bit diameters refer to the diameter of the largest portion of the bit which is typically the shank until you get into larger sizes. You also have the ability to zero with V bit with ease by zeroing to the shank. In some rare cases where you cannot zero to the shank and are left with trying to zero to a beveled area of a bit, then you can insert a different bit and zero all three axis, switch to the desired bit and zero just thee Z axis and your all set.
Setup is very easy if you already are setup for probing. My kit contains one Touch Plate, 6 feet of 16/2awg wire with a banana plug already soldered on one end, a magnetic ground using a N52 rare earth magnet to hold securely, soldered on the ground wire, and a data disk with instructions and the Cue Zero Software.
If you have any questions please don’t hesitate to give me a shout or email me at charleyntexas@gmail.com

Sent from my SAMSUNG-SM-G935A using Tapatalk
 

LGSM3

Jake<built cues for fun
Silver Member
I guess i dont really get the concept of these....especially since they are removable and somehow offer maximum repeatability. Also seems as if they would be fairly irrelevant with regards to cues. Dont get me wrong, just because i dont get it doesnt mean its not really badass but i need a little better explanation.

I guess the thing that really gets me is that the guy who developed this is obviously a smart guy and seems to be going backwards developing old tech. Why wouldnt he use his talents to develop a nice probe and simple tool height sensor?

If the smart guy wants a challenge, heres one. Recreate homing in mach with your open source board and screw applied encoders. That would be cool.
 

str8eight

AzB Silver Member
Silver Member
I guess i dont really get the concept of these....especially since they are removable and somehow offer maximum repeatability. Also seems as if they would be fairly irrelevant with regards to cues. Dont get me wrong, just because i dont get it doesnt mean its not really badass but i need a little better explanation.

I guess the thing that really gets me is that the guy who developed this is obviously a smart guy and seems to be going backwards developing old tech. Why wouldnt he use his talents to develop a nice probe and simple tool height sensor?

If the smart guy wants a challenge, heres one. Recreate homing in mach with your open source board and screw applied encoders. That would be cool.


The concept of a touch plate is not new as we all know. I personally had a need for automatic 3 axis zeroing when I first got my CNC Router and could not find one that worked with Arduino/GRBL. They were available for Mach3 but not GRBL. I was determined to learn standard g-code and finally figured it out. I posted my findings on a CNC forum and started receiving requests from the forum members on how to purchase one. I tried to give the code away but everyone kept asking me to produce and sell it as a kit. It seemed that most users on the forum either don’t like to or can’t mill aluminum. So I started making them and selling them on the forum. Sales exploded so I launched my websitewww.triquetra-cnc.com.*

My friend Shelby saw the value in it when I showed him what I was making and brought it up in conversations with Larry Vigus. Larry was keeping his machine tied up for extended periods on just one project while waiting on glue to dry or other things to happen and could not move on to another project until that one was completed. He agreed to let me show him what could be done with my touch plate and my software generated Mach3 script. Now he is able to carve something on his machine, remove the partially completed project and start a different design. When ready he can go back to the first project and re-zero his machine with complete accuracy and resume where he left off. The zeroing process with my script is quick and easy to do. Mount your material, place the touch plate on the front left corner and run the script. Click the buttons that are presented that correspond to how you want to zero and in just a few seconds your zero is set for all three axis.


It's All About Zero's

Charley Thomas


Sent from my SAMSUNG-SM-G935A using Tapatalk
 
Last edited:

KJ Cues

Pro Cue Builder & Repair
Silver Member
I don't do CNC but as a manual-machinist I can appreciate the need to repeatably re-establish 'zero'.
Your efforts are to be applauded and I do. Thank you for helping to advance this craft. I hope you do well.

KJ
 

LGSM3

Jake<built cues for fun
Silver Member
This seems a bit odd to me....don't get me wrong i think that what you have done is cool and i'm very, very supportive of anybody creating solutions with the open source stuff. I think its the future and will allow youth a low cost avenue to be creative and inventive.

Im wondering how it can be precise...for the sake of conversation we'll call precise .002 or less. What material is this plate made out of and to what tolerance? Is it lapped flat and perp.? If not was it measured with a cmm and those #'s input to script? The reason i ask is that these processes are very expensive. Far more expensive than what your charging. The video showed holding it in the corner with hand. Wouldnt there need to be some type of ledge or corner that this seats into repeatably for repeatable results to take place? A single spec of dirt could push it off as much as .010. I realize this may seem critical but we're talking about something removable with alot of variables. If it was machined or ground in place on the machine i wouldnt be so concerned.

I feel like your knowledge and efforts would have been much better served by creating a solution similar to commercial machine tools. These machines home accurately and repeatably and thus allow a person to reference machine coordinates or create an offset there confident in. As long as you know the machine coordinates and fixture your part identically there should be no need for the touch plate. right?

I guess the one exception would be that if you dont have fixtures and you just throw a square part on the table that is not true to the axis travel you only have to square the plate to the part and compensation is calculated on back end. If this is the case then why wouldnt you just run a standard probe through the arduino? I think theres actually script for probe surface mapping in mach...maybe not.

Please don't take my post the wrong way, I respect what you've done. I'm hoping that i still just dont get it and i can actually use one :)
 

Texas Carom Club

9ball did to billiards what hiphop did to america
Silver Member
I guess if you'd need to be pretty precise if you had a single small piece of something exotic you had to cut , say an inlay or point, but
....,.....

Can it be used for getting center to a butt for cutting pockets?
A butt on the 4th axis?
 

conetip

AzB Silver Member
Silver Member
Year ago, they had a piece of circuit board with a little light on it. I think it was led not sure.It had a small battery and a wire to the machine bed. So when the edge of the cutter touched the copper, it would light up. These were imperial I thought like 1/16th inch thick.
They were quite useful back in the day and you did not require to remove the cutter to install an edge finder etc. Of course some modern ceramic coated endmills it won't work.
Great to see people still working on ideas that can be useful to others at some time.
Neil
 

charleyntexas

Registered
The Cost

What is the cost ?

The kit comes with 1 touch plate, 6 feet of 16/2 AWG wire that has a banana plug soldered on one wire for connecting to the Touch Plate, and a Magnetic Connector soldered on the other wire for holding the ground to your collet. I also include a disk that has the Cue Zero Software for managing your Touch Plate(s) and creating the Mach3 Script.

The Kit costs $75.00 plus shipping.
Additional Touch Plates on the same order (up to 3) are $30.00 each. The Cue Zero software is compatible with Windows XP through Windows 10 and will generate the script to include up to 4 touch plates.

The script is not your ordinary Z axis or XYZ axis zeroing. With it you can choose which touch plate you are using from number 1 through 4. It also incorporates the use of Dialogues to make data entry easier and in most cases selecting an option by click a button in the Dialogue. You can Zero Z only, Zero with any offset distance, Zero a circle, Standard XYZ zero and High Precision XYZ zeroing.

The Cue Zero software also has a feature to fine tune the data for each touch plate to increase accuracy and once your finish fine tuning, it will generate a new script that you load into the Auto Tool Zero button.

I have been making and selling these to Hobby CNC users for a year and a half now with great success. With over 500 orders filled to date, I have only been asked for a refund one time and that customer repurchased my touch plate kit a month later after he fixed his CNC machine.

I believe the main benefit to Cue Makers is the ability to start a project, stop and remove the project from their machine for any length of time and then remount it and continue where they left off. The repeatability of zeroing is governed solely by the tolerance of your machine. The only requirement for a truly accurate re-zero is that the piece must be placed on your machine so that the raw edges are parallel with the travel of your X and Y Axis. It doesn't matter where you place it just as long as it is parallel. That is easily accomplished with your machine. If you don't know how I will explain the procedure.

Charley
 

63Kcode

AKA Larry Vigus
Silver Member
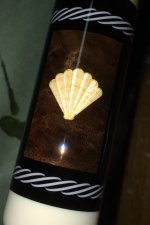
My sea shell cue was my most PIA cue I have done to date. It required me to cut a pocket. Glue in the highlight colors then wait four hours to cut the profile of each segment. With seven segments on each shell, my CNC was tied up for 28 hours for each inlay. That's why there is only one sea shell cue.

My plans are to fix a touch plate to a scrap piece of wood. With off sets( more on the off set later) do my first machining. At this point I can remove the touch plate assembly. Glue in the accent pieces. When the parts are dry. I can put it back in the machine and do the second machining. With four touch plates, I can do all four inlays, and not tie up the machine for days.

The touch plates are not machined true. So it took me some time to true up my first one. Then I marked a place on the side to do the first touch off. This worked well, but I was not looking forward to to doing three more. Plus I wasn't happy about having to keep track of putting in my off sets manually. So I contacted Charley and suggested some changes. My first suggestion was to have the program touch off twice. That way the second touch off was on the same place every time. Second change was to allow me to put in the off sets before the touch off. I just wright the off sets on the part and o get X0Y0 where ever I want it on the work piece. I haven't had time to do anything with them yet, but did get my camera working and have done some test. It repeated very well.

Though I am looking forward to using them, If I ever get time. Working with Charley has been pure joy and worth the investment so far.

Larry
 

Attachments

  • image.jpg
    image.jpg
    181.5 KB · Views: 438
Last edited:

Canadian cue

AzB Silver Member
Silver Member
I have only run industrial cnc's so not familiar with the mach based machines. Having said that am I to assume that with these machines you have to manually locate machine zero every time you turn on the machine? There is no homing sequence when you start up the machine and this gadget is a work around for this problem. On a conventional machine you would simply store your fixture offsets and you could repeatably return to them.
 

LGSM3

Jake<built cues for fun
Silver Member
I have only run industrial cnc's so not familiar with the mach based machines. Having said that am I to assume that with these machines you have to manually locate machine zero every time you turn on the machine? There is no homing sequence when you start up the machine and this gadget is a work around for this problem. On a conventional machine you would simply store your fixture offsets and you could repeatably return to them.

Mach doesn't have the ability to do that. It can only see a signal so you are limited to the accuracy of the switch, its ability to trip at the same point repeatably and transfer that signal at the same speed consistently.

Industrial machines home to a switch. It can be any cheap junky limit switch because when it sees that signal the controller goes to zero and the servo drive takes over going directly to an endcoder tick "same one everytime"

For comparison, you can setup offsets etc. in mach the same as most any industrial controller. You just have to trust or accept that it may not really home to the same spot everytime.
 

LGSM3

Jake<built cues for fun
Silver Member
The kit comes with 1 touch plate, 6 feet of 16/2 AWG wire that has a banana plug soldered on one wire for connecting to the Touch Plate, and a Magnetic Connector soldered on the other wire for holding the ground to your collet. I also include a disk that has the Cue Zero Software for managing your Touch Plate(s) and creating the Mach3 Script.

The Kit costs $75.00 plus shipping.
Additional Touch Plates on the same order (up to 3) are $30.00 each. The Cue Zero software is compatible with Windows XP through Windows 10 and will generate the script to include up to 4 touch plates.

The script is not your ordinary Z axis or XYZ axis zeroing. With it you can choose which touch plate you are using from number 1 through 4. It also incorporates the use of Dialogues to make data entry easier and in most cases selecting an option by click a button in the Dialogue. You can Zero Z only, Zero with any offset distance, Zero a circle, Standard XYZ zero and High Precision XYZ zeroing.

The Cue Zero software also has a feature to fine tune the data for each touch plate to increase accuracy and once your finish fine tuning, it will generate a new script that you load into the Auto Tool Zero button.

I have been making and selling these to Hobby CNC users for a year and a half now with great success. With over 500 orders filled to date, I have only been asked for a refund one time and that customer repurchased my touch plate kit a month later after he fixed his CNC machine.

I believe the main benefit to Cue Makers is the ability to start a project, stop and remove the project from their machine for any length of time and then remount it and continue where they left off. The repeatability of zeroing is governed solely by the tolerance of your machine. The only requirement for a truly accurate re-zero is that the piece must be placed on your machine so that the raw edges are parallel with the travel of your X and Y Axis. It doesn't matter where you place it just as long as it is parallel. That is easily accomplished with your machine. If you don't know how I will explain the procedure.

Charley

Hi Charley....hope all is well. After talking to Shelby it sounds like you live less than a mile from me so if you feel the need to give me a kik in the ass for my earlier posts you wont have to go to far!
 

charleyntexas

Registered
I guess if you'd need to be pretty precise if you had a single small piece of something exotic you had to cut , say an inlay or point, but
....,.....

Can it be used for getting center to a butt for cutting pockets?
A butt on the 4th axis?​


Unfortunately it will not work for a 4th (Rotary) axis but I am working on a method to do just that. It is still in the deign stage.
 

charleyntexas

Registered
Hi Charley....hope all is well. After talking to Shelby it sounds like you live less than a mile from me so if you feel the need to give me a kik in the ass for my earlier posts you wont have to go to far!

I'm too old to kick anyone in the rear end. They might kick back!! No offense taken. Hopefully I will get an opportunity to demonstrate one in person and make a believer out of you.
 

charleyntexas

Registered
This seems a bit odd to me....don't get me wrong i think that what you have done is cool and i'm very, very supportive of anybody creating solutions with the open source stuff. I think its the future and will allow youth a low cost avenue to be creative and inventive.

Im wondering how it can be precise...for the sake of conversation we'll call precise .002 or less. What material is this plate made out of and to what tolerance? Is it lapped flat and perp.? If not was it measured with a cmm and those #'s input to script? The reason i ask is that these processes are very expensive. Far more expensive than what your charging. The video showed holding it in the corner with hand. Wouldnt there need to be some type of ledge or corner that this seats into repeatably for repeatable results to take place? A single spec of dirt could push it off as much as .010. I realize this may seem critical but we're talking about something removable with alot of variables. If it was machined or ground in place on the machine i wouldnt be so concerned.

I feel like your knowledge and efforts would have been much better served by creating a solution similar to commercial machine tools. These machines home accurately and repeatably and thus allow a person to reference machine coordinates or create an offset there confident in. As long as you know the machine coordinates and fixture your part identically there should be no need for the touch plate. right?

I guess the one exception would be that if you dont have fixtures and you just throw a square part on the table that is not true to the axis travel you only have to square the plate to the part and compensation is calculated on back end. If this is the case then why wouldnt you just run a standard probe through the arduino? I think theres actually script for probe surface mapping in mach...maybe not.

Please don't take my post the wrong way, I respect what you've done. I'm hoping that i still just dont get it and i can actually use one :)

When I first started making touch plates a year and a half ago, machining accuracy is something I struggled with. I quickly realized that I don't have the right machine to make truly precision parts so I had to come up with a solution. I found it in the software and the script generated by the software. I call it High Precision Zeroing.

The Cue Zero software has a function called Plate Tuning. This process allows your to enter adjustments to the plate based of the distance you have to travel to correct any discrepancies in zeroing. You can literally use a tape measure to enter the initial measurements for a touch plate into the Cue Zero software, generate a script, zero with it, make adjustments, enter those adjustment shown in the DRO for each axis on the Touch Plate Tuning page. Then click the Apply button and it will recalculate the values for your touch plate. Then you create a new script, load it and zero your machine again. The discrepancies are now gone, Even with a touch plate that isn't even close to square at all. Before probing for zero on each axis the script actually looks for the touch plate to determine where it is in relation to it. Once it know where the plate is then it moves to an exact location to probe each axis. By Fine Tuning the touch plate, and the script designed to probe to the exact same location each time, machining tolerances are no longer an issue. So even though the touch plate are not absolutely perfect, the software accounts for this for each individual touch plate. The end result is you get the exact same zero point each and every time.

Holding the touch plate in place by hand is not really necessary. The video you saw is an old video in the early stages of development. I'm working on a new video now that shows it working without clamping anything down and placing the aluminum touch plate on top of aluminum material. No hands zeroing! Additional demo video's are in the works.
 

charleyntexas

Registered
Hi Charley....hope all is well. After talking to Shelby it sounds like you live less than a mile from me so if you feel the need to give me a kik in the ass for my earlier posts you wont have to go to far!

My shop is on Eisenhower. The house with the Concrete Dam and the long skinny pond in the back yard.
 
Top