My new multi-cue spinner

snipershot

Go ahead.....run for it.
Silver Member
I got tired of clear coating one cue at a time, so I made this little spinner. It needs a couple tweaks, but I'm pretty happy with how it turned out. I'm gonna make the live centers spring loaded next. The set screws in the bearing blocks hold the center pretty well, but I'd rather have constant tension.

Joe
 

Attachments

  • 2013-01-17_05-15-31_99.jpg
    2013-01-17_05-15-31_99.jpg
    91.6 KB · Views: 1,187
  • 2013-01-17_05-14-46_74.jpg
    2013-01-17_05-14-46_74.jpg
    91.2 KB · Views: 1,157
  • 2013-01-17_05-15-00_80.jpg
    2013-01-17_05-15-00_80.jpg
    93.6 KB · Views: 1,171
  • 2013-01-17_05-15-11_94.jpg
    2013-01-17_05-15-11_94.jpg
    91 KB · Views: 1,162

Sport666

FC3 Custom Cues & Repairs
Silver Member
very nice Joe, what i would do is either stand it up or elevate the back so you could get your gun on a 90 when spraying. JMO .......Frank
 

Dirtbmw20

Lee Casto
Silver Member
Sweet set up Joe. How fast will the motor spin them and will you have a way to control the speed or is it just a plug in and run set-up ?? Looks like it can be easily expanded too to accomodate more cues too.
 

GatzkeCues

It used to be a hobby
Silver Member
One of the nicer ones I've seen so far. Do you mind if I borrow parts of your design when I redo my spray booth?
Thanks Mike
 

cuejo

Cue Repair tech
Silver Member
That looks a lot like the one in my head :)
The only difference in my plan was having one big headstock with gear drive instead of belts, and adjustable tailstock....I make a lot of jump handles :)
Beauty!!
 

Bob Farr

AzB Gold Member
Gold Member
Silver Member
Pretty cool invention. Is there a chance you are related to Thomas Edison?
 

shankster8

AzB Silver Member
Silver Member
How can a single pillow block maintain allignment of the shaft it supports? I would have thought you'd need two pillow blocks at each end, for each cue. Obviously I'm missing something.
 

snipershot

Go ahead.....run for it.
Silver Member
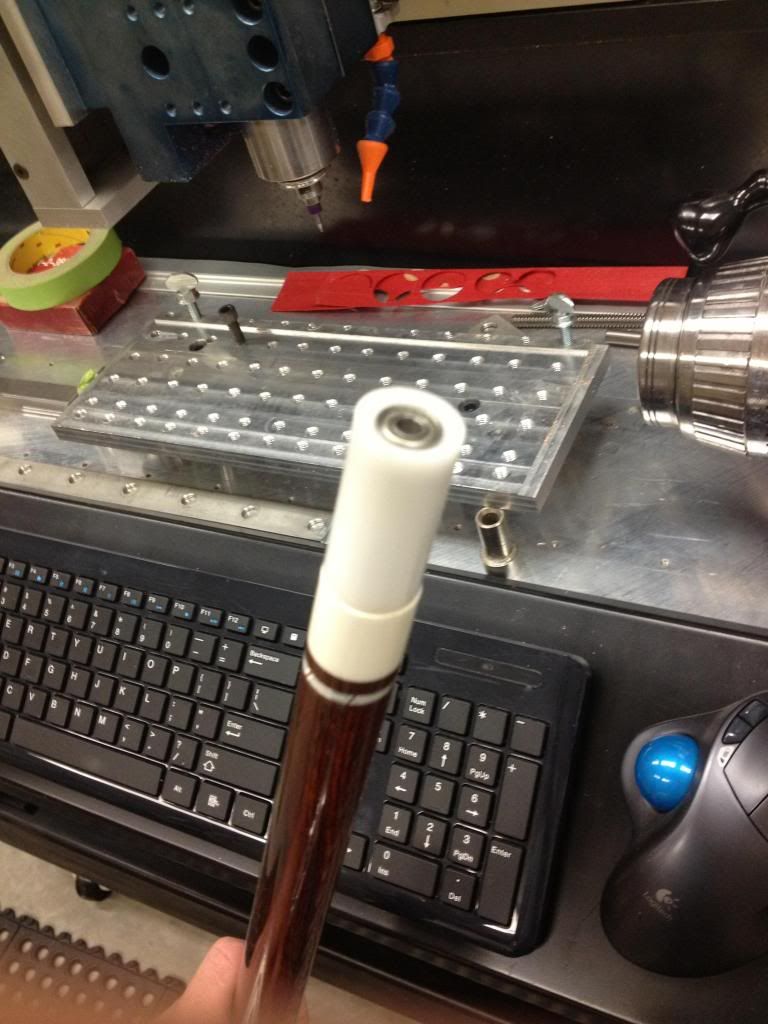
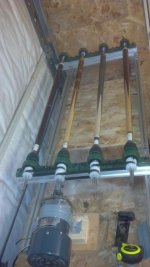
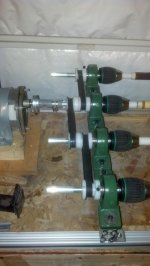
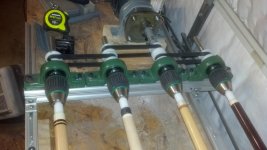
The motor is a 105 rpm motor I had laying around. Its about a perfect speed for turning. I'm not spraying the clear, I'm using raka epoxy and ceramithane, which I'm applying with a foam brush. Feel free to copy or use any of this design, I just kinda winged it and saw if it worked. Lol. I made the pulleys out of delrin and they are secured with a 1/4 20 set screw to the aluminum shafts. The belts are cheap vacuum cleaner belts from walmart, they cost me less than $5 for 4 of them. The bearing blocks were cheap ones from ebay, as well as the drill chucks. I had the aluminum rod, which I had to shave about 30 thousandths off to fit in the bearing blocks. I used a standard 1/2 20 die to thread the rods, which you can get at about any hardware store. The tail stock rods are just more 1/2 aluminum rods that I cut a point on to make them centers. Any other questions, feel free to ask. Its not fancy, just effective. Lol. I'm guessing I have around $200 in this setup, give or take.

Joe
 
Last edited:

snipershot

Go ahead.....run for it.
Silver Member
How can a single pillow block maintain allignment of the shaft it supports? I would have thought you'd need two pillow blocks at each end, for each cue. Obviously I'm missing something.

The tension of the belts keep the bearings pretty square to each other. Even so, there isn't much torque or pressure on this fixture, because its only used for clear coating. Obviously, if it was supporting some heavy weight, or had to endure a constant load, one pillow block would not stay put.

Joe
 

Blue Hog ridr

World Famous Fisherman.
Silver Member
Looks pretty snazzy there Joe and very well built.

I always like seeing pics of builders jigs.

Necessity is the Mother of Invention.
 

KJ Cues

Pro Cue Builder & Repair
Silver Member
Spring-load your tail-stock rods and the cues will go in/out much easier.

HTHs, KJ
 

LGSM3

Jake<built cues for fun
Silver Member
Joe, i have a setup very similar to yours component wise. I initially spring loaded the backside and made it "live". After shooting a ton of finish on it, it eventually became only spring loaded and the pin would just kind of spin on the raw and now fixed metal. My solution was this "picture below" basically a live mandrel, made a bunch of them, plus it protects the pin from getting finish all over. "initially i just taped over the pin". It appears as if your setup is backwards from mine. I drive of the left side and let the pin side rest on the spring loaded side.

Its basically a delrin joint protector with a bearing in the end. The hole is also only tapped near the back so its quick like a uniloc and i dont have to screw on all 10tpi.


photo1-1_zps7dd1ee3d.jpg
 
Top