Tip replacement DIY?

over60pirate

Registered
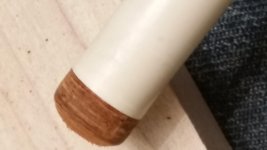
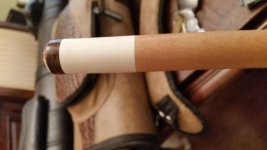
After finally getting a nice table I need to re tip some cues. Never having a good cue, (or table) in the past, I would cut the tip off with a razor knife (if it hadn't flown off!) Then scrape glue, and sand free hand with a sanding block of wood.
Sanding the tip to match the ferrule never did a great job. But, they were beater sticks.
Anyhow If I hadn't just bought a used Rick Howard cue, I would use my old method and try to get better at it. Also thinking of a diy lathe, just for tip and ferrule replacement.
What do you folks use for the tip replacement, if you do your own?

Tip cement? I bought some "tip cement" on line and the fell off after 24 hours in the clamp. Used some medium CA glue and a few minutes later I'm breaking with it.

Sorry for all the questions, but I'm a diy guy, and it feels great to be getting back into pool.

Great Forum Thanks to those who contribute
 

NervousNovice

AzB Silver Member
Silver Member
After finally getting a nice table I need to re tip some cues. Never having a good cue, (or table) in the past, I would cut the tip off with a razor knife (if it hadn't flown off!) Then scrape glue, and sand free hand with a sanding block of wood.
Sanding the tip to match the ferrule never did a great job. But, they were beater sticks.
Anyhow If I hadn't just bought a used Rick Howard cue, I would use my old method and try to get better at it. Also thinking of a diy lathe, just for tip and ferrule replacement.
What do you folks use for the tip replacement, if you do your own?

Tip cement? I bought some "tip cement" on line and the fell off after 24 hours in the clamp. Used some medium CA glue and a few minutes later I'm breaking with it.

Sorry for all the questions, but I'm a diy guy, and it feels great to be getting back into pool.

Great Forum Thanks to those who contribute

1. Cut most of the tip off with a razor blade.
2. Tape some 600 grit sandpaper on the surface of a ruler (or any piece of flat surface that you can hold on to). Use it to sand away the remaining tip or glue on the ferrule. (Yes, it's hard to avoid sanding away part of the ferrule if you're doing it by hand DIY.)
3. Sand the bottom of the new cue tip on a flat surface with 600 grit sandpaper to roughen it up a bit. (Not for a Kamui clear.)
4. Now hopefully the surfaces of your ferrule and your new tip are as flat as possible.
5. Put a thin layer of Loctite Super Glue Gel Control or Loctite Professional glue on the surfaces of the ferrule and the tip.
6. Place the cue tip on the ferrule as centered as possible. Apply pressure. Press it down for 30 seconds.
7. Wait for 30 minutes for the glue inside to dry. (You could just wait for 5 minutes, but I have a lot of time.)
8. Hold your shaft on a table vertically with the tip touching the table.
9. Use a razor blade to trim vertically downward parallel to the ferrule to trim away the edge of the tip. Don't be too greedy with each cut. Do it bit by bit until the wall of the tip ALMOST flushes with the ferrule.
10. Put taper on the ferrule to protect it.
11. Sand the wall of the tip to flush it with the ferrule and smooth it. Start with 600 grit sandpaper, then 800, 1000, 1500, and 2000. (Note: In step 9, you should've cut the wall of the tip almost into its final shape because it takes forever to sand the tip to reduce its diameter, even with 600 grit.)
12. Now hopefully your tip is flush with the ferrule with the right diameter, and the wall is reasonably smooth from the 2000 grit sandpaper.
13. Use a piece of leather to burnish the wall of the tip. You can apply wax as a lubricant too.
14. Now you can shape the tip into whatever dome shape you want.

The whole process takes about 45 minutes if you do it carefully and slowly. Step 4 and 9 are the most critical.
 

arnaldo

AzB Silver Member
Silver Member
After finally getting a nice table I need to re tip some cues. . . .What do you folks use for the tip replacement, if you do your own?
Pirate, here's a DIY video I made for the members of our local billiards club last year:

https://www.youtube.com/watch?v=0UHlJUye9zI

Forty-three of our guys (and a couple of the DIY-handy ladies) have borrowed the home-shop fabricated kit since then and carefully followed the video & the accompanying printable instructions and gotten results that were extremely satisfying. If you're reasonably DIY-handy your mileage will almost certainly be the same.

If you're installing any layered tips, don't moisten them during the burnishing step. No need for it.

Arnaldo
 

Dave-Kat

AzB Silver Member
Silver Member
Nice to get some help from members and It's ok to like to 'do things yourself'. We all know, re-tipping is not 'rocket science' but do yourself a favor on your Howard and drop the $30 and have a professional handle it. The tip is the most important component of any cue.

Now if you live in an area that does not have anyone who actually does this kind of work on a regular basis then I understand and have at it.

-Kat:thumbup:
 

NervousNovice

AzB Silver Member
Silver Member
Pirate, here's a DIY video I made for the members of our local billiards club last year:

https://www.youtube.com/watch?v=0UHlJUye9zI

Forty-three of our guys (and a couple of the DIY-handy ladies) have borrowed the home-shop fabricated kit since then and carefully followed the video & the accompanying printable instructions and gotten results that were extremely satisfying. If you're reasonably DIY-handy your mileage will almost certainly be the same.

If you're installing any layered tips, don't moisten them during the burnishing step. No need for it.

Arnaldo

Nice video. Kinda like my step-by-step procedure too.

Nice to get some help from members and It's ok to like to 'do things yourself'. We all know, re-tipping is not 'rocket science' but do yourself a favor on your Howard and drop the $30 and have a professional handle it. The tip is the most important component of any cue.

Now if you live in an area that does not have anyone who actually does this kind of work on a regular basis then I understand and have at it.

-Kat:thumbup:

Indeed. You just can't DIY that uniformity and shine for the cue tip wall without a lathe. I can DIY but I would still pay someone $30 to get that nicer finish.
 

mortuarymike-nv

mortuarymike-nv
Silver Member
Diy

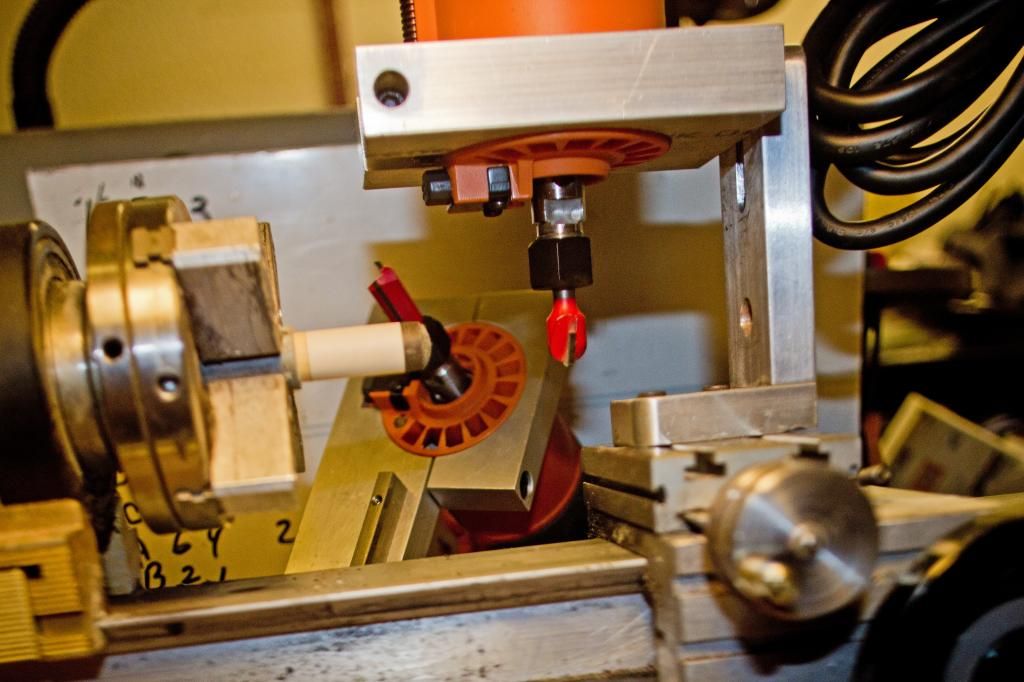
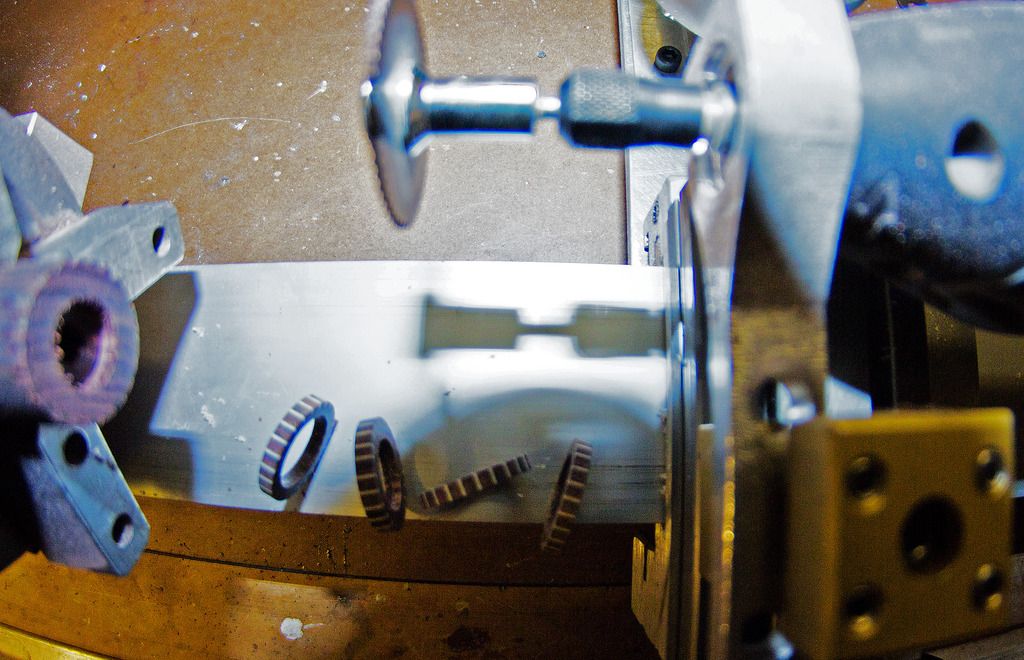
Now there's a nice diy lathe huh?


I know its really roughing it ;)
But it sure works great and really does a professional looking job....
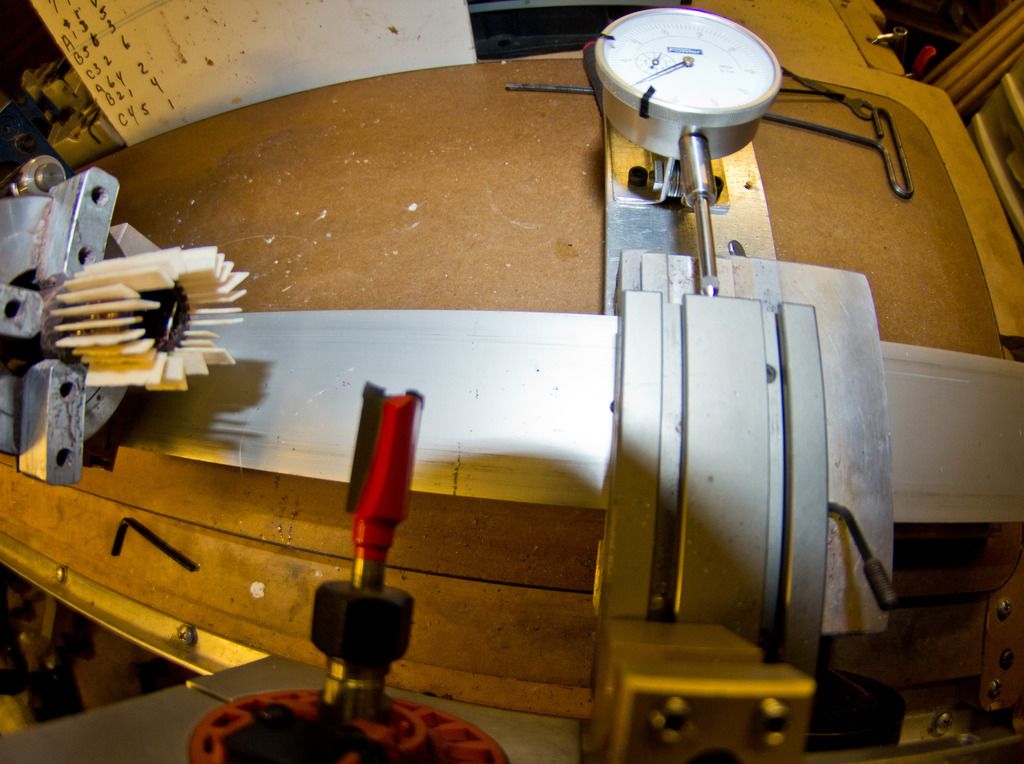
I put a dial indicator on the cross slide.
I zero out on the ferrule and then set the cross slide or live cutter one or two thousands away from the ferrule and cut the tip in one fast pass with the carbide cutter doing 20.000 rpm's .
With the dial indicator and the live cutter it makes for a very user friendly process to replace a tip and not swell the tip when flushing the tip up to the ferrule.

Very functional little lathe .
Ps I was making some 24 slot rings in the picture


I think I could do a fair job replacing a tip by hand knowing what I know now .
I also know when I first started to replace tips by hand I screwed up a ferrule and shaft .

For you new guys to replacing your tip for the first time , if for what ever reason you Think you need to cut or sand on the side of your ferrule STOP RIGHT THERE .
Come on here and we can walk you through the process or we will get you to a cue repair man....... so you don't end up screwing up your new tip the ferrule and the shaft .

I flip a few cues from time to time and the lathe is a must if the customer wants a different taper on the shaft or wishes to have different tips or ferrules installed .

If I was going to do my own tips by hand I would use a hand sharpened wood chisel .
I would have my wife or friend hold the cue upside down and straight up and down on a block of wood and I would trim the tip to the ferrule with the extremely sharp wood chisel..
And I would take great care not to cut the ferrule or sand on it .
 

thomas.huntluck

Registered
Who is saying to sand the new tip before placing it on a cue? I've never seen it done that way, but what don't know. I've just competed in 9, 10, and 8 ball for like 15 years


Sent from my iPhone using Tapatalk
 

RiverCity

AzB Silver Member
Silver Member
Who is saying to sand the new tip before placing it on a cue? I've never seen it done that way, but what don't know. I've just competed in 9, 10, and 8 ball for like 15 years


Sent from my iPhone using Tapatalk

You are supposed to sand the bottom of tips flat before you install them. It also breaks any sealant that might be on the tip so that the glue is actually on leather (think le pro and sumo tips etc).

Learn something new everyday, dont ya? :grin:
 

EddySJ

AzB Silver Member
Silver Member
...

If I was going to do my own tips by hand I would use a hand sharpened wood chisel .
I would have my wife or friend hold the cue upside down and straight up and down on a block of wood and I would trim the tip to the ferrule with the extremely sharp wood chisel..
And I would take great care not to cut the ferrule or sand on it .
[/QUOTE]

That is what I did on one of my house cues I play with at home. I will try to attach photos, as I am using my phone and haven't been successful with it yet.

1. Remove tip (mine had popped off...manufacturers tip, not one of mine)with razor as close as possible to the glue line at top of fiber pad or ferrule.
2. Sand tip remnants and excess adhesive using suitable sander . I used a squared sanding block across a plastic carpenter square from Harbor Freight. I padded My bar cue in 1 layer of thin blue shop rag from Big orange box store...ensured straight section of shaft remained flush while carefully sanding across shaft.
3. Remove dust after sanding, do not touch the gluing surfaces with bare skin, to prevent oils interfering with bonding.

4. Lightly sand base of tip...
I followed DZ cues advice on tip and ferrule surfaces/ prep before gluing...which also calls for lightly sanding the tip.

5. Glue using superglue gel or the pro super, same as mentioned in previous posts.

6. Carefully apply light pressure and ensure tip remains centered on shaft.

7. Once set (i waited a half hour)use razor sharp chisel and backer block to rough cut the excess edges of tip away.

8. Repeat again on the higher spots left from the first series of cuts to remove additional excess material. Repeat as necessary to allow a skimming style cut with the chisel skewed, while carefully rotating the cue by hand along your pants leg (seated position)

Caution: This step requires good technique and very steady hands with a good feel for the chisel biting into the sides of the leather tip for the skim cut...

9. Lay the chisel's back face flat on the ferrule in a skew cut orientation, with the leading edge of the chisel near the tip/ferrule's glue line and trailing edge across the top of the tip. (My chisels are polished mirror bright on the back face and won't scratch the ferrule.) The tip will lie inside the left and right faces of the chisel. I used a 3/4" wide chisel for my standard bar cue ferrule.
Gradually Elevate chisel while maintaining flat face contact, while slowly rotating cue.. too much elevation will bite into the leather very fast and likely result in damage to the ferrule.

The idea is that the chisel is perfectly flat against the ferrule, and the leather tip will only catch the cutting edge if it is a larger O.D. than the ferrule. Elevating the blade too much will dig into the ferrule as well.
10. Start trimming away the excess leather at the glue line, around the entire circumference of the ferrule/shaft while slowly rotating the shaft with one hand and cradling the chisel flat and skewed against ferrule with the other.

11. Maintain the same chisel elevation and Gradually work your way up the tip until enough excess material is removed to enable faster skim cuts ( tip is becoming more perfectly rounded.)
12. Increase elevation and repeat the trimming process until the tip is fairly even with the ferrule.

13. Carefully sand the tip sides with 600 grit, followed by 1200 and 2000. Don't sand the ferrule with the 600. Mask if necessary. I rotated my shaft by hand using my thumbs and the factory edge of the sand paper to slowly put the finishing shape to my tip.

14. I polished the ferrule and sides of my tip with the 1200 and 2000 grit.

15. I applied a very light coat of a gold class car wax (carnauba) to the ferrule and sides of tip. I burnished with a brown paper towel.

16 - 17. I took a beveled cut from the top of the tip, to speed the shaping process along. I then use a chute style shaper to round the tip. I followed it up with a Willard tip tool for final shaping.
The tip shown is a Wizard, if I recall correctly.

Thanks for reading, I know it was a bit long winded. I was hoping to give too much info versus not enough.

I would like to say that I will be investing in a sander and clamping device for future repairs. The entire process took me about 45 minutes, plus the additional cure time of 30 I gave for the super glue gel to set.
Sorry for repeat pics, can't get rid of them now...bah.
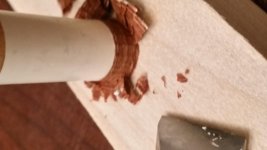
uploadfromtaptalk1434406817711.jpg
uploadfromtaptalk1434406906392.jpg
uploadfromtaptalk1434406966912.jpguploadfromtaptalk1434407007176.jpg

Sent from my SAMSUNG-SM-G850A
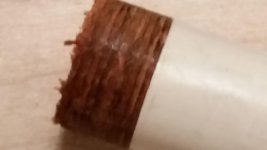
 
Last edited:

PoolBoy1

AzB Silver Member
Silver Member
Very little equipment. Pliers to pull off old tip. Super retractable sharp at least a new blade. Scrape off old glue. I use super glue after surface of shaft and tip are prepared. I hold firm for few minutes. My tip size is 13mm so I buy 14mm to glue on and shave sides down with razor knife and some sand paper. . Use a nickle size shaper for tip. Burnish edge of tip with an old leather belt. Tip is ready for use. I do not break with this cue and tip. Once a week I'll pick it some with a safefy pin. Play mostly every day 1-2 hours. Tip likes: med hard. I like non layered.
 

Dave-Kat

AzB Silver Member
Silver Member
Nice DYI tip job. Like I mentioned it is not rocket science and many have at it themselves. This method would suffice on a solid tip real nice like a Triangle, Lepro etc.

However, more to it than 'meets the eye' my friends. Easy to damage the 'integrity' of a glued, spliced layered pig skin tip without a lathe. This means potential delamination, wear, feel and most important the hit.

-Kat :thumbup:
 
Top