Hello All -
I'm attempting to build my first cue and I'm just learning as I go. I'm at the stage where I want to join the forearm and handle together and I ran into my first big problem.
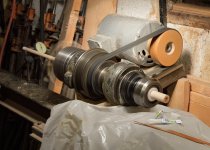
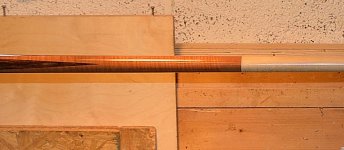
The forearm is just gaboon ebony cored onto a maple core. I have some simple ring work (shown in photos) that if like to go at this A joint.
For the foream, I created a .750" diameter tennon by roughly .750" long. I center drilled, bored, and tapped for 3/8x10 pin.
For the handle, I bored the pocket for the tenon and tapped for the pin.
However when joining things up dry, I noticed quite a bit of run-out :-(
I made sure to not over tightening things and triple checked the rings for sqaureness. After reading tons of other threads, I may have discovered where I went wrong.
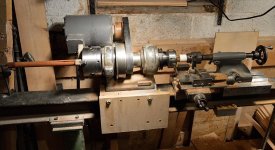
After glueing on the core I took several passes on the ebony between centers using the butt taper bar, however when I sized the tennon for .750, I did this by chucking up on the slightly tapered ebony. I also faced things at this time.
I think the correct approach would be to create the tennon to size and face while still between centers, however I'm stumped on how to face if the center is in the way? Am I missing something here?
Thanks,
Phil


Sent from my Pixel 4 XL using Tapatalk
I'm attempting to build my first cue and I'm just learning as I go. I'm at the stage where I want to join the forearm and handle together and I ran into my first big problem.
The forearm is just gaboon ebony cored onto a maple core. I have some simple ring work (shown in photos) that if like to go at this A joint.
For the foream, I created a .750" diameter tennon by roughly .750" long. I center drilled, bored, and tapped for 3/8x10 pin.
For the handle, I bored the pocket for the tenon and tapped for the pin.
However when joining things up dry, I noticed quite a bit of run-out :-(
I made sure to not over tightening things and triple checked the rings for sqaureness. After reading tons of other threads, I may have discovered where I went wrong.
After glueing on the core I took several passes on the ebony between centers using the butt taper bar, however when I sized the tennon for .750, I did this by chucking up on the slightly tapered ebony. I also faced things at this time.
I think the correct approach would be to create the tennon to size and face while still between centers, however I'm stumped on how to face if the center is in the way? Am I missing something here?
Thanks,
Phil


Sent from my Pixel 4 XL using Tapatalk

")
