Anyone know David Deboy? Selling a homemade ball polisher

TEAM SLO

AzB Silver Member
Silver Member
Nevermind, made my own pool ball polisher

Nevermind, ended up making my own polisher and it works great.

EDIT-----
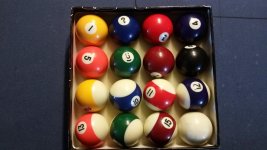
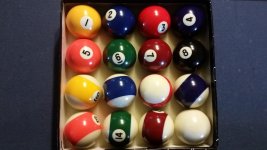
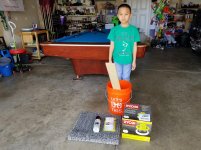
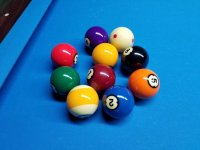
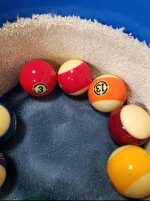
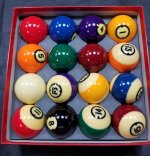
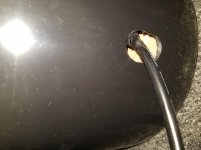
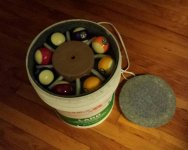
Ended up making one, was actually very simple to do even not being good with tools and such. Post 16 shows our results.
-----End of Edit
 
Last edited:

maha

from way back when
Silver Member
make one yourself it only takes 15 minutes. bucket, polisher, piece of carpet. 25 bucks.
 

jay helfert

Shoot Pool, not people
Gold Member
Silver Member
Pretty sure he made one for me several years ago. I paid him fifty bucks and it still works great some seven or eight years later. Thanks Dave!
 

oldschool1478

AzB Silver Member
Silver Member

Attachments

  • 20171106_071900 - Copy.jpg
    20171106_071900 - Copy.jpg
    126.5 KB · Views: 1,019

DASHZNT

AzB Silver Member
Silver Member
I made mine with the same polisher. The problem with this design is that the balls knock into each other and leave marks all over.
The solution is to make a floating separator like shown in the attached photo.

http://forums.azbilliards.com/attachment.php?attachmentid=482896&stc=1&d=1517420523

Can you please send me a PM with what you used to create that? I really could benefit from a polisher but will not justify the $500 price some of these machines cost. I appreciate your help very much and anticipate your response, Thank You.
 

oldschool1478

AzB Silver Member
Silver Member
Can you please send me a PM with what you used to create that? I really could benefit from a polisher but will not justify the $500 price some of these machines cost. I appreciate your help very much and anticipate your response, Thank You.
PM sent. Let me know if you need any more info.
 

whammo57

Kim Walker
Silver Member
You don't need a ball separator ............. think about it............. the balls bang into one another when you play and don't leave any marks....................... just drop them in the home made polisher and add a little Meiguires PlastX head light polish............. run it for 10 minutes and then add a little cream Turtle Wax............. run it a few minutes .............. wipe the balls with a towel and Play............................ I have used mine for 5 years

Kim
 

Black-Balled

AzB Silver Member
Silver Member
You don't need a ball separator ............. think about it............. the balls bang into one another when you play and don't leave any marks....................... just drop them in the home made polisher and add a little Meiguires PlastX head light polish............. run it for 10 minutes and then add a little cream Turtle Wax............. run it a few minutes .............. wipe the balls with a towel and Play............................ I have used mine for 5 years

Kim
Your experience is not everyone's:

http://forums.azbilliards.com/showthread.php?t=468124
 

Black-Balled

AzB Silver Member
Silver Member
The spots occurred after playing, not after polishing...

Incorrect- appears you failed to read the thread or acknowledge the post earlier in this thread.

Game play was not the only cause of the spots.

With reasonable certainty, I would say there is no discernable difference between collisions in a polisher, vs on a table, a shoebox, or a back seat of a porsche 914.
 

pwd72s

recreational banger
Silver Member
Incorrect- appears you failed to read the thread or acknowledge the post earlier in this thread.

Game play was not the only cause of the spots.

With reasonable certainty, I would say there is no discernable difference between collisions in a polisher, vs on a table, a shoebox, or a back seat of a porsche 914.

You have a very unusual Porsche 914. ;)
 

Ak Guy

AzB Silver Member
Silver Member
What I did.

Awhile back a guy on here posted a pic of his home made ball polisher and all parts came from Home Depot. It consisted of 2 orange plastic buckets and a Ryobi buffer.

I cut a whole little bit bigger then the buffer and put it in the first bucket and then cut slots in the other bucket to feed cord through and glued Velcro strips on the inside of the buffer bucket. Leave cord turned on and just plug it in to run it.

Home Depot gave me carpet scraps that we put Velcro on and lined 6 inches of buffer bucket with them. I have had this ball cleaner for 2 years and have about 40 bucks in it and it works great. If needed I can pull apart to replace buffer pad cloth.

I have the Aramith cleaner and restorer stuff and a bottle of Meguiars Quik Detailer for the final finish. The Turtle Wax Scratch and Swirl Remover will replace the Aramith Ball Restorer when it is gone.

I do half the balls at a time and it only takes a few minutes to make the balls clean and shiny and if you leave a bucket lid on it cuts down on the noise, which ain't a big deal for me as my table is in my shop. All of this for under 50 bucks.
 

radnur22

AzB Silver Member
Silver Member
you don't need anything fancy

I picked up a $3 bucket and $30 10" car buffer from walmart and that's all you need. No carpet glued to the sides, no ball separator. Put the buffer in the bucket upside down, place all 16 balls on top of the buffer, add your favorite cleaner/polisher (I use Aramith's), turn on for 20 minutes or so and your done. The carpet is not needed because of the orbital/rotational action of the buffer. You will notice the balls moving around a bit, that's all you need. They get cleaned/polished with the contact of the buffing pad. There are no collision spots on the balls ;);) The pictures really don't show it, but the cue ball was terrible with chalk marks/scuffs. This was after 10 minutes in the polisher. My Aramith premium balls with measle cue ball looks great!!!
 

Attachments

  • 20180211_115047.jpg
    20180211_115047.jpg
    199.7 KB · Views: 569
  • 20180211_115852.jpg
    20180211_115852.jpg
    194.1 KB · Views: 582
Last edited:

TEAM SLO

AzB Silver Member
Silver Member
Yeah, ended up taking my son to home depot and buying everything there. I figured my first pass would be a fail but it actually works really good. Since I bought the table, even took the balls to a local pool hall to have the balls polished up, it never looked good and was set on buying a new set.

After this though, no plans to buy another set, keeping these as they cleaned up good.
 

Attachments

  • 20180203_115335.jpg
    20180203_115335.jpg
    202.4 KB · Views: 338
  • 20180203_131758.jpg
    20180203_131758.jpg
    192.8 KB · Views: 341
  • 20180203_131845.jpg
    20180203_131845.jpg
    186.5 KB · Views: 334
  • 20180203_133528.jpg
    20180203_133528.jpg
    199.9 KB · Views: 338

KenRobbins

AzB Silver Member
Silver Member
I picked up a $3 bucket and $30 10" car buffer from walmart and that's all you need. No carpet glued to the sides, no ball separator. Put the buffer in the bucket upside down, place all 16 balls on top of the buffer, add your favorite cleaner/polisher (I use Aramith's), turn on for 20 minutes or so and your done. The carpet is not needed because of the orbital/rotational action of the buffer. You will notice the balls moving around a bit, that's all you need. They get cleaned/polished with the contact of the buffing pad. There are no collision spots on the balls ;);) The pictures really don't show it, but the cue ball was terrible with chalk marks/scuffs. This was after 10 minutes in the polisher. My Aramith premium balls with measle cue ball looks great!!!

You'd think without the carpet the balls are turning at high speed against the hard plastic surface of the sides. Be nice to your balls and put some padding in there. It will polish the balls much nicer too. I made one for a friend of mine and made one in black to match my room. The Brunswick Centennials in the box are about 20 years old and polished up like new, minus little nicks in the balls from years of abuse. The ones in the polisher are about 2 years old now.
https://youtu.be/PDn_E0nl1QQ
 

Attachments

  • Screenshot_20180211-154508.jpg
    Screenshot_20180211-154508.jpg
    206.8 KB · Views: 331
  • Screenshot_20180211-155200.jpg
    Screenshot_20180211-155200.jpg
    171.4 KB · Views: 333
  • Screenshot_20180211-155045.jpg
    Screenshot_20180211-155045.jpg
    148.5 KB · Views: 330

KenRobbins

AzB Silver Member
Silver Member
can someone pm me on how to make one of these..directions and parts?...Thanks!!!

I'm shot out for the day, but will take mine apart tomorrow and show how I made mine. I had a bunch of ideas of modifications, but will take to much table time away from me to do them. I originally used bolts and washers underneath to mount the buffer to some 2 x 2's in the bucket, but the balls polished better with the buffer floating/vibrating not mounted to bottom.
I found a buffer that was returned to Walmart on the shelf and talked them into giving me it for $12.00. I have less than $20.00 into mine.
 

KenRobbins

AzB Silver Member
Silver Member
I think the black buckets from Home Depot look better because you can peel the label off the side. The other buckets have markings on most of them. From the bottom of bucket, measure up to 2 1/2 inches, this is center for the opening of the cord mounted on the 2 x 2's. I pre drilled the hole, then used my dremel to make the opening to 1 1/4" x 1" for the cord.
 

Attachments

  • 20180211_204219.jpg
    20180211_204219.jpg
    186.9 KB · Views: 311
  • 20180211_204121.jpg
    20180211_204121.jpg
    186.4 KB · Views: 317
Top