Anniversary project

JoeyInCali

Maker of Joey Bautista Cues
Silver Member
Did you use Diamond black cushions?
I don't think they're a drop-in replacement for Monarch cushions.

4.75" corners will play very generous.
If you are going to replace the facings, I think going with a thicker set so the corner pockets get close 4.5" will be better .
 

bradsh98

Bradshaw Billiard Service
Silver Member
Did you use Diamond black cushions?
I don't think they're a drop-in replacement for Monarch cushions.

4.75" corners will play very generous.
If you are going to replace the facings, I think going with a thicker set so the corner pockets get close 4.5" will be better .

Note: He did replace the face of the sub-rail, and modified the height and face angle.

It's all a matter of opinion on the pocket size.. I do a lot of 4.75" corners for casual players. 4.5" for serious players.

For me, pocket entry angles ALWAYS stay the same, at 141 degrees. The downward angle may change, depending on the table. Shorter shelves require shallower downward angle. Deeper shelves require a steeper angle. I generally cut all older Brunswick tables (Gold Crown, Anniversary, Etc..) at 12 degrees. I never go less than 10 degrees or more than 14 degrees, on any table.
 
Last edited:

martin35

AzB Silver Member
Silver Member
Note: He did replace the face of the sub-rail, and modified the height and face angle.

It's all a matter of opinion on the pocket size.. I do a lot of 4.75" corners for casual players. 4.5" for serious players.

For me, pocket entry angles ALWAYS stay the same, at 141 degrees. The downward angle may change, depending on the table. Shorter shelves require shallower downward angle. Deeper shelves require a steeper angle. I generally cut all older Brunswick tables (Gold Crown, Anniversary, Etc..) at 12 degrees. I never go less than 10 degrees or more than 14 degrees, on any table.

Geoff

You are right all along.

I redid the subrail nose at 1-11/16 high with a down angle of 23.5deg. I’m ending up with my K55 cushion nose at a hair bellow 1-7/16” and the playing surface is right on 50x100.

Regarding the pocket I think I will like the 4-3/4” opening since I’m really just a casual player and the table is intended for the family and friends.

As for the angles it’s been a tough choice. Since I’m not an expert by any mean and don’t pretend to understand all the subtilties of opening angle, down angle and shelf depth and all their interactions, I’ve tried to take a decision based on various data and opinion found on the forum but I’ve not been able to found a consensus. Since the original Brunswick angle seems to be 142Deg, I kept that that and add some down angle at 14 deg. since it could, I think, probably help. Hopefully I did the right choice.

Thanks for the comments guy

Martin
 
Last edited:

bradsh98

Bradshaw Billiard Service
Silver Member
I think that you will be just fine with your pocket angles. Looking forward to seeing the finished product.
 

martin35

AzB Silver Member
Silver Member
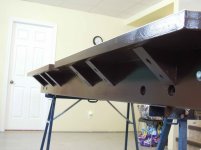
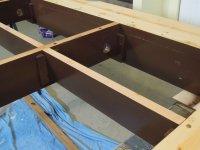
UPDATE Frame conversion

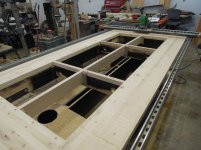
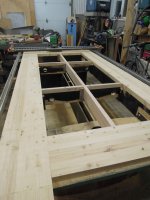
After some thought I've decided to modify the frame to make it similar to the original. Not really because it was necessary but more for the fun of doing it.

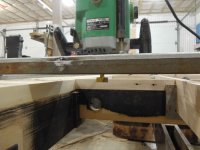
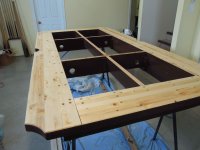
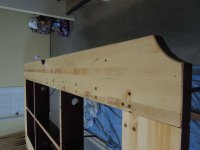
Here is what I did :

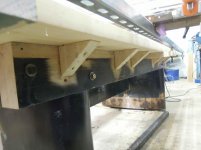
-Glue laminated some 2x10 (roughly)
-Resized my existing frame to match to original dimension (I goof up on the lenght but it's another story)
-Glue and screw everything together
-Add reinforcement block all around
-Widen the cross-members to match the new frame height and add 3 new one
lenghtwise
-Plane the top surface with a rigged-up router sled and a 1-1/2" mortising bit
-Cut the outside edges to final dimensions.
-Sand, paint and seal the top surface.


1.jpg

2.jpg

3.jpg

4.jpg
 
Last edited:

martin35

AzB Silver Member
Silver Member
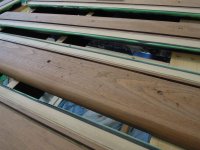
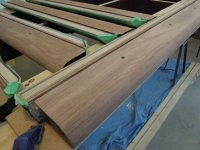
Next step :

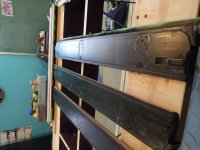
I'm done sanding and removing all the old finish on my rails, sanded and repaint the bottom.

There's a lot of burn mark to get rid of on the top rails . Lot of work to come....

I'll keep you posted.

Martin

PS Sorry but my workshop is a total mess, way too much stuff. It's looking better these days after some clean-up.
 
Last edited:

trentfromtoledo

8onthebreaktoledo
Silver Member
Way to go Martin!!! Happy you decided to restore/ rebuild it. Looking forward to seeing your finished table. It is gonna be special!


Trent from Toledo :thumbup:
 

Lawnboy77

AzB Silver Member
Silver Member
Wow!! Awesome job! I love the jig you made with the router, looks like you effectively made a 50 inch planer/joiner with it. I see you transcribed the serial numbers to the new section with stamps, very classy.

The frame looks wider than a stock Anniversary frame...maybe longer to? I just noticed the cutouts at the side pocket wrap around much further than mine. I hope that doesn't create interference issues, I would imagine the new drop pockets are going to have to be cut quite a bit to accommodate that extra width? I just looked at my table and don't think that would work for mine unless I bored holes all the way through the frame to gain access to the rail bolts. I take it you must have a different setup?
 
Last edited:

martin35

AzB Silver Member
Silver Member
Wow!! Awesome job! I love the jig you made with the router, looks like you effective made a 50 inch planer/jointer with it. I see you transcribed the serial numbers to the new section with stamps, very classy.

The frame looks wider than a stock Anniversary frame...maybe longer to? I just noticed the cutouts at the side pocket wrap around much further than mine. I hope that doesn't create interference issues, I would imagine the new drop pockets are going to have to be cut quite a bit to accommodate that extra width? I just looked at my table and don't think that would work for mine unless I bored holes all the way through the frame to gain access to the rail bolts. I take it you must have a different setup?


Thank you for the nice comment

My frame is 51-7/8 x 101-7/8. The slate being 57x107 it leaves about 2-9/16 all around which is close to the original .On the other hand I pretty much eye ball the pocket cutout at roughly 1-1/2" - 2" (dont recall exactly) behind the slate cutout. They probably dont look exactly like the original.

The angle the picture have been taken from is probably creating an optical illusion...
 

Lawnboy77

AzB Silver Member
Silver Member
Thank you for the nice comment

My frame is 51-7/8 x 101-7/8. The slate being 57x107 it leaves about 2-9/16 all around which is close to the original .On the other hand I pretty much eye ball the pocket cutout at roughly 1-1/2" - 2" (dont recall exactly) behind the slate cutout. They probably dont look exactly like the original.

The angle the picture have been taken from is probably creating an optical illusion...

Okay good! I just measured mine and 2-9/16" all around will be fine. I think you are right about the optical illusion. The stock frames are tapered to accommodate a ball return option and that's probably what threw me off. Good deal! I just didn't want you to have put the slate on, and then find out later you need to take 2 inches off the frame width.
 

martin35

AzB Silver Member
Silver Member
Okay good! I just measured mine and 2-9/16" all around will be fine. I think you are right about the optical illusion. The stock frames are tapered to accommodate a ball return option and that's probably what threw me off. Good deal! I just didn't want you to have put the slate on, and then find out later you need to take 2 inches off the frame width.

Thank you anyway, better be safe than sorry.

Martin
 

Lawnboy77

AzB Silver Member
Silver Member
I think I understand the difference now. I don't think it's an issue at all, as a matter of fact it will probably be even better for clearance of the side pockets, since the cutouts for the side pockets are more inboard than the typical Anniversary frame that I've seen here in the states. My aftermarket side pockets had to be trimmed due to clearance issues with the frame, had the side pocket radius been cut back another 1/2", or so it probably would of made a better fit. Something else for me to consider the next time the Brunstone is off the frame.
 

martin35

AzB Silver Member
Silver Member
Update

Guys

I'll be ready to post an update of my project soon but with the recent debate about DIYer posting in mechanic forum, I wonder if I should ask to have my thread moved to the main forum ?

For me posting my project here is just a way to thank past and present contributers for sharing their knowledge by giving back some entertainment.

Just let know if you feel that I should have it moved and I will gladly comply.

Martin
 

CuesDirectly

AzB Silver Member
Silver Member
Guys

I'll be ready to post an update of my project soon but with the recent debate about DIYer posting in mechanic forum, I wonder if I should ask to have my thread moved to the main forum ?

For me posting my project here is just a way to thank past and present contributers for sharing their knowledge by giving back some entertainment.

Just let know if you feel that I should have it moved and I will gladly comply.

Martin

When the table is complete, post in the main forum like many people do. I posted my Anniversary there and it got a great response. Don't ask this one to be moved but keep this one going until complete. Just my two cents.
 

bradsh98

Bradshaw Billiard Service
Silver Member
Guys

I'll be ready to post an update of my project soon but with the recent debate about DIYer posting in mechanic forum, I wonder if I should ask to have my thread moved to the main forum ?

For me posting my project here is just a way to thank past and present contributers for sharing their knowledge by giving back some entertainment.

Just let know if you feel that I should have it moved and I will gladly comply.

Martin

Martin,

I would appreciate you continuing your updates in this forum. The DIY forum debate was a bit foolish, in my opinion. Aside from that, your skill-set is far beyond the typical DIY'er.

Thank you for sharing.
 

martin35

AzB Silver Member
Silver Member
Update

It's time for an update

In the last couple of months I did some slow progress but it's still going forward, I would like to be done for end of June.


Quite a bit of burn marks to remove:

DSCN7624.jpg

After steaming and sanding ( rail at the front only) pretty much everything is gone :

DSCN7629.jpg

Repaint the bottom of the rails :

DSCN7633.jpg

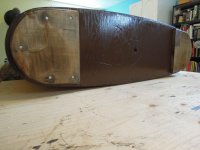
New feets for the pedestal :

DSCN7634.jpg

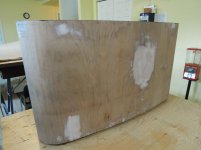
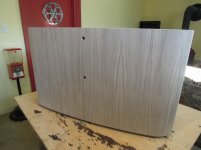
Pedestal repaired ready to be veneered :

DSCN7636.jpg
 

martin35

AzB Silver Member
Silver Member
Update

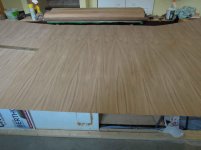
New walnut paperback veneer:

DSCN7639.jpg

Veneering done :

DSCN7640.jpg

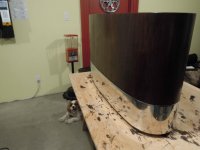
Stained and varnished pedestal with repaired (lot of dents) and polished leg band :

DSCN7644.jpg

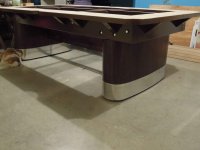
And finally a big milestone for me, the base frame is back together :

DSCN7646 (2).jpg

Thanks
 
Last edited:
Top