Gambler Cue build-log.

Jr's Farm

Be inspired!
Silver Member
As a long-time forum lurker and avid researcher, I have learned a great deal of info from AZ Billiards “Ask the Cuemaker” and the “Cue Machinery” forums. I figured the least I could do would be to give something back. In this case, a photo build-log of my Gambler themed cue. This is the first time I’ve posted any of my cue pictures of on AZ, but figured I’d share this one.

I started this cue before my CNC machine arrived, but the intention was to inlay it all along, so my assembly process may have been a little out of sequence as the cue was completely assembled and .020 oversize prior to the inlays. Anyway, here it is.

Regards,
Frank
 
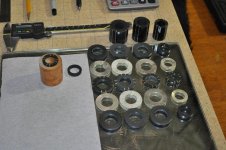
Cutting the stitch rings with KJ's mandrel and carbide saw blade. Stitch rings are Sterling Silver in Double Black Phenolic. Face off the billet, reset the indicator to 0, then feed the correct distance +saw kerf, part, repeat.
 

Attachments

  • Lathe 022a.jpg
    Lathe 022a.jpg
    94.8 KB · Views: 528
Lapping ring components on a piece of mirror (figure 8 pattern) prior to assembly.
 

Attachments

  • Lathe 028a.jpg
    Lathe 028a.jpg
    96.7 KB · Views: 513
  • Lathe 031a.jpg
    Lathe 031a.jpg
    97.9 KB · Views: 517
Last edited:
Getting ready to assemble the butt section. I like to thread my butt caps, in this case, MPI. It may be overkill but with live tooling it's not that difficult, it's fun to do, and I feel it provides for a better construction method, IMHO.
 

Attachments

  • Lathe 046a.jpg
    Lathe 046a.jpg
    98.3 KB · Views: 518
Here is the assembled cue, getting ready for inlays. The cue was hanging on my rack for probably almost a year at this point.
 

Attachments

  • 10-8-10 133a.jpg
    10-8-10 133a.jpg
    92.3 KB · Views: 515
Cutting the ebony inlays. For reference, the thickness of the point frame is .040" thick, and all small radii are .010". Shell inlay is Paua Abalone.
 

Attachments

  • 10-8-10 147a.jpg
    10-8-10 147a.jpg
    99.9 KB · Views: 511
Getting ready to assemble the butt section. I like to thread my butt caps, in this case, MPI. It may be overkill but with live tooling it's not that difficult, it's fun to do, and I feel it provides for a better construction method, IMHO.

nice ............
 
Here I'm cutting out the 3D dice facets out of some MOP stock. The MOP was meant for making necklaces, so it has a hole right through the center. It was a tight fit to yield the parts and avoid the hole and running out of room around the edges.
 

Attachments

  • 10-8-10 164a.jpg
    10-8-10 164a.jpg
    94 KB · Views: 529
Mock-up of inlays on the full-scale design drawing.
 

Attachments

  • 10-8-10 169a.jpg
    10-8-10 169a.jpg
    60.8 KB · Views: 503
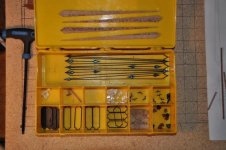
Parts tray holding my inlays...72 total for this cue. There's a couple extras and a couple 'oops' in there too, but you get the idea.
 

Attachments

  • 10-8-10 172a.jpg
    10-8-10 172a.jpg
    97.7 KB · Views: 516
Getting the cue dialed in on the CNC, making sure to 'clock' and index off my stitch rings, setting my Y and A zero points.
 

Attachments

  • 10-9-10 002a.JPG
    10-9-10 002a.JPG
    87.5 KB · Views: 506
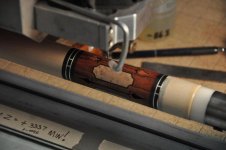
Cutting in the razor blade windows and the spear barbs. Again, all small radii are .010". Inlays are either .140" or .125" deep, except for the Paua, which is .080" deep.
 

Attachments

  • 10-9-10 029a.jpg
    10-9-10 029a.jpg
    56.9 KB · Views: 490
Maple Burl window inlays surrounded by Ebony frames. No colored filler was used anywhere in this cue except for the pips in the dice (not shown yet).
 

Attachments

  • 10-9-10 031a.JPG
    10-9-10 031a.JPG
    98.9 KB · Views: 502
As someone that hopes to be able to this one day as a hobby THANK YOU so much for sharing these photos. One of my favorite threads to date here at AZB.

Thanks!
 
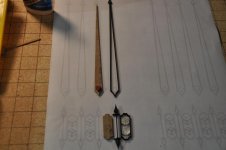
Milling the butt sleave spears through the barbs for tight inside corners.
 

Attachments

  • 10-10-10 001a.jpg
    10-10-10 001a.jpg
    63.7 KB · Views: 428
My Autocad drawing with inlay ideas, and a copy of my Excel spreadsheet pasted in. I print this out on 11x17 paper for my build print. The spreadsheet is still a work in progress, but I use it to factor in all my materials, sizes, hole sizes, tenons, components and etc. to come up with the final cue weight. I weigh all my wood and figure out the weight per cubic inch, the spreadsheet will take all my cone dimensions, tenon sizes, A-joint screw holes, etc., and figure my total cubic inches in materials, and thus the total cue weight.
 

Attachments

  • 10-10-10 008a.jpg
    10-10-10 008a.jpg
    93.5 KB · Views: 411
Last edited:
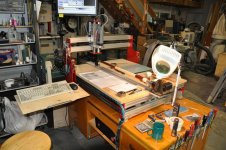
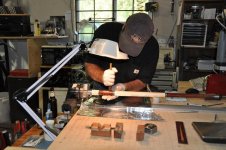
That's me keeping an eye on my $17, .020" diameter solid carbide endmill, spinning at 27,000 RPM, hoping I won't break "another one". The Kress router at that RPM is fricken' loud. Most times I'll have my Ultimate Ears TF10's hooked up to my iPhone, and then the Peltors on over them, and then the Kress can scream all it wants!
 

Attachments

  • 10-10-10 014a.jpg
    10-10-10 014a.jpg
    101.8 KB · Views: 403
Last edited:
Pressing in the spears with some BSI 20-minute finish cure epoxy. I turn my work light upside down and put the dixie-cup next to the light bulb for about 3 minutes to heat up the resin. Flows like water (almost) after that.
 

Attachments

  • 10-10-10 028a.jpg
    10-10-10 028a.jpg
    98.2 KB · Views: 408
Back
Top