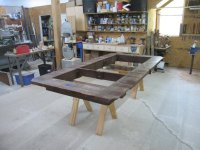
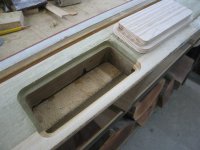
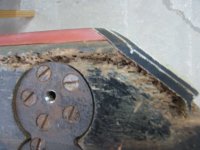
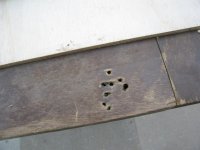
I recently bought a disassembled Gold Crown 1, from the dates on the metal parts looks like from 1963. It has obviously been recovered many times and also moved repeatedly. The pocket angles, both vertically and horizontally are all over the board. I removed one of the cushions and it was glued well in spots and barely attached in others. From the screw holes in the base it looks like the slate was reinstalled at least a half dozen times and never in the exact same place twice. Lots of work to do.
I have been doing custom woodwork my entire adult life, and am now transitioning into something of a semi-retirement. I am repurposing some of the floor space in my shop from work space to recreational space. The table is my retirement gift to myself. I played quite a bit of pool when I was young and used to enjoy it, but then marriage, kids, life....at this point I have not picked up a pool cue in decades. I live in a rural area, a county with a population of less than 20,000 and that I know of, one 7' bar box pool table. I am never going to be a competative player, nor is anyone who is ever likely to play on this table. I say all this just to add some context to the project.
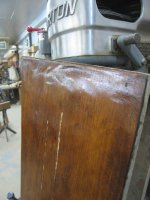
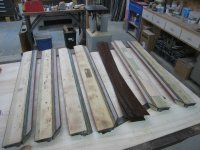
The legs and aprons I have are stained and varnished...rather poorly. I have started stripping the finish and have found remnants of what looks like a green/blue paint on the bottom of the legs. I'm thinking it might have been painted originally? I don't like the formica on the top of the rails, so have already removed that and will replace it with a solid wood veneer. The cushions are not the original Monarch, but Brunswick Superspeed, probably K55? The nose height appears to be correct, 1 7/16" from the playing surface, and after assembling three of the rails the width looks like 49 3/4". Based on this and the appearance of the rail that I removed the cushion from I am thinking that the subrails have never been altered.
My research says that replacing the Monarch cushions with K55s will close the playing surface up by 1/4" both ways, but other than that, not cause any problems. I am not sure this is going to be a concern for a player of my caliber. On the other hand, now would be the time to fix it. It seems to me that if the only problem is the size of the playing surface, then if I were to keep everything about the subrail like it is but shift the whole shape out by 1/8", my playing surface will be the correct 50 x100. Right? Or am I missing something....
I have been doing custom woodwork my entire adult life, and am now transitioning into something of a semi-retirement. I am repurposing some of the floor space in my shop from work space to recreational space. The table is my retirement gift to myself. I played quite a bit of pool when I was young and used to enjoy it, but then marriage, kids, life....at this point I have not picked up a pool cue in decades. I live in a rural area, a county with a population of less than 20,000 and that I know of, one 7' bar box pool table. I am never going to be a competative player, nor is anyone who is ever likely to play on this table. I say all this just to add some context to the project.
The legs and aprons I have are stained and varnished...rather poorly. I have started stripping the finish and have found remnants of what looks like a green/blue paint on the bottom of the legs. I'm thinking it might have been painted originally? I don't like the formica on the top of the rails, so have already removed that and will replace it with a solid wood veneer. The cushions are not the original Monarch, but Brunswick Superspeed, probably K55? The nose height appears to be correct, 1 7/16" from the playing surface, and after assembling three of the rails the width looks like 49 3/4". Based on this and the appearance of the rail that I removed the cushion from I am thinking that the subrails have never been altered.
My research says that replacing the Monarch cushions with K55s will close the playing surface up by 1/4" both ways, but other than that, not cause any problems. I am not sure this is going to be a concern for a player of my caliber. On the other hand, now would be the time to fix it. It seems to me that if the only problem is the size of the playing surface, then if I were to keep everything about the subrail like it is but shift the whole shape out by 1/8", my playing surface will be the correct 50 x100. Right? Or am I missing something....
")