I have that exact same machine but from Horrible Fright. It never came with the feed but I purchased it separately on e-bay for a little less than 200.00. The machine I got was on sale for 699.00 but the store only had one left that had some rust on the post so they knocked 150.00 off. It took me about an hour using diesel fuel to clean it up. It's give me no problems for the 5 or 6 years I've owned it. I bought a 5" vice for it and it is really overkill as it limits the amount of Z travail to much. The vice that I bought can rotate and has a degree wheel on it but truthfully, it is worthless for setting the degrees for cutting the points as they are so minute. After trying to cut points with the jig held in the vice I went a different way and it works perfectly. I took a 1 X 3 aluminum bar and mounted a 360 deg. 5C collet holder that can be bought on e-bay for 30-40.00 on one end and on the other I mounted a tail stock. In the 5C closer I put in one of Lee's indexing jigs so that I can mount the prong, remove and then remount perfectly indexed again. On the bottom of this aluminum bar, near one end, I put on a piece of aluminum bar that is a snug fit in the grooves on the table. I used one 1/4X20 bolt to hold this in place so that it can twist a little.
Now when I want to use this jig I just drop it onto the table with the pivot on one slot and I then clamp the fixture to the table. This fixture holds the prong perfectly straight between centers. Now to get the proper angle for cutting a point to the length and depth that I desire, I spent about a half a day and turned some dowels to the finished diameter at the joint and where the A-joint would be but made them around 15" long. I then started cutting V-grooves at different angles and depths until I came up with the ratio that I wanted so that my points come out to 9" long and almost touching at the A-joint on a 4 point cue. I did this with 4 points 5 points 6 points all even and 6 points 3 high and 3 low.
Once I had a point to the proper length and depth that I wanted I used my Digital caliper and measured from a mark I had put on the jig to the side of the table. In this way I can mount the jig and set the correct angle in only a minute or so. I wrote down these measurements for each number of points. For the depth of cuts I would measure the exact diameter of the dowel exactly where I wanted the points to start near the A-joint. I take this measurement which say is 1.100ths. I divide in half giving me .5500 to the center. Since I want the points to nearly touch in the back I need to make my cuts close to the center of the dowel. I cut to .040 from the center. This only leaves .080 to hold the prong together until the points and veneer work are glued in so you must be very careful handling the prong once the Vs have been cut. Using Lee's indexing jig makes it much easier as you can just cut 2 Vs, glue the points in, make a clean up pass and then re-index and do your other two as the first two has now stabilized the prong. By using Lee's jig you can actually make your V cut to the exact center of the prong and then the points and veneers will touch in the rear.
I'm spraying cues right now but a little later I'll take some pictures and send you of the jig. It's simple to build fairly cheaply and works perfectly.
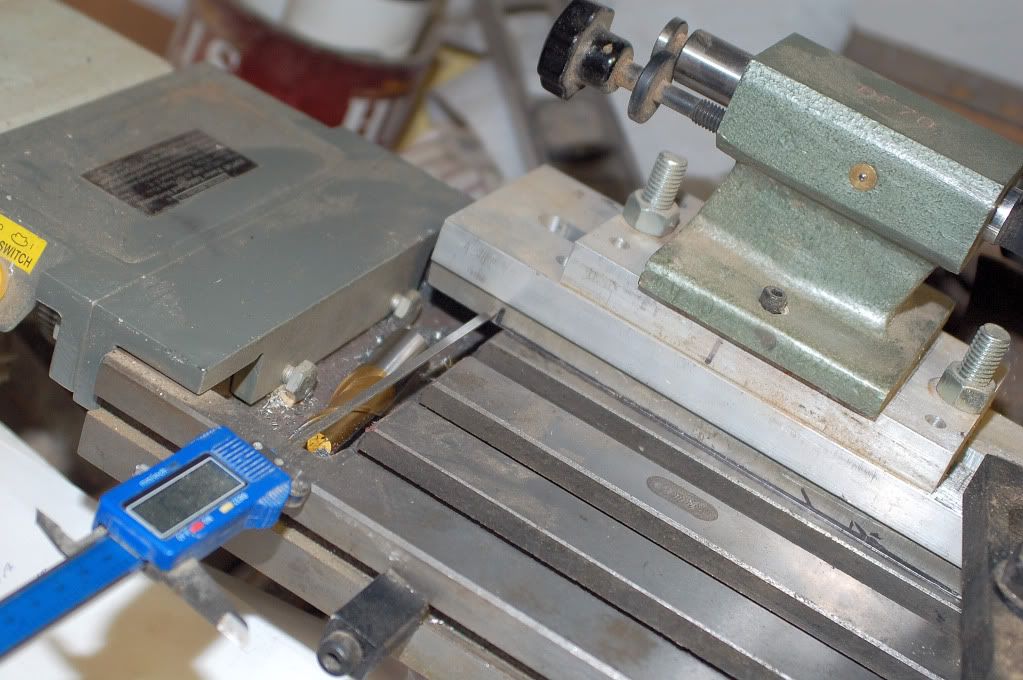
This is the lug on the bottom of the fixture to pivot on.
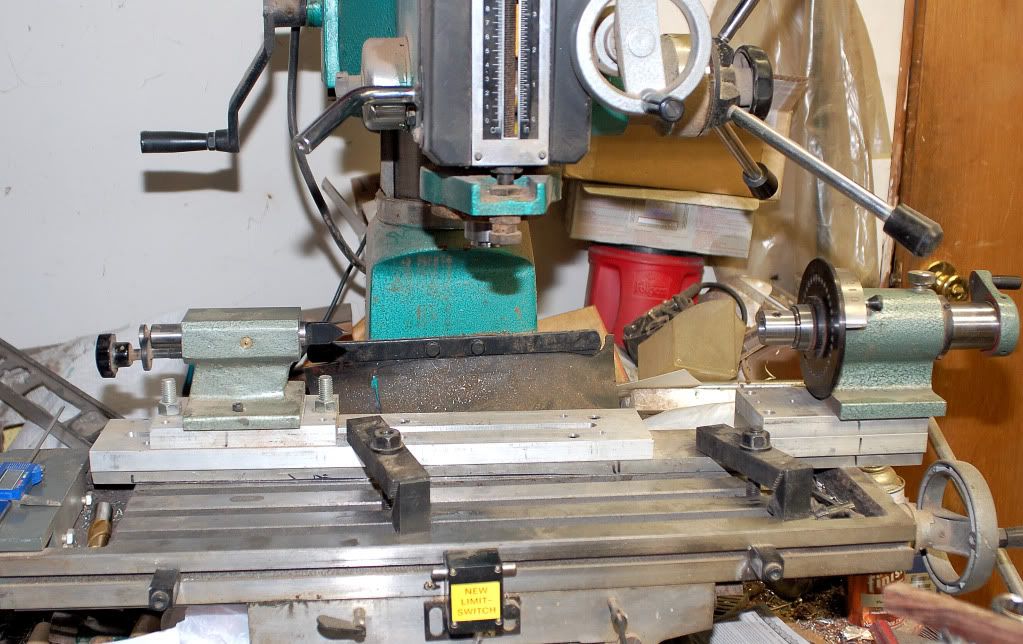
This picture shows how messy the shop is and the fixture on the table of the mill. One end has a 360 deg. indexer with Lee's re-indexing jig installed and the tail-stock with a half faced center.
This just shows where I measure to set the angle on the fixture for what ever angle of cut is needed.
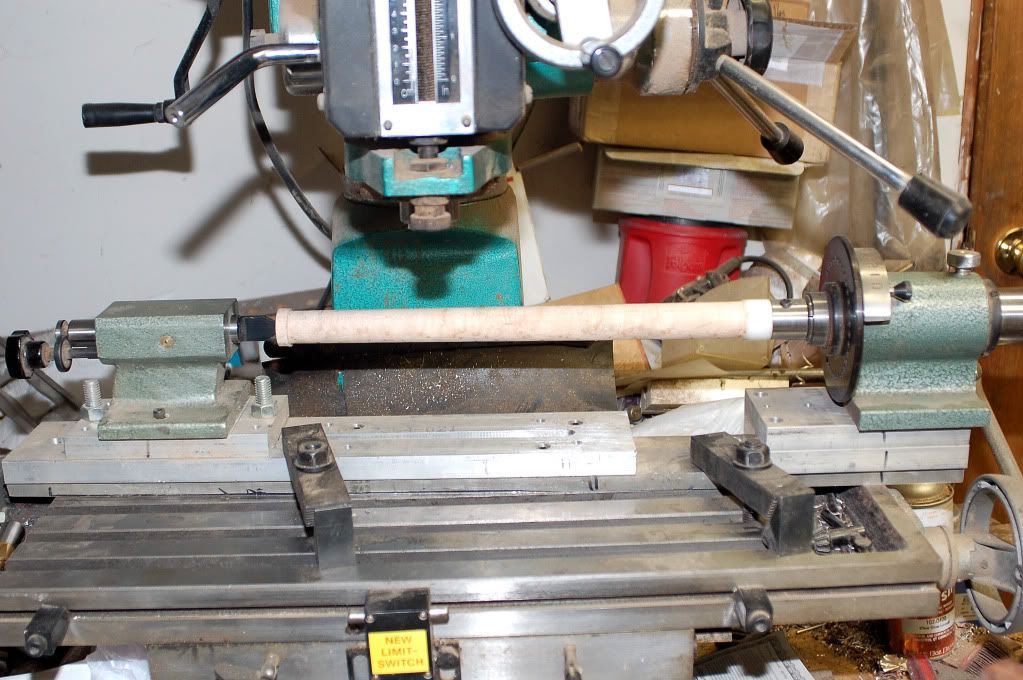
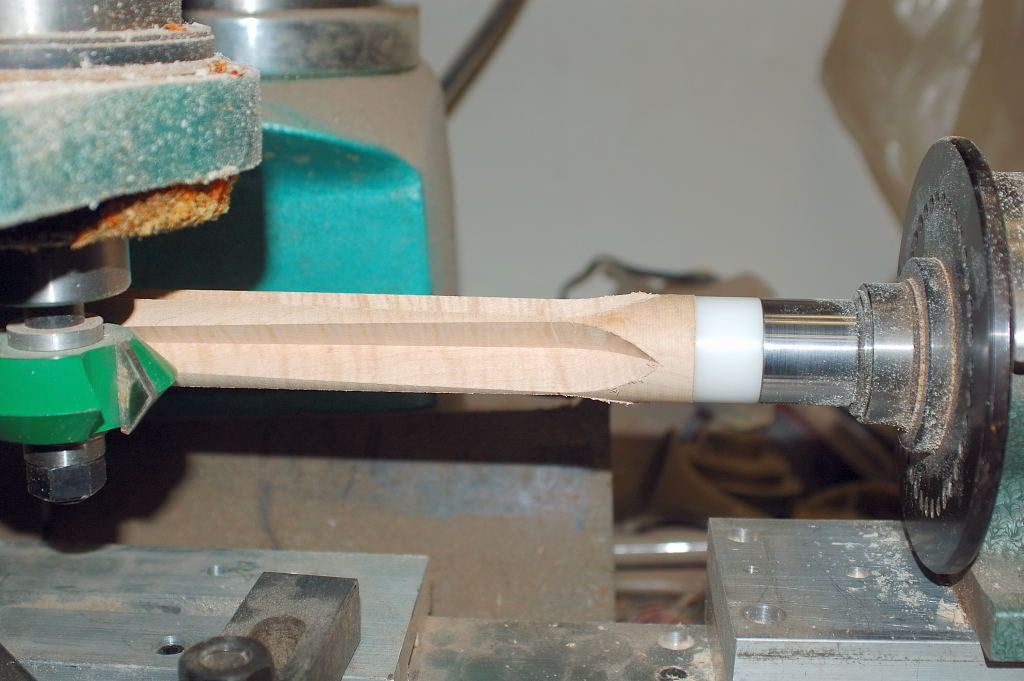
This shows the prong in the fixture ready to be V grooved.
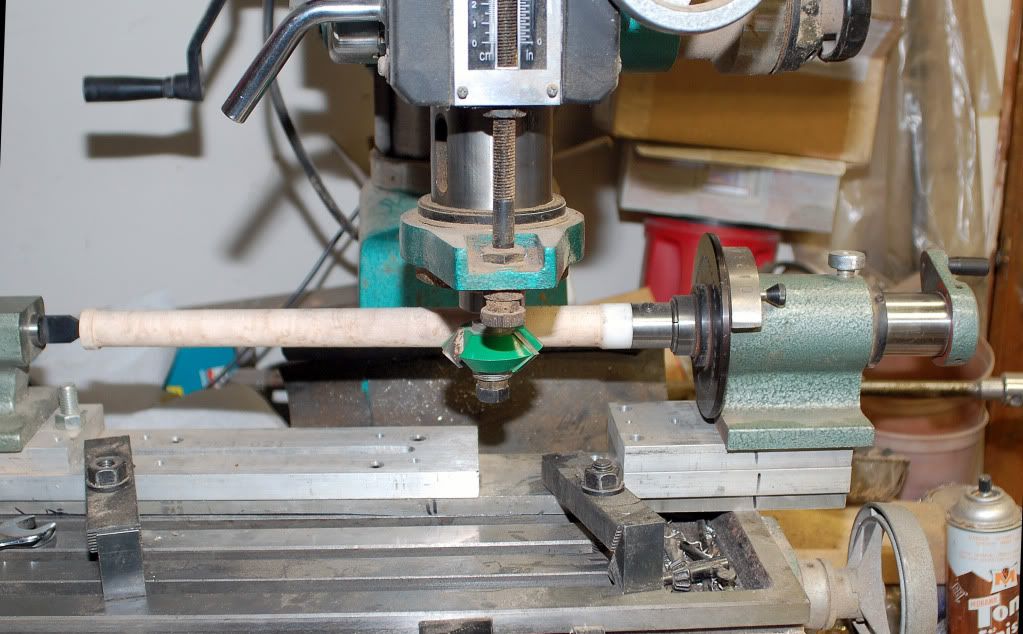
This is a picture of the cutter in place ready for the cut .
This is a picture of the V groove cut and Lee's re-indexer in use.
Dick