BSealsBazooka
New member
Here's a little background on me: I am an engineer by degree, a business owner, and a contractor by trade. I grew up playing pool from a young age, and my family has a history in this game going back a couple of generations. I put the cue down for many years, but recently picked it back up a couple of years ago. For some reason, my grandfather has been talked about a lot recently on podcasts, which led to me becoming friends with CJ and getting a few lessons from him. Somewhere in this recent journey, the local pool hall owner gifted me one of their old tables before replacing them with Diamond tables. It is an older Brunswick Brookstone 2.
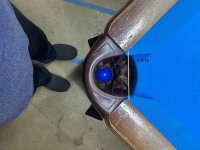
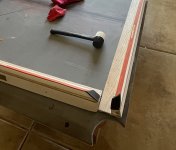
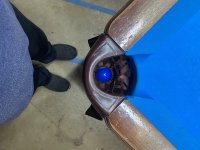
The local guy who maintains the Diamonds at the pool hall set it up for me. He's a great guy, very knowledgeable, and a hell of a player. At first, I was thrilled to have a 9-foot at home, but over time, I began to notice little things that drove me crazy. Some pockets were way easier for certain shots than others. I would notice this while doing drills and while playing. I also noticed that the pockets didn't look clean and symmetrical in all places.
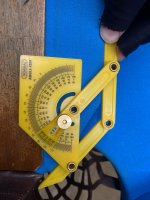
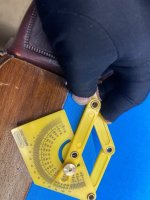
Well, that got me doing research and spending a lot of time on these forums. I started to get really into learning about the physics of the game, pocket geometry, and reading a lot in the mechanic forums. I bought a cheap protractor, measured all my pocket angles and down angles, and realized that it was pretty inconsistent. The pocket angles range from around 146 to 153, with none of them being the same in any single spot. Down angles are from 8 degrees to 14 degrees, again just random. No two sides in any pocket match the same pocket they're in.
I just dealt with this for a little while, keeping center pocket in mind and playing to the strengths of each pocket in games. I had just paid for new cushions and cloth for the table and didn't want to do it all again right away. Eventually, though, the slate started getting small humps at the seams, and I started planning to have it redone. I feel like I have learned a lot, and want to redo it myself slowly, just for the sake of learning how to do it. I'm very patient and thorough in everything that I do, so I'm pretty confident I can do a good job.
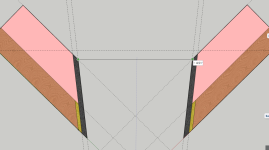
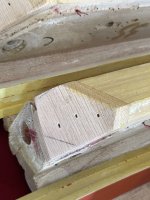
I'm currently in prep mode. I have a sanding disk for my miter saw and have practiced on some scrap 2x4's getting the angles correct. (They were just cut with a knife when they were installed). I have new cushions (Brunswick Super speeds) and a set of 60 durometer facings from classic billiards in both 1/4" and 3/16" so I can decide once I get them torn down which to use. I have new cloth on the shelf ready to go, I've ordered a Starrett level and a straight edge. I have access to hardwood to extend the sub rails if that's needed (I don't think that I will have to.) I've drown up some templates in sketchup to get a feel for how it should go. I'm really excited to get into it.
At any rate, I'm excited to attempt to tackle this on my own slowly and thoroughly. I did have a couple of questions.
There appears to be 2 types of 3m10 contact adhesive. Is that just packaging, or are there actually two kinds. One seems to be more expensive than the other. I've seen both linked to on here. Just want to make sure I get this step correct. I plan to index and edge glue the cloth as per RKC vids and simonis.
My other question is as to what extent it's okay to post progress on here for others to maybe catch my mistakes while I'm learning or give me encouragment that I'm doing it correctly.
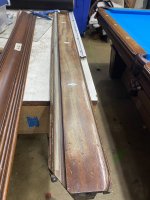
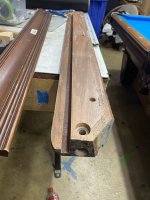
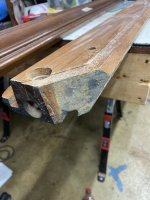
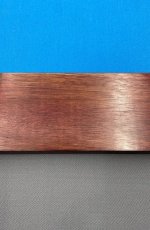
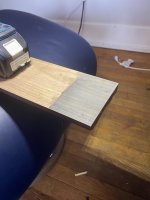
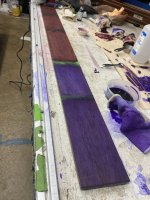
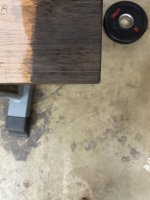
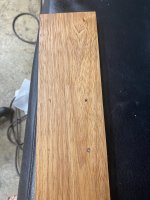
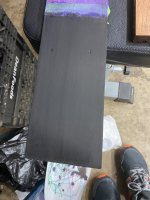
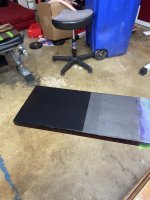
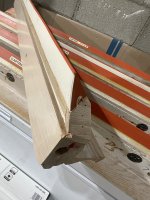
I've included a few pictures of the current table conditions just to know what I'm dealing with. Again, this is just practice and learning. Currently saving up for a diamond professional, but that will take me about another year. Just enjoying the journey.
The local guy who maintains the Diamonds at the pool hall set it up for me. He's a great guy, very knowledgeable, and a hell of a player. At first, I was thrilled to have a 9-foot at home, but over time, I began to notice little things that drove me crazy. Some pockets were way easier for certain shots than others. I would notice this while doing drills and while playing. I also noticed that the pockets didn't look clean and symmetrical in all places.
Well, that got me doing research and spending a lot of time on these forums. I started to get really into learning about the physics of the game, pocket geometry, and reading a lot in the mechanic forums. I bought a cheap protractor, measured all my pocket angles and down angles, and realized that it was pretty inconsistent. The pocket angles range from around 146 to 153, with none of them being the same in any single spot. Down angles are from 8 degrees to 14 degrees, again just random. No two sides in any pocket match the same pocket they're in.
I just dealt with this for a little while, keeping center pocket in mind and playing to the strengths of each pocket in games. I had just paid for new cushions and cloth for the table and didn't want to do it all again right away. Eventually, though, the slate started getting small humps at the seams, and I started planning to have it redone. I feel like I have learned a lot, and want to redo it myself slowly, just for the sake of learning how to do it. I'm very patient and thorough in everything that I do, so I'm pretty confident I can do a good job.
I'm currently in prep mode. I have a sanding disk for my miter saw and have practiced on some scrap 2x4's getting the angles correct. (They were just cut with a knife when they were installed). I have new cushions (Brunswick Super speeds) and a set of 60 durometer facings from classic billiards in both 1/4" and 3/16" so I can decide once I get them torn down which to use. I have new cloth on the shelf ready to go, I've ordered a Starrett level and a straight edge. I have access to hardwood to extend the sub rails if that's needed (I don't think that I will have to.) I've drown up some templates in sketchup to get a feel for how it should go. I'm really excited to get into it.
At any rate, I'm excited to attempt to tackle this on my own slowly and thoroughly. I did have a couple of questions.
There appears to be 2 types of 3m10 contact adhesive. Is that just packaging, or are there actually two kinds. One seems to be more expensive than the other. I've seen both linked to on here. Just want to make sure I get this step correct. I plan to index and edge glue the cloth as per RKC vids and simonis.
My other question is as to what extent it's okay to post progress on here for others to maybe catch my mistakes while I'm learning or give me encouragment that I'm doing it correctly.
I've included a few pictures of the current table conditions just to know what I'm dealing with. Again, this is just practice and learning. Currently saving up for a diamond professional, but that will take me about another year. Just enjoying the journey.
")