Brand New Murnak Case and Build journal

johnnysd

AzB Silver Member
Silver Member
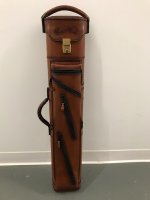
Jim Murnak recently was gracious enough to accept an order for a new case for me.

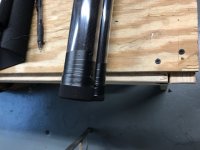
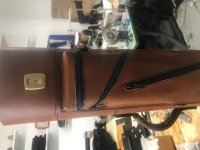
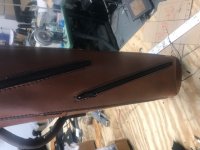
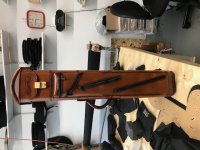
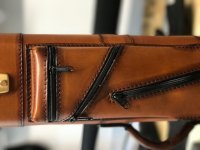
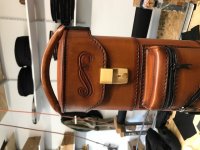
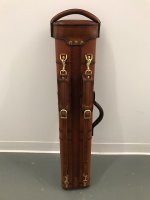
The results are spectacular. It is an absolutely gorgeous case, with exceptional craftsmanship and really high end leather.

All the materials are top notch.

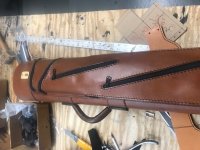
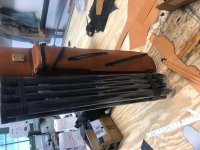
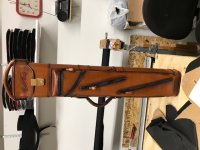
It is much lighter than it looks as well at just over 5 pounds empty for a 3x6.

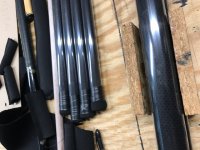
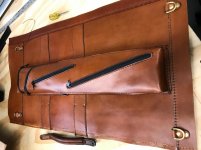
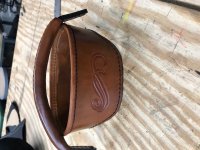
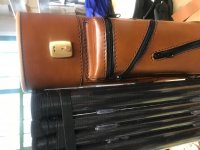
The build is extremely solid and durable, should last forever. The handles are really thick an luxurious.

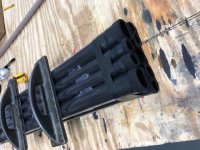
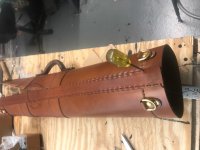
The single pocket design is unique and there is a ton of room. Pockets are not the easiest to use but not bad. There is a space for a break cue butt or extension on each side.

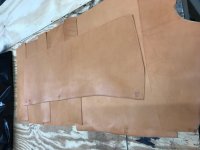
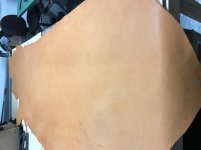
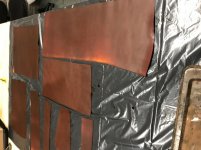
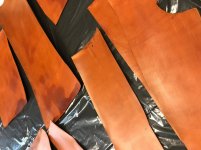
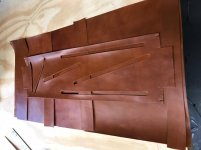
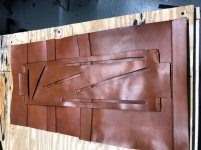
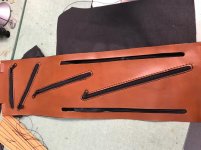
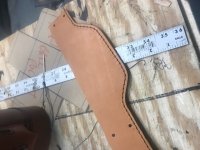
Really couldn't be happier. Easily the nicest and most upscale case I have owned despite being essentially his entry level case and plain. He sent me pics of the build along the well and I include them below it like a little mini journal.
 

Attachments

  • Completed 1.JPG
    Completed 1.JPG
    46.1 KB · Views: 335
  • Completed 2.JPG
    Completed 2.JPG
    48.2 KB · Views: 339
Last edited:
First Step Making the Tube Assembly

Jim started by assembling the tubes
 

Attachments

  • image2.JPG
    image2.JPG
    71.8 KB · Views: 321
  • image3.JPG
    image3.JPG
    114.9 KB · Views: 321
  • image1.JPG
    image1.JPG
    98.1 KB · Views: 315
Second Stage: Cutting and Dyeing the Leather

Jim started with an un-dyed side of a cow (RIP fair cow)
 

Attachments

  • Raw leather 1.jpg
    Raw leather 1.jpg
    192.1 KB · Views: 315
  • Raw leather 3.jpg
    Raw leather 3.jpg
    153.7 KB · Views: 307
  • Raw leather 2.jpg
    Raw leather 2.jpg
    186.2 KB · Views: 308
  • image.jpg
    image.jpg
    184.9 KB · Views: 301
Third Stage: Rough cut of the leather pieces

Jim then created a rough cut of the final pieces of the leather, sewed it together and added the zippers.
 

Attachments

  • rough cut.jpg
    rough cut.jpg
    188.3 KB · Views: 309
  • Sewn.jpg
    Sewn.jpg
    194.9 KB · Views: 311
  • Zippers.jpg
    Zippers.jpg
    194.5 KB · Views: 299
Fourth Stage; Assembling the Pieces and adding hardware

Jim then started to add the hardware, sew the leather into a sleeve to fit over the tubes.
 

Attachments

  • Clasps.jpg
    Clasps.jpg
    186.3 KB · Views: 301
  • front early.JPG
    front early.JPG
    91 KB · Views: 300
  • back early.JPG
    back early.JPG
    73.6 KB · Views: 303
Making the Top and Handles

Jim then made the tops and handles. Dont have pics of the handles being made
 

Attachments

  • strap I think.JPG
    strap I think.JPG
    89.2 KB · Views: 304
  • Top in progress.JPG
    Top in progress.JPG
    99.9 KB · Views: 304
Fifth Stage: Finishing the leather sleeve

Jim then finished the leather sleeve making the exterior of the case look almost complete.
 

Attachments

  • almost together.JPG
    almost together.JPG
    70.8 KB · Views: 310
  • almost together bottom.JPG
    almost together bottom.JPG
    76 KB · Views: 310
Sixth Stage; Assembling case

Jim then slid the sleeve over the tubs and secured them together with a wood plate at the bottom.
 

Attachments

  • Final assembly 1.jpg
    Final assembly 1.jpg
    192.4 KB · Views: 295
  • Final assembly 2.jpg
    Final assembly 2.jpg
    189.6 KB · Views: 298
Seventh stage: Adding highlights through additional dyeing

Once assembled, Jim added some darker highlights in dye around the edges
 

Attachments

  • Assembled and dyed 1.JPG
    Assembled and dyed 1.JPG
    117.3 KB · Views: 291
  • Assembled and dyed 2.JPG
    Assembled and dyed 2.JPG
    69 KB · Views: 299
  • Assembled and dyed 3.JPG
    Assembled and dyed 3.JPG
    84.5 KB · Views: 296
Final Stage Adding straps and other finishing touches

To finish off the case, he added the straps, the leather zipper pulls and other final details
 

Attachments

  • Done Minus Straps.JPG
    Done Minus Straps.JPG
    85.5 KB · Views: 294
Finsihed

And then the case was completed and spectacular. Hope you enjoyed seeing it put together as much as I did,
 

Attachments

  • Completed 1.JPG
    Completed 1.JPG
    46.1 KB · Views: 308
  • Completed 2.JPG
    Completed 2.JPG
    48.2 KB · Views: 300
Thanks for the photos of your case being made.

I'd like to have a case made in a theme but never
found any leather craftsmen that would tackle this.

Seeing the case come together was an added treat.


Matt B.
 
Thanks for the photos of your case being made.

I'd like to have a case made in a theme but never
found any leather craftsmen that would tackle this.

Seeing the case come together was an added treat.


Matt B.

I would suspect Jim could do almost anything you wanted if you asked. We have talked about a themed case that would be really complicated and he is fine doing it. There are videos on YouTube of some of the theme cases he has done, pretty impressive, Of course there is always Eastwood but that would thousands of dollars.
 
Back
Top