In the spirit of Monto P2 I decided to write a "HowTO" on preparing a photograph for internet/forum viewing using a great free software called PhotoFiltre.
How to prepare pictures for the web with PhotoFiltre
Download and install PhotoFiltre which is a free and easy to use photo editing software.
You can download the PhotoFiltre from here:
http://photofiltre.free.fr/download_en.htm
You can choose the English or French version. For other languages you can download the desired language file from the same page.
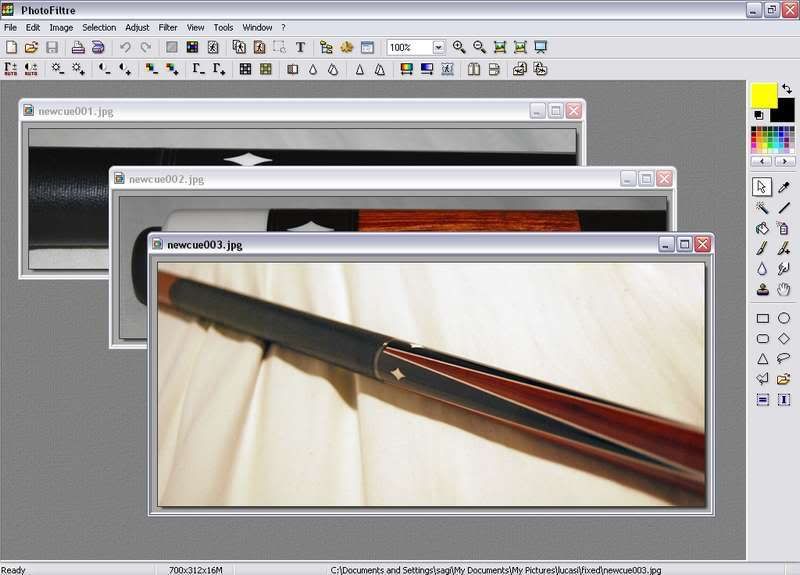
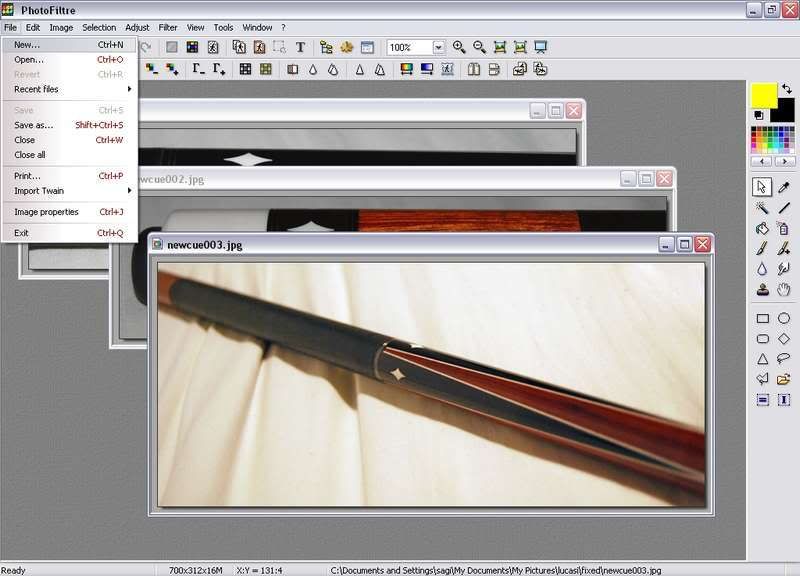
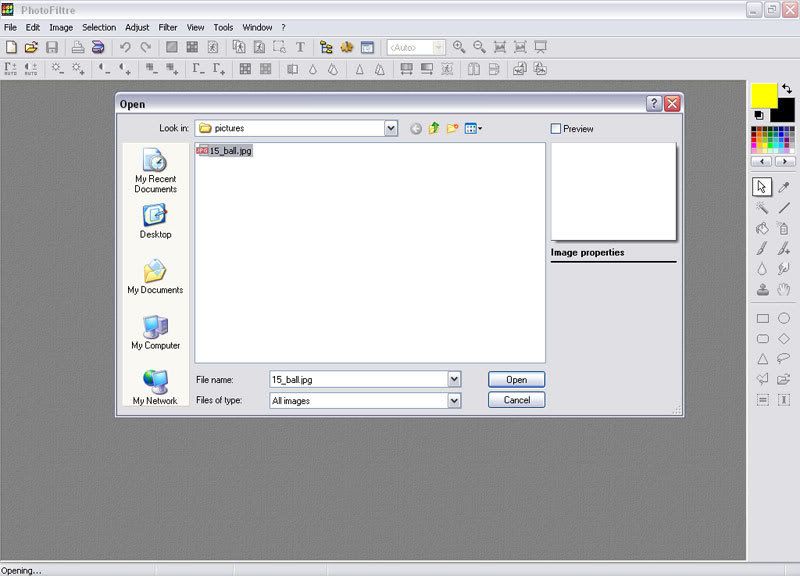
Start PhotoFiltre and import a picture. From the top menu bar click File --> Open
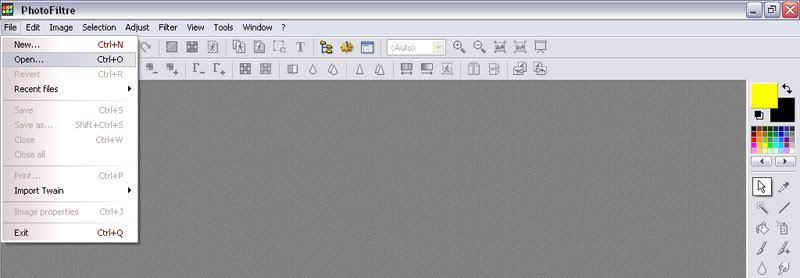
A window will pop up, browse to the desired picture file and click Open
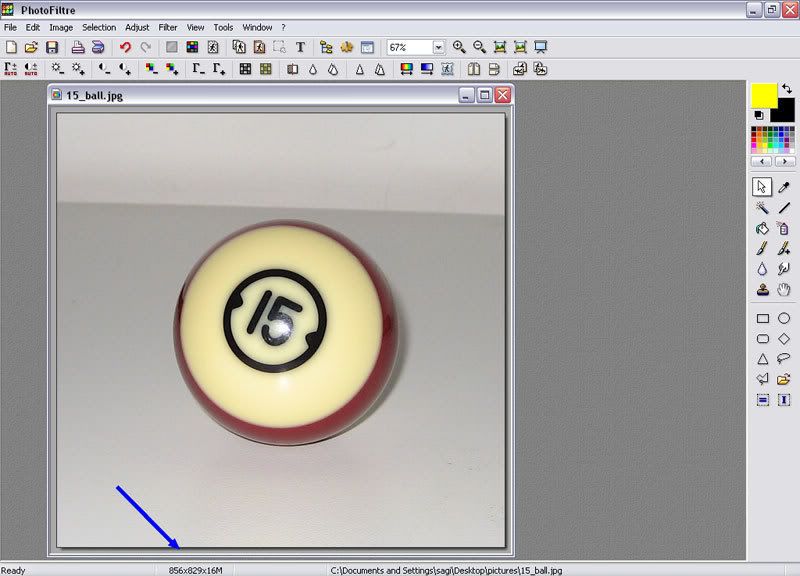
I want to post a picture of a pool ball and as you can see there are other elements in the picture that are not relevant, you also see at the bottom that the picture size is very big.

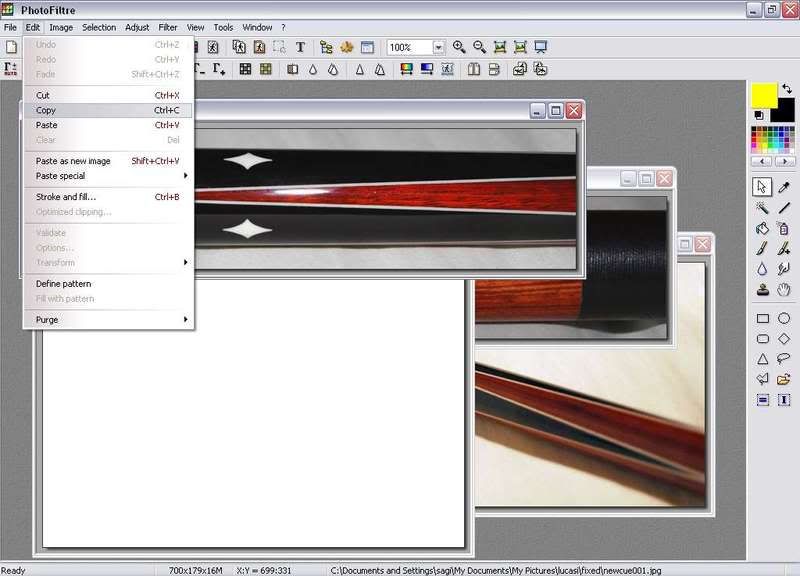
First thing to do is to crop the picture, at this step I will "cut" the 15-ball out of the picture, to do that I will use the mouse.
While holding the mouse's left button mark the desire area of the picture, you will see a dashed border that marks the desired area.

From the top menu bar click Image --> Crop or use the key combination of "Ctrl+shift+H".

After clicking the Crop option we will be left with only the desired area of the original picture.
If you want to change the marked area then you can just click anywhere outside the marked area and mark a new area.
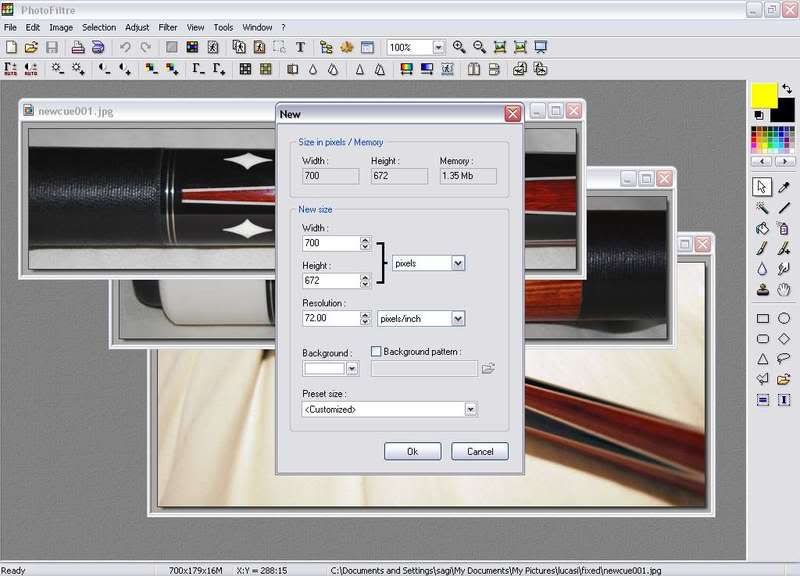
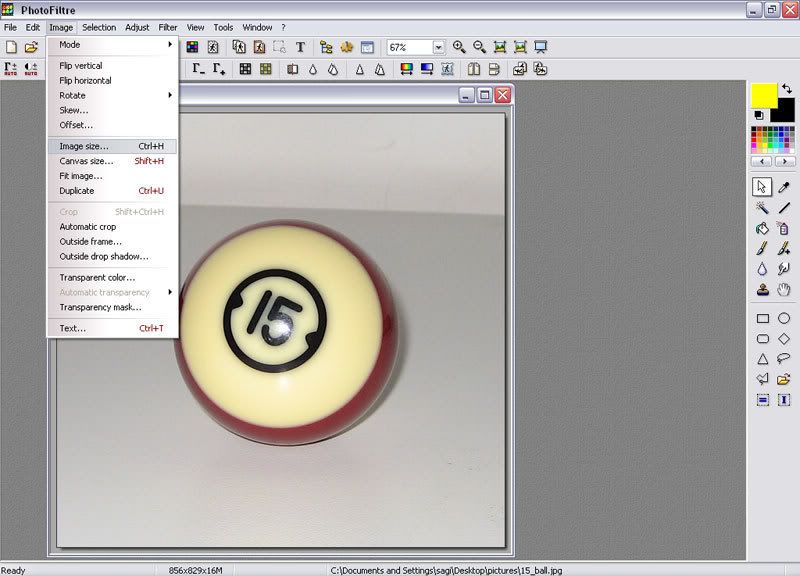
As you can see, the new picture is smaller but I want to make it even smaller. To reduce the picture size: From the top menu bar click Image --> Image size
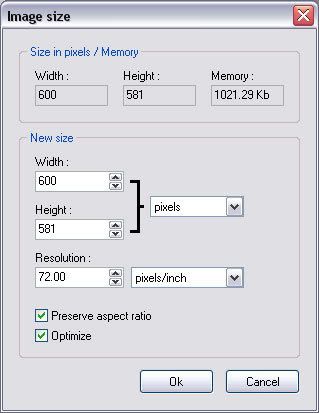
A window will pop up with the image size parameters
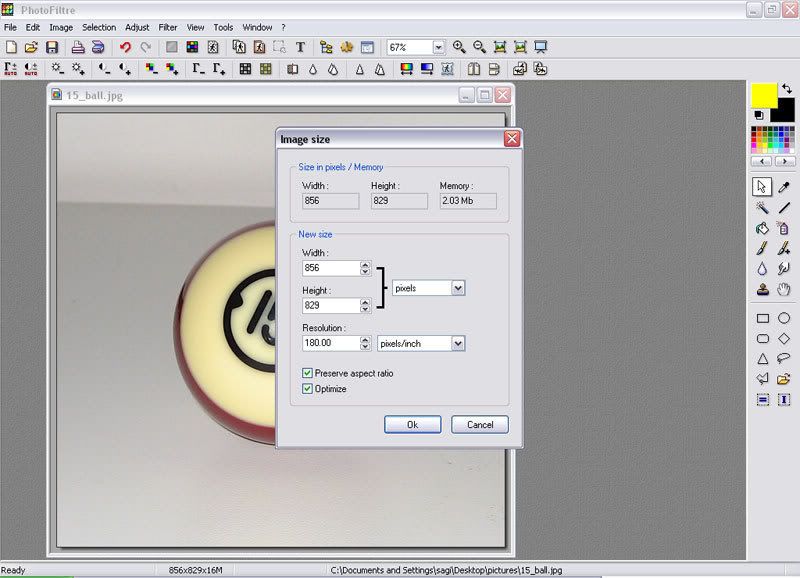
Make sure that the image size values are in pixels and that the resolution value is in pixel/inch. Also make sure both boxes of "Preserve aspect ratio" and "Optimize" are checked
Change the size to the desired values, note that since the "Preserve aspect ratio" is checked you can only change the width or height of the picture and the other parameter will change automatically.
Change the resolution value to: 72pixels/inch. There is no need for higher resolution for internet viewing of pictures.
Click OK.
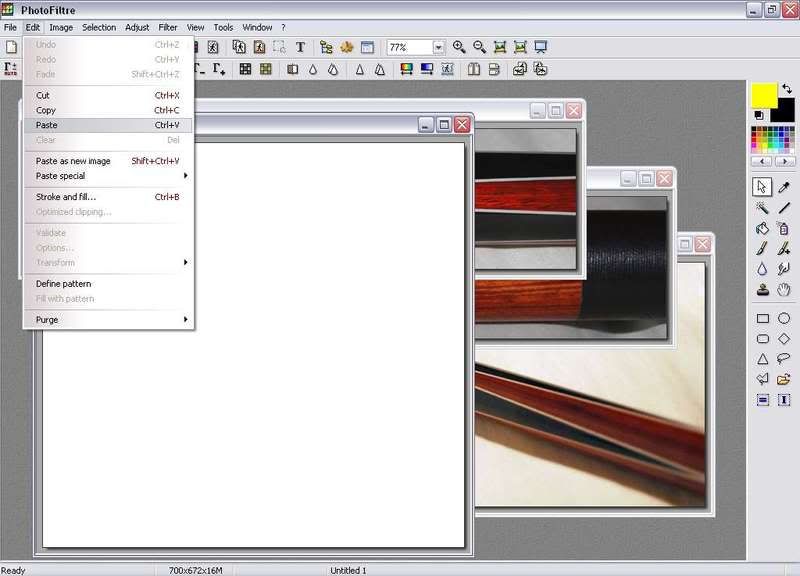
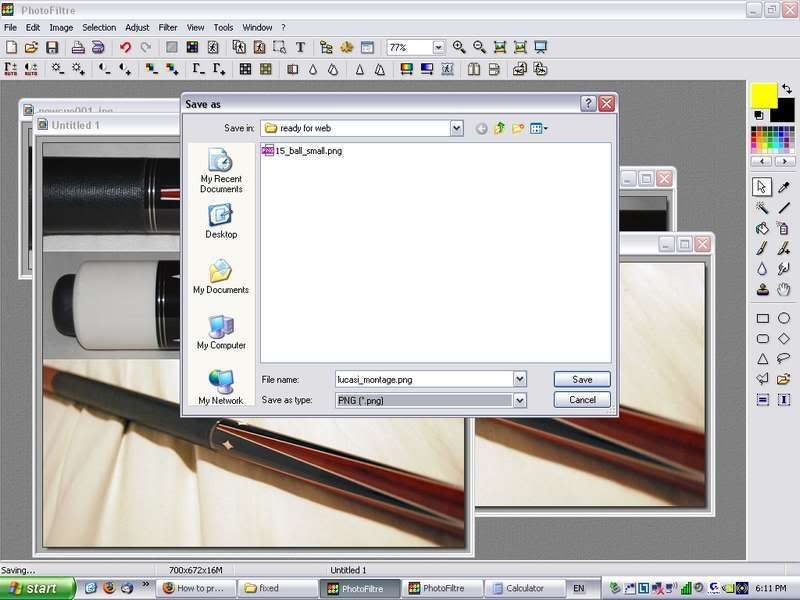
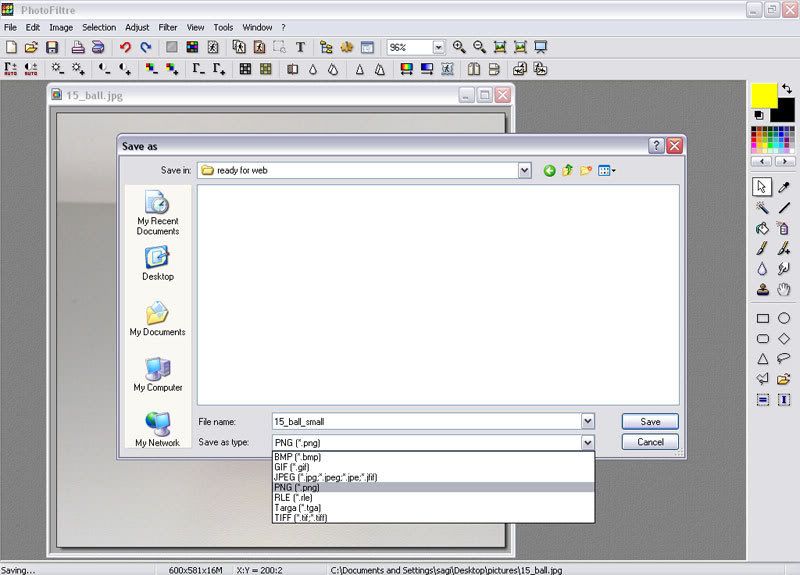
To save the new picture, from the top menu bar click File --> Save as
A window will open up.
* Browse to the location you want to save the picture at.
* Rename the picture
* Select PNG from the "Save as type"
* Click Save
An option window for PNG will pop up, just leave the default ?none? option and click OK.
If you choose the JPG file type then the option pop window will give you a slider to choose the compression level, set the slider to the value of 60.
This will create a lighter file the the PNG file but the quality will be a bit lower.
More advanced users can also modify the pictures with the different tools that the software offers.
That's it! The picture is ready for uploading to the web.
We had a 2816x2112 pixels 1.73Mb picture and ended up with a 600x581 pixels 597K picture (for JPG with the compression level of 60 the file size would be about 50K)
Enjoy!
How to prepare pictures for the web with PhotoFiltre
Download and install PhotoFiltre which is a free and easy to use photo editing software.
You can download the PhotoFiltre from here:
http://photofiltre.free.fr/download_en.htm
You can choose the English or French version. For other languages you can download the desired language file from the same page.
Start PhotoFiltre and import a picture. From the top menu bar click File --> Open
A window will pop up, browse to the desired picture file and click Open
I want to post a picture of a pool ball and as you can see there are other elements in the picture that are not relevant, you also see at the bottom that the picture size is very big.
First thing to do is to crop the picture, at this step I will "cut" the 15-ball out of the picture, to do that I will use the mouse.
While holding the mouse's left button mark the desire area of the picture, you will see a dashed border that marks the desired area.
From the top menu bar click Image --> Crop or use the key combination of "Ctrl+shift+H".
After clicking the Crop option we will be left with only the desired area of the original picture.
If you want to change the marked area then you can just click anywhere outside the marked area and mark a new area.
As you can see, the new picture is smaller but I want to make it even smaller. To reduce the picture size: From the top menu bar click Image --> Image size
A window will pop up with the image size parameters
Make sure that the image size values are in pixels and that the resolution value is in pixel/inch. Also make sure both boxes of "Preserve aspect ratio" and "Optimize" are checked
Change the size to the desired values, note that since the "Preserve aspect ratio" is checked you can only change the width or height of the picture and the other parameter will change automatically.
Change the resolution value to: 72pixels/inch. There is no need for higher resolution for internet viewing of pictures.
Click OK.
To save the new picture, from the top menu bar click File --> Save as
A window will open up.
* Browse to the location you want to save the picture at.
* Rename the picture
* Select PNG from the "Save as type"
* Click Save
An option window for PNG will pop up, just leave the default ?none? option and click OK.
If you choose the JPG file type then the option pop window will give you a slider to choose the compression level, set the slider to the value of 60.
This will create a lighter file the the PNG file but the quality will be a bit lower.
More advanced users can also modify the pictures with the different tools that the software offers.
That's it! The picture is ready for uploading to the web.
We had a 2816x2112 pixels 1.73Mb picture and ended up with a 600x581 pixels 597K picture (for JPG with the compression level of 60 the file size would be about 50K)
Enjoy!
Last edited: