You are using an out of date browser. It may not display this or other websites correctly.
You should upgrade or use an alternative browser.
You should upgrade or use an alternative browser.
Library resource for pool table repair
- Thread starter Ssonerai
- Start date
Thanks!
AFA the wood, generally something around 320 min, but occasionally 400 papers, or 320/500 Norton softtouch contour sponges if obvious scratches can be seen. There's a good chance that in hard, fine grained wood, you will still see 320 grit scratches if there is any stain/dye/of color/toner in the initial finish coats. After saturation with thin shellac, the grain raises a tiny bit. I sand all over with the Norton softtouch sponges, grits from 400/600 through 800/1000 as "necessary".
After that, generally 1200 or 1500 mesh between coats, though in rougher areas the 800/1000 sponges are ok, too.
I use Naptha ("white gas") for lube where necessary after finish coats are started. It won't cut shellac, and it evaporates fast. OTOH, is is highly flammable. Mineral spirits stays wet longer, but it will bleed into the wood and take longer to dry, if the wood is not completely sealed.
However, if i have to use significant abrasives after the saturation coat, i recognize that there is something else wrong with my application process. Too much too fast, usually. The old guys got the "under glass" finish with virtually no abrasives after the pumice filler coats on the bare wood. (I don't use the classic pumice method, except on some antiques. Full grain fill is generally not my preference on grainy wood, and fine pored woods like we are discussing don't need it)
It's done.
Or, depending on your view point, it never is.")
It will slightly darken and the mahogany colors start to blend more on it's own after some exposure to light.
I am using Tried & True oil over the shellac, but it only takes a few drops to do quite a large area. There should be none visible after an application and it should not exactly be "wet" even as it is applied. If there are scratches or anything like that from storage or assembly, i'll touch them up with some scuff sanding and a quick shellac polish.
Long term, I might wax it with Trewax (brand)
Wax helps avoid some scratching due to blows sliding on it.
Light buffed out wax does not interfere with shellac (for touch up) but i'm not of the opinion that it helps. So there is that consideration. OTOH, I clean off repair areas with naptha before commencing & continue to use if for the abrasive lube.
Oil in the wood (before shellac) will darken fast, and darken more over time.
Faintly, rarely, oil over top, adds some heat, moisture, alcohol protection with little darkening beyond the wood and all the finishes slightly changing with time.
I kind of prefer a "dull" "rubbed" effect finish. Sometimes rubbed out with 0000 steel wool, or 3M synthetic gray (non-abrasive) pads is were i end up for personal stuff. Oil over the shellac, &/or wax, buffed out with a soft cloth.
You did ask about historic finishes.
The modern response is to attempt to provide a bullet proof, never-care finish that will last "forever" (Usually about 20 years, but maybe 50 if no significant damage occurs) The production approach would be to clean, sand, tint/dye/tone wood & or finish; spray 2 - 3 coats of armor like finish. A cheap system might include consumer grade poly (which has actually very little polyurethane in it but is way tougher than shellac). A "higher end" finish might be conversion varnish. What might be considered the "ultimate" these days would be epoxy sealer and polyester or polyurethane high solids piano finish. The modern system attempts to provide a finish armor that will never crack, fade, or scratch. OTOH, when it does, it requires stripping or very intensive repair efforts, some of which are best not taken in a residential space.
The old methods accept that scratches, damage, "battle" scars are inevitable, and provide an easy means to repair, blend, or mitigate over a lifetime of light attention/maintenance. They are easy to strip and re-apply, and AFA shellac are mostly innocuous to humans, though some of the solvents like naptha and mineral spirits are not benign, and all including ethanol are quite flammable.
From about the 1600's through about 1929 these were pretty much the only finish methods available. Some of the old stuff still has original finish on it, and some still looks like it is shining under a coat of glass. With every other patina imaginable based on tastes/preferences.
No finish system (except possible consumer grade "Poly") is a slam-dunk. They all require education and practice/experience.
It is best to run some test boards/cards before choosing a finish system. Then run a full test board the whole way through right along with every step taken in the actual finish. Label it step by step, and keep it as part of the archive. this would include the solvents, retarders, any toners, etc, etc by percent for the finish batches as they are applied. I don't quite do that with familiar processes, but have them laying about or stored in the loft for systems when they were new to me.
BTW, i truly hate finishing and avoid it afa possible.
But it has been necessary as a woodworker to be somewhat conversant.
Nice when the project permits hiring that part out.
Good luck with your choices!
smt
What is the final sanding grit. 320?
AFA the wood, generally something around 320 min, but occasionally 400 papers, or 320/500 Norton softtouch contour sponges if obvious scratches can be seen. There's a good chance that in hard, fine grained wood, you will still see 320 grit scratches if there is any stain/dye/of color/toner in the initial finish coats. After saturation with thin shellac, the grain raises a tiny bit. I sand all over with the Norton softtouch sponges, grits from 400/600 through 800/1000 as "necessary".
After that, generally 1200 or 1500 mesh between coats, though in rougher areas the 800/1000 sponges are ok, too.
I use Naptha ("white gas") for lube where necessary after finish coats are started. It won't cut shellac, and it evaporates fast. OTOH, is is highly flammable. Mineral spirits stays wet longer, but it will bleed into the wood and take longer to dry, if the wood is not completely sealed.
However, if i have to use significant abrasives after the saturation coat, i recognize that there is something else wrong with my application process. Too much too fast, usually. The old guys got the "under glass" finish with virtually no abrasives after the pumice filler coats on the bare wood. (I don't use the classic pumice method, except on some antiques. Full grain fill is generally not my preference on grainy wood, and fine pored woods like we are discussing don't need it)
What will you use for a final finish?
It's done.
Or, depending on your view point, it never is.
It will slightly darken and the mahogany colors start to blend more on it's own after some exposure to light.
I am using Tried & True oil over the shellac, but it only takes a few drops to do quite a large area. There should be none visible after an application and it should not exactly be "wet" even as it is applied. If there are scratches or anything like that from storage or assembly, i'll touch them up with some scuff sanding and a quick shellac polish.
Long term, I might wax it with Trewax (brand)
Wax helps avoid some scratching due to blows sliding on it.
Light buffed out wax does not interfere with shellac (for touch up) but i'm not of the opinion that it helps. So there is that consideration. OTOH, I clean off repair areas with naptha before commencing & continue to use if for the abrasive lube.
Oil in the wood (before shellac) will darken fast, and darken more over time.
Faintly, rarely, oil over top, adds some heat, moisture, alcohol protection with little darkening beyond the wood and all the finishes slightly changing with time.
I kind of prefer a "dull" "rubbed" effect finish. Sometimes rubbed out with 0000 steel wool, or 3M synthetic gray (non-abrasive) pads is were i end up for personal stuff. Oil over the shellac, &/or wax, buffed out with a soft cloth.
You did ask about historic finishes.
The modern response is to attempt to provide a bullet proof, never-care finish that will last "forever" (Usually about 20 years, but maybe 50 if no significant damage occurs) The production approach would be to clean, sand, tint/dye/tone wood & or finish; spray 2 - 3 coats of armor like finish. A cheap system might include consumer grade poly (which has actually very little polyurethane in it but is way tougher than shellac). A "higher end" finish might be conversion varnish. What might be considered the "ultimate" these days would be epoxy sealer and polyester or polyurethane high solids piano finish. The modern system attempts to provide a finish armor that will never crack, fade, or scratch. OTOH, when it does, it requires stripping or very intensive repair efforts, some of which are best not taken in a residential space.
The old methods accept that scratches, damage, "battle" scars are inevitable, and provide an easy means to repair, blend, or mitigate over a lifetime of light attention/maintenance. They are easy to strip and re-apply, and AFA shellac are mostly innocuous to humans, though some of the solvents like naptha and mineral spirits are not benign, and all including ethanol are quite flammable.
From about the 1600's through about 1929 these were pretty much the only finish methods available. Some of the old stuff still has original finish on it, and some still looks like it is shining under a coat of glass. With every other patina imaginable based on tastes/preferences.
No finish system (except possible consumer grade "Poly") is a slam-dunk. They all require education and practice/experience.
It is best to run some test boards/cards before choosing a finish system. Then run a full test board the whole way through right along with every step taken in the actual finish. Label it step by step, and keep it as part of the archive. this would include the solvents, retarders, any toners, etc, etc by percent for the finish batches as they are applied. I don't quite do that with familiar processes, but have them laying about or stored in the loft for systems when they were new to me.
BTW, i truly hate finishing and avoid it afa possible.
But it has been necessary as a woodworker to be somewhat conversant.
Nice when the project permits hiring that part out.
Good luck with your choices!
smt
Last edited:
It's been a few years.
Exterior walls have been opened, rot repaired, extended for insulation and closed back up.
Another new 3 section slider window built and installed.
Hall wall was removed.
4, count 'em, four, steel I beams have been installed in the cellar to hold the house floors up. Including all the piers for columns and cut and poured pockets in the walls.
Hundreds of pounds of squirrel stashings, mostly pinecones have been removed from the ceiling; and wire and solid blocking installed to forestall the damn critters.
Electric has been improved and new wiring and lighting run.
HVAC changed.
Subfloor installed.
Compare with previous pix: the room has changed considerably.


At the risk of jinxing things, word is that a crew i used to work with in DC is coming up in a couple weeks to install flooring they are also bringing, with all the supplies. I've been hard at it the past few weeks to make the borders, using pool cue and table related type lumber.
This simple border will go around the dining room, and around the outside of a more complex border in the billiard room.
It consists of wenge, bloodwood, and holly. To make it simple to install with a whole crew working, i also made simple corner blocks for any joint, and at the corners. These have mitered wenge, and the center is satinwood.


Exterior walls have been opened, rot repaired, extended for insulation and closed back up.
Another new 3 section slider window built and installed.
Hall wall was removed.
4, count 'em, four, steel I beams have been installed in the cellar to hold the house floors up. Including all the piers for columns and cut and poured pockets in the walls.
Hundreds of pounds of squirrel stashings, mostly pinecones have been removed from the ceiling; and wire and solid blocking installed to forestall the damn critters.
Electric has been improved and new wiring and lighting run.
HVAC changed.
Subfloor installed.
Compare with previous pix: the room has changed considerably.
At the risk of jinxing things, word is that a crew i used to work with in DC is coming up in a couple weeks to install flooring they are also bringing, with all the supplies. I've been hard at it the past few weeks to make the borders, using pool cue and table related type lumber.
This simple border will go around the dining room, and around the outside of a more complex border in the billiard room.
It consists of wenge, bloodwood, and holly. To make it simple to install with a whole crew working, i also made simple corner blocks for any joint, and at the corners. These have mitered wenge, and the center is satinwood.
Last edited:
This is the larger, inner border for the pool room.
Ebony and Tasmanian myrtle. I have not fully settled on what color and arrangement of the beech and apple wood strips will separate the elements. Might need to see it all set in place after the field parquets go in.


Ebony and Tasmanian myrtle. I have not fully settled on what color and arrangement of the beech and apple wood strips will separate the elements. Might need to see it all set in place after the field parquets go in.
Hard Knock Cues
Well-known member
A true labor of love you have going on. That's going to be an amazing room when you're done. Looking forward to seeing it when finished.
Excellent work all around. The table, room once done will showcase your talents in the woodworking field and getting the complete job done correctly.
You are correct that the old wood finishes took some skill to apply to have them come out looking great. Shellac is still a very good finish, but it is hard to match the labor/time saving advantages the new water based Polys have to offer. Zar makes a great, self leveling water based Poly that dries and can be re coated with another layer of Poly in 30 minutes. Last time I bought some it was 80 a gallon but worth every penny spent. 45 minutes after final coat is applied you can handle the pieces coated with the Poly for assembly. After the product fully cures it is as tough as nails. I have used the water based Poly on exotic wood floors and have achieved great results every time. Clean up of tools is done with soap, water only and very quickly, which is another benefit of the Poly. Works great and saves lots of labor time when working with oily exotic woods such as Cumaru.
I use a small handheld wand type of sheetrock orbital sander that uses 9" discs with your choice of sand paper grit. This tool makes short work of all the sanding chores for the wood floor from start to finish. You could finish your whole floor, sanding and top coat with 2 coats in under 3 hours. I use a Yattich unit that works great and even has LED lights installed around the tools sanding head, so you can see what you are doing. Also has a vacuum hose that is attached to the sanding tool's head comes with the unit, that allows you to hook up a dustless vacuum system to make things even easier. Sure makes finishing wood floors a lot easier with far less time and effort to achieve great looking floors. The sanding tool works good when taping and finishing sheetrock.
Last edited:
That looks fantastic, that's going to be beautiful floor when done. Wanna do mine when you are done with yours??This is the larger, inner border for the pool room.
Ebony and Tasmanian myrtle. I have not fully settled on what color and arrangement of the beech and apple wood strips will separate the elements. Might need to see it all set in place after the field parquets go in.
View attachment 730005View attachment 730006View attachment 730007
Late on Friday a week ago, my buddies from Maryland came up and stayed over night.
Saturday we had a big breakfast and were hard at work by the ungodly early hour of 8:30 am or so.
In the past we spent years on jobs getting up at 4 or 4:30 am, driving to meet one or the other of us depending on the specific job location, and then organizing outside a building somewhere in DC ready to meet the bomb squad, sniffer dogs, & go through security to start before 6 AM. So in my dotage, this was a nice reprieve.

By 6:30 PM we had all had enough of working & my wife's cooking was causing us all to lose focus.
Field was installed in both rooms, and most of the borders. In the dining room, even most of the diagonal perimeter parquets were in place.
See notes further down about closing the basket weave left out in this picture.

I spent this week tidying up, filling in the basket weave, and catching loose details.

The "shiny" stuff is clear packing tape. This has been industry standard for custom parquets for a few decades already. It will shred off when sanding commences. I have a lot of other work to do in the room including mouldings, and it is a good idea to let a floor acclimate, though on paying jobs there is never time. This floor will probably not get sanded and finished until spring.
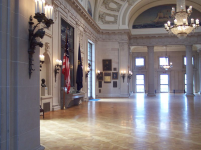
The parquets are traditional Fontainebleau pattern. Originally used when floor patterns had to be structural, it was designed for use in Versailles, and hence became popular worldwide because it offered strength in the physical fabrication, and metaphysical reference to imperial luxe. Neither red oak nor the pattern were high on my list. I had planned simple white oak1 ft squares laid in a checkerboard as i've made acres of for government buildings. But these were left over from the floor restoration/replacement at USNA Memorial Hall a few years ago. Since the company owner made them available to me, organized everyone, & offered to deliver and install them, it was a no brainer. The adventure alone was impossible to beat for me. The Memorial Hall installation included additional mitered pickets between each parquet.I chose not to use the dividing pickets because the size was already large for these rooms, I wanted to use full parquets in the field to simplify installation. The extra width with pickets would have screwed up the border placement.
Moving outward from the red oak field parquets, the woods are apple, beech on both sides of the basket weave, beech dentils in the basket weave which includes Tasmanian myrtle blocks & ebony squares. Then the outer border is wenge & sap stained holly with bloodwood diamonds. The small mitered feature & corner blocks used to avoid mitering during installation include satinwood squares. Red oak parquets on the diagonal complete the perimeter to the walls.

Saturday we had a big breakfast and were hard at work by the ungodly early hour of 8:30 am or so.
In the past we spent years on jobs getting up at 4 or 4:30 am, driving to meet one or the other of us depending on the specific job location, and then organizing outside a building somewhere in DC ready to meet the bomb squad, sniffer dogs, & go through security to start before 6 AM. So in my dotage, this was a nice reprieve.
By 6:30 PM we had all had enough of working & my wife's cooking was causing us all to lose focus.
Field was installed in both rooms, and most of the borders. In the dining room, even most of the diagonal perimeter parquets were in place.
See notes further down about closing the basket weave left out in this picture.
I spent this week tidying up, filling in the basket weave, and catching loose details.
The "shiny" stuff is clear packing tape. This has been industry standard for custom parquets for a few decades already. It will shred off when sanding commences. I have a lot of other work to do in the room including mouldings, and it is a good idea to let a floor acclimate, though on paying jobs there is never time. This floor will probably not get sanded and finished until spring.
The parquets are traditional Fontainebleau pattern. Originally used when floor patterns had to be structural, it was designed for use in Versailles, and hence became popular worldwide because it offered strength in the physical fabrication, and metaphysical reference to imperial luxe. Neither red oak nor the pattern were high on my list. I had planned simple white oak1 ft squares laid in a checkerboard as i've made acres of for government buildings. But these were left over from the floor restoration/replacement at USNA Memorial Hall a few years ago. Since the company owner made them available to me, organized everyone, & offered to deliver and install them, it was a no brainer. The adventure alone was impossible to beat for me. The Memorial Hall installation included additional mitered pickets between each parquet.I chose not to use the dividing pickets because the size was already large for these rooms, I wanted to use full parquets in the field to simplify installation. The extra width with pickets would have screwed up the border placement.
Moving outward from the red oak field parquets, the woods are apple, beech on both sides of the basket weave, beech dentils in the basket weave which includes Tasmanian myrtle blocks & ebony squares. Then the outer border is wenge & sap stained holly with bloodwood diamonds. The small mitered feature & corner blocks used to avoid mitering during installation include satinwood squares. Red oak parquets on the diagonal complete the perimeter to the walls.
Attachments
Last edited:
Beautiful flooring!!!!Late on Friday a week ago, my buddies from Maryland came up and stayed over night.
Saturday we had a big breakfast and were hard at work by the ungodly early hour of 8:30 am or so.
In the past we spent years on jobs getting up at 4 or 4:30 am, driving to meet one or the other of us depending on the specific job location, and then organizing outside a building somewhere in DC ready to meet the bomb squad, sniffer dogs, & go through security to start before 6 AM. So in my dotage, this was a nice reprieve.
By 6:30 PM we had all had enough of working & my wife's cooking was causing us all to lose focus.
Field was installed in both rooms, and most of the borders. In the dining room, even most of the diagonal perimeter parquets were in place.
See notes further down about closing the basket weave left out in this picture.
I spent this week tidying up, filling in the basket weave, and catching loose details.
View attachment 733202
The "shiny" stuff is clear packing tape. This has been industry standard for custom parquets for a few decades already. It will shred off when sanding commences. I have a lot of other work to do in the room including mouldings, and it is a good idea to let a floor acclimate, though on paying jobs there is never time. This floor will probably not get sanded and finished until spring.
The parquets are traditional Fontainebleau pattern. Originally used when floor patterns had to be structural, it was designed for use in Versailles, and hence became popular worldwide because it offered strength in the physical fabrication, and metaphysical reference to imperial luxe. Neither red oak nor the pattern were high on my list. I had planned simple white oak1 ft squares laid in a checkerboard as i've made acres of for government buildings. But these were left over from the floor restoration/replacement at USNA Memorial Hall a few years ago. Since the company owner made them available to me, organized everyone, & offered to deliver and install them, it was a no brainer. The adventure alone was impossible to beat for me. The Memorial Hall installation included additional mitered pickets between each parquet.I chose not to use the dividing pickets because the size was already large for these rooms, I wanted to use full parquets in the field to simplify installation. The extra width with pickets would have screwed up the border placement.
Moving outward from the red oak field parquets, the woods are apple, beech on both sides of the basket weave, beech dentils in the basket weave which includes Tasmanian myrtle blocks & ebony squares. Then the outer border is wenge & sap stained holly with bloodwood diamonds. The small mitered feature & corner blocks used to avoid mitering during installation include satinwood squares. Red oak parquets on the diagonal complete the perimeter to the walls.
View attachment 733203