Bubsburg: Your little back chuck was not made to close tolerance, or designed to be expected to be. So we need to tweak it in. You have put some effort into making your adaptor, is the thread for your chuck cut concentric to the solid unthreaded area between the two sets of threads? In other words did you true up that solid smooth area? I hope you say yes here. Both sets of threads, and the outer smooth surface should all be concentric and true if you made them off of one solid mounting of your stock in the lathe and did not disturb that mounting until you were finished with the adapter and were ready to part it off. So here is how we can make it accurate:
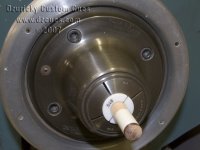
The next step is to install a pin in the little back chuck while it is mounted onto the rear of your lathe. Use a pin of an OD that matches what you would customarily use that chuck to grasp. Maybe use 35mm or 1 3/8 in? Then make collets for that size OD for all your cue work.Remember: a chuck, even a run true chuck can only be expected to be accurate for one size opening! Measure the runout and put some masking tape on the jaws and write the runout on the tape. Now, remove the back chuck, adapter, and dowel pin all as a unit from the rear of the lathe spindle, and mount up the trio in your main chuck jaws. Chuck up on the smooth area of the adapter with your main chuck on the lathe. Yes, you have a chuck hanging out of a chuck. Indicate that in, or use a four jaw chuck, better yet, and indicate in. Indicate off of the adapter surface not the pin or the chuck body.
You should have your back chuck adapter running concentric to the main spindle bore now. Is the pin still running way out? Is the pin off in the same areas? Do the inaccuracies match the numbers on the masking tape.? If you did a good job making your adapter, they will be close in errors. That is the best to hope for. To fix it, just regrip the pin very deep in your back chuck while it is still held firmly in your main chuck. Use a grinder mounted on your tool post and very carefully grind the mostly exposed inner grip area of the lathe jaws of that little chuck. You may also use a sharp boring bar at the slowest feed rate. Just be sure to have that 35 mm dowel chucked in the rear of the jaws of your little chuck to preload the jaws and keep them at the opening you chose, be it 35 mm or whatever! After cutting or grinding, they will be trued up to the adapter you made for mounting that chuck. Then mill , or cut away the nib that was not cut in the trueing process and you have a set of jaws in your back chuck that run true to your adapter, at that specific jaw opening.
Now a worst case scenario: Your numbers of runout are not even close from the back of the spindle. I suggest you either shim a three jaw, or if you listened and used a four jaw, then tweak the four jaw to get the pin numbers to match what you first read on the rear chuck test. Now the little back chuck is running close to what it did when mounted on the rear of the main spindle. Then cut and true up your little jaw faces as we did above. You have a tru running chuck, at THAT specific jaw opening, for the rear of your spindle.
Seems like it is too hard? Too much bother? Hey I am sure many savvy mechanics out there have seen the holes in my explanations. I only assumed the errors are in one plane! Are the jaws off in another plane are the main jaw chuck errors accounted for? If you used a longer pin to test would the readings not change in a linear relationship to the first set of readings? We will not even go there unless you have a few months to get this right. I am sure others here have felt that pain though, and some have most likely conquered it!
