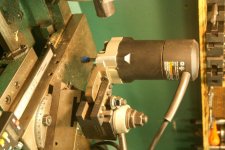
The following links are what I did for my Cuesmith but it is far from simple. Alignment is so critical and such a pain in the ars, I went with a dedicted setup.
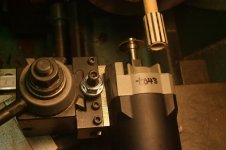
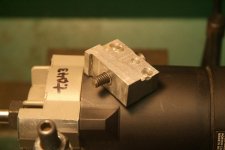
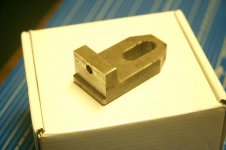
I bought a second carriage from Chris that is 1" lower since a PC router will not fit normally. I bought a dedicated router for that carriage. I bought a dedicated mandrel and cutoff saw blade from KJ. I then designed a fabricated a V block for mounting.
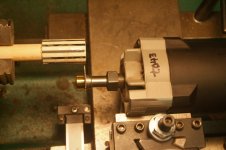
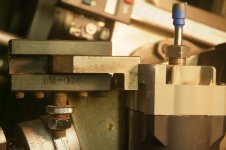
Every PC router has machined corners that nest in the V block. I have dowels in the bottom of the block that pick up on the cross slide T slots. I could take this on and off but why bother. I already had the rear bed extension coupler, again thanks to Chris, so I made a little bracket to attach an indicator for travel.
Now my setup is nothing. Chuck up the material. slide on the carriage. Slide on the indicator. Cut my rings. Set it back on my shelf when done.
http://www.timocues.com/Cues/Stitch ring 1.JPG
http://www.timocues.com/Cues/Stitch ring 2.JPG
http://www.timocues.com/Cues/Stitch ring 3.JPG
See that, no burn. Alignment is dead nuts on the billet. Now I'm cutting all my own rings, not just stitch rings. I got a lot of positive input from the major contriutors to this website in order to think this through and do it right the first time. Lets keep that going.
 :wink: