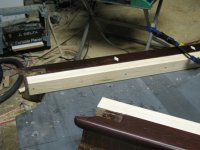
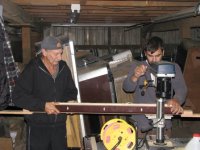
Replacing sub-rails on a Brunswick 1905 Saratoga Potbelly 9ft Pool table.

realkingcobra

Well-known member
Silver Member
Since I was on my way from Montana through Washington State to Portland, OR...I stopped by my old barn/shop to help Rich Gieler out with an old antique pool table he had. Someone in the past had cut off the sub-rails on this table and replace them with new ones, only problem was that at one end of the sub-rail it was a 1/16" of an inch below the finish of the top rail, but at the other end of the rail it was 1/4" below the finish, as it was the sub-rails were only 1 1/2" thick, should have been 1 11/16" thick.

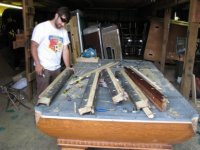
Well, to make a long story short, told Rich to bring the frame of the table and the slates to my old shop, set it up there, leave the rails laying on it and I'd take a look at it when I stopped by on my way to OR.

Well, looking at it wasn't going to do it any good, so I decided to tear apart the rails and remove the sub-rails and rebuild them right, so I got Zach on the project right away.

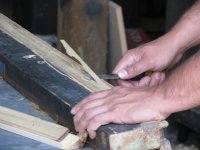
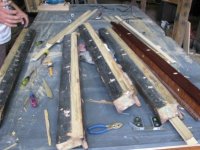
In these pictures he's removing the final bit of wood around the nails that were used to mount the old sub-rails.
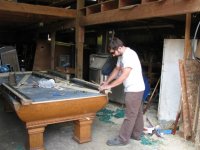
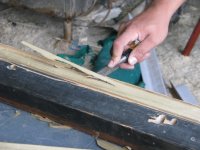
Removing the sub-rails.JPG

Removing the sub-rails (2).JPG

Removing the sub-rails (3).JPG

Removing the sub-rails (4).jpg

Removing the sub-rails (5).JPG
 
Gleno, I'm glad to see things are going your way, you sure deserve it for as much work as you have done, you have paid your dues. And I'm proud to have had you work on my boxes and to be your friend. Let me know when your comming to town again I'll fire up some steaks etc.

best

Eric
 
Well, got some sleep, time to get back to work. Because the left over wood from the sub-rails is so rotted out, it has to be removed and cleaned up flat, putting the rails in a jig and passing them through the planer is the best way to make sure the face of the rails is flat and cleaned up, as you can see in the pictures.

Planning the sub-rails.JPG

Planning the sub-rails (2).JPG

Planning the sub-rails (3).JPG

Planning the sub-rails (4).JPG
 
Bolted the rails back on and checked for a square fit to the slates.

Checking for a square fit.JPG

Checking for a square fit (2).jpg

OK, every-thing's square, time to start making the new replacement cushion blocks.
 
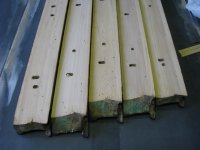
In this pictures you can see Zach making the cushion blocks, made with Poplar wood. All the cushion blocks are drilled ever 6" and doweled together for a much straighter alignment, and stronger hold with wood glue.

Making cushion blocks.JPG

Making cushion blocks (2).JPG

Making cushion blocks (3).JPG

Making cushion blocks (4).JPG

Making cushion blocks (5).JPG

Both pieces of 3/4" Poplar are glued together, doweled, and clamped until dried.
 
These are some random pictures of fitting the sub-rails to the rail caps so they can be doweled as well. Drilling out the rail bolt holes so they all line up with the slate bolt holes as well. Also pictures of lining out the actual pocket openings so that all the pockets are exactly the same in the openings...I can't stand pockets that are of all different sizes;) Because it's an antique I'm setting the corner pockets at 5" and sides at 5 3/8"ths, keep in mind this table will play off the cushions as well as any GC, but it's not a table to turn into a players table with tight pockets as it's not that kind of a buyer that buys this kind of table.

Drilling rail bolt holes, and fitting the cushion blocks.JPG

Drilling rail bolt holes, and fitting the cushion blocks (2).JPG

Drilling rail bolt holes, and fitting the cushion blocks (3).JPG

Drilling rail bolt holes, and fitting the cushion blocks (4).JPG

Drilling rail bolt holes, and fitting the cushion blocks (5).JPG
 
Well, in the next few pictures you can see I've mounted the sub-rails, then with my tooling cut the bevel for the cushions, and the relief angle under the cushions. I also added a cloth relief under the rails as well, antique tables didn't come with that, so the cloth could change the nose height of the rails, but not on these rails.

If Brunswick made their cushions right, the sample cushion Rich is holding up to the rail would have been a perfect fit...but oh well, they'll have to have the top lip sanded before the new ones can be mounted anyway, so they'll fit perfect once that's done.

This is as far as I'm taking these rails as Rich is going to finish up installing the cushions and facings, then he's going to recover the table in Simonis cloth and deliver it to his customer who's waiting on the table right now.

You can see how straight cut the rails are by looking past the side pockets, straight as an arrow;)

010.JPG

011.JPG

017.JPG

013.JPG

Don't think for one second that the pocket didn't line up perfect in this picture on both sides;)...it's just set there for looks to show off the pocket cut and angles:D

016.JPG
 
At this point, I loaded up my tools and left the rest for Rich Geiler to finish up. He had no chance at fixing these rails up to get this table ready to deliver, but being friends for so long, $60 in Poplar wood, some Kentucky fried chicken and a few jumbo jacks from Jack-n-the-box:D and we called it even:D

Glen
 

Attachments

  • 020.JPG
    020.JPG
    67.9 KB · Views: 1,787
  • 022.JPG
    022.JPG
    87.1 KB · Views: 1,823
Gleno, I'm glad to see things are going your way, you sure deserve it for as much work as you have done, you have paid your dues. And I'm proud to have had you work on my boxes and to be your friend. Let me know when your comming to town again I'll fire up some steaks etc.

best

Eric

I should be back in Vegas again in about 2 weeks, going to still be there?
 
Back
Top