I will try to make this a short story.
I purchased an A.E. Schmidt table for a pretty good price and then saved until I could afford Simonis cloth. Fridge went without food for a couple weeks") .
.
I truly wanted to have the table set up proffesionally but there was no room in the budget and that is when all the research came into play.
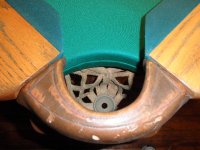
Let me just say, there is no way I could have done this set up without all the information that you mechanics have put on here. Make no mistake, I will not be trying to take any work from any of you. After having done this I have the utmost respect for the talent you posess.
I used a couple of ideas from a couple different peeps including RKC. My only regret was not having a machinist level to use. I asked everyone I thought that might have one and everyone they thought might have one. I borrowed a couple of Stabil spirit levels that are made in Germany and just took my time.
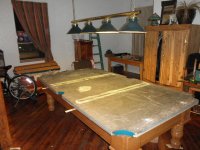
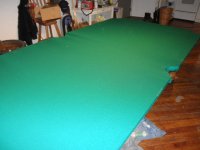
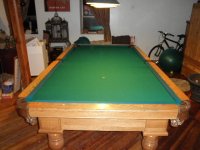
Here are a couple of pics of the finished product and am pretty pleased with how the table plays.
Once again, thank you to all that share their hard earned secrets!
I purchased an A.E. Schmidt table for a pretty good price and then saved until I could afford Simonis cloth. Fridge went without food for a couple weeks
. I truly wanted to have the table set up proffesionally but there was no room in the budget and that is when all the research came into play.
Let me just say, there is no way I could have done this set up without all the information that you mechanics have put on here. Make no mistake, I will not be trying to take any work from any of you. After having done this I have the utmost respect for the talent you posess.
I used a couple of ideas from a couple different peeps including RKC. My only regret was not having a machinist level to use. I asked everyone I thought that might have one and everyone they thought might have one. I borrowed a couple of Stabil spirit levels that are made in Germany and just took my time.
Here are a couple of pics of the finished product and am pretty pleased with how the table plays.
Once again, thank you to all that share their hard earned secrets!

 )
)")