Resin Impregnation

How about curly mango ?
What size would they be best in getting stabilized.

Joey I cut mango a little oversized and it stabilizes a lot like koa. Not much twisting and warping but I still go about 1.75 square to be safe. It will add significant weight....

Might as well respond to the OP here as well, so I don't have to retype this again.

1). Make sure your wood is dry under 10% moisture level.
2). Cut it oversized to be safe, in case it does warp or twist when it cures.
3). The 2 companies I use, are WSSI (Wood Stabilizing Specialist Inc) in Ionia Iowa and K/G (Knife and Gun Supply) in Arizona. (Google for their sites)
4). Depending on species etc, I decide where to send what.... For Redwood Burl I would send to K/G in Arizona.
5). I do not work for, or receive any compensation from either of those companies, so my endorsement of their services is based on my being happy with their stabilizing services. I don't even get a discount......:eek:
6). If I was just starting out I would send a call sized blank (2 x 2 x 6) of some burl or whatever to some pro companies out there and see which you like the best. I think River Ridge used to offer to a single block for free if you pay postage, I dunno if that is still is an option or not.

7) Try them out, test the results --->
a) Did the dye or stabiliant go all the way thru? Using the dye is an easy way to tell...
b) What did the block weigh before versus after.... (if you use the same piece of wood ( say an 18" piece cut into 3 smaller pieces) for all the companies it will tell you how much stabilant was retained at the cellular level ....meaning which process was more successful at getting the wood cells to fill with the stabilant
c). Does the block float or sink in water? Can you soak for 24 hrs with no effect. Water makes wood move.... so does it swell? When it dries, does it shrink?
d). Could you dent the wood with a thumbnail before you sent it in, and can you dent it now that it has been processed? In other words, is it now hard? think spalted / box elder etc....
e). Is the dye color bright and brilliant or is it kind of faded and sort of pastel looking...? On the inside and the outside of the piece ? What look do you prefer?
f) I have seen some guys send blocks thru the dishwasher, and leave them outside during the winter time exposed to snow and rain, etc. TEST TEST TEST....


Then decide for yourself what you like best.... For the DIY folks who still want to create a chamber, I have the PDF instructions for valve configurations for the paint pot. Probably still on the net as well. I can look for it if anyone is interested. It allowed vac and pressure using the same lid with 2 diff valves. Could be reused for a fabbed tank for longer pieces...

There is also a bunch of new stabilant on the market as well... Some of them are as runny as water, and harden well if it can be pushed through the wood.

FYI....There is a company out there that is saying they can successfully stabilize cocobolo which normally wont stabilize well because of the oil content...
 
Wow Eric, the name calling seems to come easy for you.... First it was "Hack" for one of your fellow cuemakers a week or so ago, and now you're calling me a "SHILL".

I'm not going to play these ridiculous games of political correctness & diplomacy. We're all big boys here. I posted a couple of "Wiki" & "Urban Dictionary" definitions. Think about that. Now go back & read my post carefully. Not once did I call you a name or single you out. Fact is I didn't have to. The definitions did it, and by all accounts were spot on. Not only did you relate it to yourself, but so did others relate it to you. How hard is it to describe an elephant before everybody knows exactly what you're talking about? And why should said elephant be offended when somebody points out that he has a trunk & big ears? It is what it is.
 
Joey I cut mango a little oversized and it stabilizes a lot like koa. Not much twisting and warping but I still go about 1.75 square to be safe. It will add significant weight....

Might as well respond to the OP here as well, so I don't have to retype this again.

1). Make sure your wood is dry under 10% moisture level.
2). Cut it oversized to be safe, in case it does warp or twist when it cures.
3). The 2 companies I use, are WSSI (Wood Stabilizing Specialist Inc) in Ionia Iowa and K/G (Knife and Gun Supply) in Arizona. (Google for their sites)
4). Depending on species etc, I decide where to send what.... For Redwood Burl I would send to K/G in Arizona.
5). I do not work for, or receive any compensation from either of those companies, so my endorsement of their services is based on my being happy with their stabilizing services. I don't even get a discount......:eek:
6). If I was just starting out I would send a call sized blank (2 x 2 x 6) of some burl or whatever to some pro companies out there and see which you like the best. I think River Ridge used to offer to a single block for free if you pay postage, I dunno if that is still is an option or not.

7) Try them out, test the results --->
a) Did the dye or stabiliant go all the way thru? Using the dye is an easy way to tell...
b) What did the block weigh before versus after.... (if you use the same piece of wood ( say an 18" piece cut into 3 smaller pieces) for all the companies it will tell you how much stabilant was retained at the cellular level ....meaning which process was more successful at getting the wood cells to fill with the stabilant
c). Does the block float or sink in water? Can you soak for 24 hrs with no effect. Water makes wood move.... so does it swell? When it dries, does it shrink?
d). Could you dent the wood with a thumbnail before you sent it in, and can you dent it now that it has been processed? In other words, is it now hard? think spalted / box elder etc....
e). Is the dye color bright and brilliant or is it kind of faded and sort of pastel looking...? On the inside and the outside of the piece ? What look do you prefer?
f) I have seen some guys send blocks thru the dishwasher, and leave them outside during the winter time exposed to snow and rain, etc. TEST TEST TEST....


Then decide for yourself what you like best.... For the DIY folks who still want to create a chamber, I have the PDF instructions for valve configurations for the paint pot. Probably still on the net as well. I can look for it if anyone is interested. It allowed vac and pressure using the same lid with 2 diff valves. Could be reused for a fabbed tank for longer pieces...

There is also a bunch of new stabilant on the market as well... Some of them are as runny as water, and harden well if it can be pushed through the wood.

FYI....There is a company out there that is saying they can successfully stabilize cocobolo which normally wont stabilize well because of the oil content...

Great info, thanks.
 
Kelly
No more details than that? Curly is one of the easiest. Where did you send it? What was the moisture content? How over sized were they ?

I will say this..... I have NEVER had curly maple (spalted or not) come back cracked. So not sure what happened.

There is ALWAYS a risk, but one of the places I use is regularly doing SNAKEWOOD in 2 x 2 squares, and have been successfully doing it for YEARS.

Also it should be mentioned that even tho you get it done by a pro, it's still not a 100% guarantee that it wont move....but IMO its the best method available.

River ridge. They were 1 3/8 squares. I do not specifically know what the MC was, but it definitely did not cut/feel like it was wet. Dry dust.
 
I'm not going to play these ridiculous games of political correctness & diplomacy. We're all big boys here. I posted a couple of "Wiki" & "Urban Dictionary" definitions. Think about that. Now go back & read my post carefully. Not once did I call you a name or single you out. Fact is I didn't have to. The definitions did it, and by all accounts were spot on. Not only did you relate it to yourself, but so did others relate it to you. How hard is it to describe an elephant before everybody knows exactly what you're talking about? And why should said elephant be offended when somebody points out that he has a trunk & big ears? It is what it is.

Eric,
Not sure what all this jibber / jabber is about.....This is very simple.... provide the proof or some sort of documentation that I have received some sort of compensation from either company I have endorsed, and I will FULLY admit that I am .... like you said a "SHILL"....

If you do not have that...(which I know you don't, because it doesn't exist).... then STFU.
 
River ridge. They were 1 3/8 squares. I do not specifically know what the MC was, but it definitely did not cut/feel like it was wet. Dry dust.

Kelley,
If you have some other material that want to have done let me know. I will include a couple sticks of yours in my next order, if you want to send it to me. I havent used River Ridge so I'm not sure as to their methods. Postage would be on you tho...... send me a PM if you want.
 
Dave I have done A TON of stabilizing myself.... that's why I send to the PROS. Isnt it coincidental that he used the 4K PSI number? hahaahaha....The math is off Dave, the tank is pressurized up to 4K.... redwood is VERY difficult to do right, and even some of the PRO outfits have trouble with it as well. Yep real easy to tell if it went thru...show the pics of the dye going all the way thru....and the weight. Dave when do we get to do the water test? There was other woods he listed in his tip too.

To the OP.... send me a PM and I can tell you where to send it to have it done the professionally, with penetration going all the way thru.

I'm not an expert, but have done a lot of research trying to do my own stabilizing, and have had great success with it for cuemaking, with some oop's along the way. My math maybe off, but one must realize that with 4000 PSI, that means there is a GREAT amount of pressure on the wood being done, as it's 4000 per square inch times the total amount of square inches and CAN lead to cellular collapse. Pressure treated lumber at 2x?? sizes by 12 foot long are done with vacuum and only about 100-150 psi and it goes straight thru....google it and it's described very well. No 4000 psi for 2" x ?? lumber, so why use it for 1.5" x1.5"x 16-18"?
When I asked you if you had any experience with this you didn't answer, so I assumed you didn't....my bad, sorry. But you do come off as a self righteous know it all about this subject and did ridicule other posters in the other thread with 'your way is the only way' and basically you gave some not so correct info to others that may be interested in doing this themselves. You were the first one to use the 4000 PSI figure that was quoted from your suppliers website. Just because you failed at DIY doesn't mean others will. First thing to remember is that we build cues...not knife handle or gun handles and there is a big difference as to what is required for these 2 different purposes. We need to 'stabilize' a piece of soft, maybe unworkable, wood that we still want the properties of wood to an extent. If we wanted a block of plastic that has the grainwork look of wood, we can buy plastic blocks that look that way, but they won't transmit the same 'feel' in a cue. You need a piece of wood that is been made into a plastic block so that it is impervious to water and chemicals and just applying a finish would not work as it would wear out to fast. You want the look of wood and the 'feel factor' isn't a factor. We drill out 3/4" of that impregnated wood in the middle and basically have a skin of it on the outside of a core, so most of what we would pay for from a 'pro shop' is wasted on the floor of our shop. You take a block and cut it into slabs and need the consistant color through out the block as you're trying to use all of it. If there are defects caused by the process of OVER pressured, you can cut around them, we can't. If we need a colored dye, we need the color basically at the final size. As to penetration, the stuff I am using has a UV component in it and when done, if you cut the dowel in half, and use a UV light, it shows that the POLYMER has gone all the way thru. A dye like you're talking about is a pigment with a larger size particle than the fluid it is suspended in and the colored dye pigments may need the pressure to get them deeper but that doesn't mean the polymer didn't get in all the way before hand. Coloring doesn't equal stabilizing....you seem to be equating the dye/coloring to mean stabilized....not so. Stabilizing is only making it so that it isn't soft and weak....and actually most stabilizing companies even advertise that it won't make the wood waterproof, so the 'water test isn't important.....don't plan on floating any of my cues anytime soon anyways.
If I do a redwood burl blank, it is already turned to 1-3/8" and is about 14"-16" long, goes in at about 5 -6 oz. and comes out around 12-13 oz. after the bake cycle, so for you to say it is hard to do as a DIY, your flat out wrong, sorry. I pay $100 for the fluid and get about 13 - 15 pieces, depending on type of wood and size, out of it that are great, so do the math verses a pro shop where most of your money endeds up in the dust collector.....
JMHO,
Happy Easter,
Dave
 

FYI....There is a company out there that is saying they can successfully stabilize cocobolo which normally wont stabilize well because of the oil content...
Why would someone want to stabilize cocobolo ???? It's hard, pretty stabile, if seasoned....doesn't crack when you look at it like snakewood... must be missing something on that one.:confused::confused:
Dave
 
Stabilizing wood

Here is a post I sent in last year regarding this subject:

Iv'e been doing stabilizing for several years now and have made most of the mistakes (I hope). This is kind of what I have learned:
You need a good vacuum pump. DO NOT buy one from Harbor Freight. They are cheap and I mean cheap. Buy a GAST.
Make your tanks from 1/4" acrylic tubing 5 or 6" in diameter. The lengths are optional. I have 16" 18" and 20" tanks. Cut a top and bottom out of 1" thick acrylic. Cut a ledge on the top and bottom pieces so they fit snugly part way into the tank. Cut an O-ring groove for the top and tap 1/4-20 NPT for a fitting.
CA glue the bottom into the tank.
Make up a 6 ft hose to attach the pump to the tank. Somewhere on the line place a valve so you can open the line to atmospheric pressure. I use quick release fittings on both ends of the hose.
Make a piece of chicken wire for the bottom of the tank to keep the wood off the bottom. Make a piece for the top to keep the wood from floating to the top. Make a basket for small pieces.
I use Cactus Juice. Place wood in cylinder and hold in place with the wire.
Add juice to cover the wood plus 2". Open your atmospheric (air) valve and
start your pump. Slowly close the valve to reduce foaming. Vacuum should reach 30". Keep it at 30" until all bubbles disappear then hold vacuum another 15 minutes. Open the valve and notice the drop in level of the resin.
Spalts will take more resin that say bamboo. Let sit in the resin 15 minutes then remove and let air dry overnight. Oh, I always put a cup hook in one end of the wood for easy removal from the tank and hanging. There is no need for air pressure to be introduced into the tank for further resin penetration. 14 psi of atmosphere is enough for 1 1/2" pieces. The resin will
displace the vacuum and the atmospheric pressure will reinforce it.
Wrap in aluminum foil and bake at 200 degrees for 90 minutes. DO NOT use
your house oven as it makes a stink of toxic vapors. I bought an induction
oven from WallMart on line that holds an 18" piece for $100.
Remember, you are stabilizing CUE wood not knife handles. Your goal is to beautify and make a unusable piece of wood usable--not to create a block of plastic that looks somewhat like wood.
As a side note: Years ago I worked as a diesel mechanic for Cummins in LA.
They also had a branch in Las Vegas. On the shop wall in LAS VEGAS was a sign that said "WE DON'T CARE HOW THEY DO IT IN LA". With that said good luck with your project.
 
I'm not an expert, but have done a lot of research trying to do my own stabilizing, and have had great success with it for cuemaking, with some oop's along the way. My math maybe off, but one must realize that with 4000 PSI, that means there is a GREAT amount of pressure on the wood being done, as it's 4000 per square inch times the total amount of square inches and CAN lead to cellular collapse. Pressure treated lumber at 2x?? sizes by 12 foot long are done with vacuum and only about 100-150 psi and it goes straight thru....google it and it's described very well. No 4000 psi for 2" x ?? lumber, so why use it for 1.5" x1.5"x 16-18"?
When I asked you if you had any experience with this you didn't answer, so I assumed you didn't....my bad, sorry. But you do come off as a self righteous know it all about this subject and did ridicule other posters in the other thread with 'your way is the only way' and basically you gave some not so correct info to others that may be interested in doing this themselves. You were the first one to use the 4000 PSI figure that was quoted from your suppliers website. Just because you failed at DIY doesn't mean others will. First thing to remember is that we build cues...not knife handle or gun handles and there is a big difference as to what is required for these 2 different purposes. We need to 'stabilize' a piece of soft, maybe unworkable, wood that we still want the properties of wood to an extent. If we wanted a block of plastic that has the grainwork look of wood, we can buy plastic blocks that look that way, but they won't transmit the same 'feel' in a cue. You need a piece of wood that is been made into a plastic block so that it is impervious to water and chemicals and just applying a finish would not work as it would wear out to fast. You want the look of wood and the 'feel factor' isn't a factor. We drill out 3/4" of that impregnated wood in the middle and basically have a skin of it on the outside of a core, so most of what we would pay for from a 'pro shop' is wasted on the floor of our shop. You take a block and cut it into slabs and need the consistant color through out the block as you're trying to use all of it. If there are defects caused by the process of OVER pressured, you can cut around them, we can't. If we need a colored dye, we need the color basically at the final size. As to penetration, the stuff I am using has a UV component in it and when done, if you cut the dowel in half, and use a UV light, it shows that the POLYMER has gone all the way thru. A dye like you're talking about is a pigment with a larger size particle than the fluid it is suspended in and the colored dye pigments may need the pressure to get them deeper but that doesn't mean the polymer didn't get in all the way before hand. Coloring doesn't equal stabilizing....you seem to be equating the dye/coloring to mean stabilized....not so. Stabilizing is only making it so that it isn't soft and weak....and actually most stabilizing companies even advertise that it won't make the wood waterproof, so the 'water test isn't important.....don't plan on floating any of my cues anytime soon anyways.
If I do a redwood burl blank, it is already turned to 1-3/8" and is about 14"-16" long, goes in at about 5 -6 oz. and comes out around 12-13 oz. after the bake cycle, so for you to say it is hard to do as a DIY, your flat out wrong, sorry. I pay $100 for the fluid and get about 13 - 15 pieces, depending on type of wood and size, out of it that are great, so do the math verses a pro shop where most of your money endeds up in the dust collector.....
JMHO,
Happy Easter,
Dave

Good Post, Dave! I have a question. Why not core your wood before impregnating? Perhaps use an undersized gun drill, and then, after it is stabilized, go thru with your regular sized gun drill to tru things up? That would mean you were stabilizing from the inside, and the outside, and would save some of the waste (though you've already shown it is economical to DIY).
 
Here is a post I sent in last year regarding this subject:

Iv'e been doing stabilizing for several years now and have made most of the mistakes (I hope). This is kind of what I have learned:
You need a good vacuum pump. DO NOT buy one from Harbor Freight. They are cheap and I mean cheap. Buy a GAST.
Make your tanks from 1/4" acrylic tubing 5 or 6" in diameter. The lengths are optional. I have 16" 18" and 20" tanks. Cut a top and bottom out of 1" thick acrylic. Cut a ledge on the top and bottom pieces so they fit snugly part way into the tank. Cut an O-ring groove for the top and tap 1/4-20 NPT for a fitting.
CA glue the bottom into the tank.
Make up a 6 ft hose to attach the pump to the tank. Somewhere on the line place a valve so you can open the line to atmospheric pressure. I use quick release fittings on both ends of the hose.
Make a piece of chicken wire for the bottom of the tank to keep the wood off the bottom. Make a piece for the top to keep the wood from floating to the top. Make a basket for small pieces.
I use Cactus Juice. Place wood in cylinder and hold in place with the wire.
Add juice to cover the wood plus 2". Open your atmospheric (air) valve and
start your pump. Slowly close the valve to reduce foaming. Vacuum should reach 30". Keep it at 30" until all bubbles disappear then hold vacuum another 15 minutes. Open the valve and notice the drop in level of the resin.
Spalts will take more resin that say bamboo. Let sit in the resin 15 minutes then remove and let air dry overnight. Oh, I always put a cup hook in one end of the wood for easy removal from the tank and hanging. There is no need for air pressure to be introduced into the tank for further resin penetration. 14 psi of atmosphere is enough for 1 1/2" pieces. The resin will
displace the vacuum and the atmospheric pressure will reinforce it.
Wrap in aluminum foil and bake at 200 degrees for 90 minutes. DO NOT use
your house oven as it makes a stink of toxic vapors. I bought an induction
oven from WallMart on line that holds an 18" piece for $100.
Remember, you are stabilizing CUE wood not knife handles. Your goal is to beautify and make a unusable piece of wood usable--not to create a block of plastic that looks somewhat like wood.
As a side note: Years ago I worked as a diesel mechanic for Cummins in LA.
They also had a branch in Las Vegas. On the shop wall in LAS VEGAS was a sign that said "WE DON'T CARE HOW THEY DO IT IN LA". With that said good luck with your project.

Thanks for the detailed info. I will follow your advice, even without the 4000 psi.
 
Kelley,
If you have some other material that want to have done let me know. I will include a couple sticks of yours in my next order, if you want to send it to me. I havent used River Ridge so I'm not sure as to their methods. Postage would be on you tho...... send me a PM if you want.

I think i will pass. Thanks though. If I had more material to process i would prefer to establish a relationship with a secret source myself.

I am building the cue for a local player and friend after considerable requesting. I suspect I will be hard pressed to build another cue from something so ill suited any time soon.
 
Kudos to the guys who posted some information and details on their home brew setup. I completely agree regarding the idea of achieving the goal using the minimum amount of transformation. I have read before comments on getting full penetration. Who wouldn't core a stabilized piece? Full penetration sounds good but is stabilization overkill best for cue purposes? If you rely on full penetration and don't core it i think a buzz from a bolt might be more likely if it is true stabilized material doesn't glue all that well.
 
I prefer to impregnate burl wood with a big fat core....at that point the only real benefit i see to a stabilant "on the .050 to .125ish wall thickness" is surface hardness and not having to seal the cue 50 times. Its also alot easier to penetrate a tube with a thin wall than a giant chunk in which 85% turns into saw dust anyway.
 
I prefer to impregnate burl wood with a big fat core....at that point the only real benefit i see to a stabilant "on the .050 to .125ish wall thickness" is surface hardness and not having to seal the cue 50 times. Its also alot easier to penetrate a tube with a thin wall than a giant chunk in which 85% turns into saw dust anyway.

Damn straight.
 
Damn straight.

Exactly... haha ... to answer the question about coring first then stabilizing, the wood can and will move during the process and needs to be re-turned to get a truly round piece again. If there is a hole drilled all the way thru the center before hand, it will not be in the center afterwards. Tried that once...
Dave
 
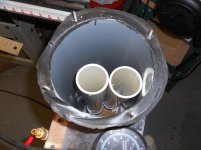
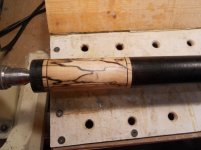
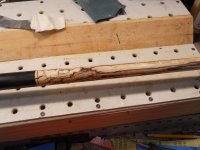
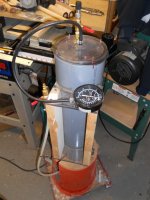
This is a cue I am building for my son using stabilized spalted maple with ebony handle. The maple is from my own tree. It has a full length maple core. Also a couple pictures of my tank setup. It's not top of the line but it works. I use individual holding tanks inside the main tank. This way I can do redwood and maple at the same time without having the redwood stain the maple as redwood will leach the red color. I do not use pressure, just vacuum.
Dave

006.jpg

007.jpg

008.jpg

009.jpg
 
Exactly... haha ... to answer the question about coring first then stabilizing, the wood can and will move during the process and needs to be re-turned to get a truly round piece again. If there is a hole drilled all the way thru the center before hand, it will not be in the center afterwards. Tried that once...
Dave

If you cored first with an undersized drill, say .625, then stabilized, then final cored with a .750 gun drill, would that be advantageous, or just extra, unnecessary effort? TA
 
If you cored first with an undersized drill, say .625, then stabilized, then final cored with a .750 gun drill, would that be advantageous, or just extra, unnecessary effort? TA
One thing to consider about this process is that if there is a big hole in the middle, stabilizer can get in a bit faster in the vacuum tank, BUT it will drain out while you are waiting for the heat to reach the proper temp. With a solid dowel, it sinks to the bottom, which shows it has absorbed as much as it can take statically. Then it gets wrapped in heavy tinfoil tightly and placed in the oven. I do this right away, I do not let it dry, or drip dry. This helps to retain what is in the wood long enough for the curing process to happen. As the temp raises on the outside it solidifies the resin on the outer layers which now holds the deeper held resin in and allows it to solidify while it is still held in the wood. Now if the center is hollow, not only will it will be off center by the time you finish, but it also allows the fluid to drain out into the hole you drilled, and then puddle and then solidify on the bottom during the curing process. In the end, you have a hole filled with cured resin, and a skin which is not stabilized properly. In my opinion, the only time to core with stabilized wood is after the process is completed. Anything different will cause headaches.
Again, I'm not an expert, just going by my own experiences.
Your mileage may vary....;)
dave
 
Back
Top