You are using an out of date browser. It may not display this or other websites correctly.
You should upgrade or use an alternative browser.
You should upgrade or use an alternative browser.
Gold Crown Barn Find
- Thread starter rexus31
- Start date

Extremely Excited
Hello everybody , I happen to run across this post . Super Excited to say the least . My name is Frank , and I to believe I bought the same exact Gold Crown as you did. And my plan is to restore it to it's original state , as close as possible. I have about 6 months to complete my restoration , as we will be moving into our new house. I private messaged you earlier today , Hoping I can pick your brain on any information I may not have. I played pool all my life , played a lot of the best players in the world. Played on some of the best equipment ever built . I was searching for a Gold Crown 1-2 , low and behold 1 showed up. So thankful . And I'm so thankful to run across this post. Hopefully I can gain enough information to be able to restore my table back to it's , I will just say " Championship form " Thank you again for allowing us to walk this journey with you. Sincerely Frank
Hello everybody , I happen to run across this post . Super Excited to say the least . My name is Frank , and I to believe I bought the same exact Gold Crown as you did. And my plan is to restore it to it's original state , as close as possible. I have about 6 months to complete my restoration , as we will be moving into our new house. I private messaged you earlier today , Hoping I can pick your brain on any information I may not have. I played pool all my life , played a lot of the best players in the world. Played on some of the best equipment ever built . I was searching for a Gold Crown 1-2 , low and behold 1 showed up. So thankful . And I'm so thankful to run across this post. Hopefully I can gain enough information to be able to restore my table back to it's , I will just say " Championship form " Thank you again for allowing us to walk this journey with you. Sincerely Frank
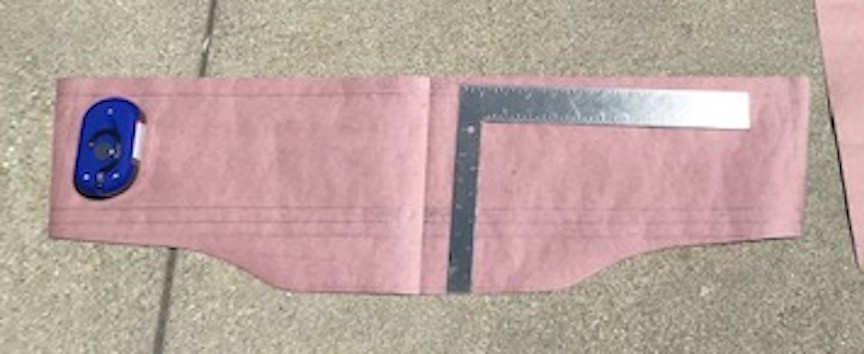
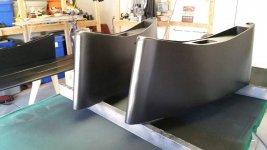
Did the second round of body work to the aprons yesterday and shot some primer early this morning. There are still a couple small imperfections that need to be filled and primed. I should be laying some color this weekend. I'm looking forward to seeing these in blue.

Looking nice there Scott. Can't wait to see what the Blue color looks like on there.
Thanks! Me too!!!
Quite a day today/ I did the final bodywork and final prime on the aprons. I'll do the final sanding tomorrow then lay the first coat of blue Sunday.
I also picked up the pocket castings and feet from the powder coater today and I couldn't be happier.
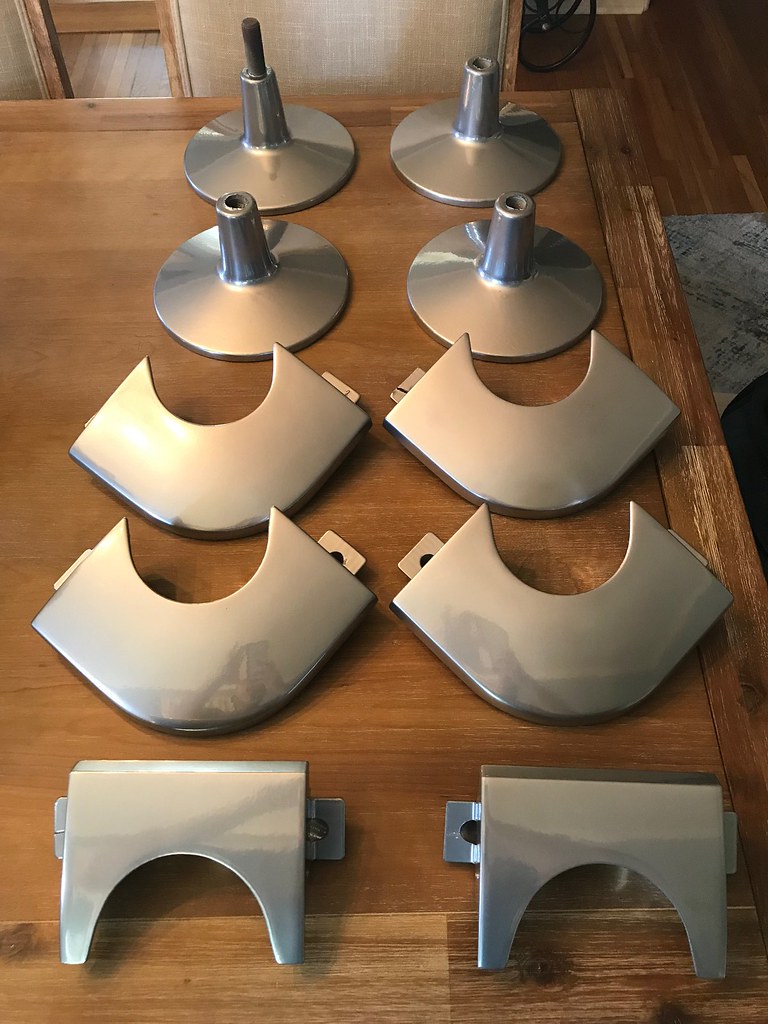
The pedestals finally have their feet back.

I also repainted the nameplate. It's not a dead on match, but it is good enough for me. First I sprayed Rustoleum Vintage Bush:

Then dusted some Krylon ColorMaster Rose Gold Metallic over the top:

The end result came out pretty good.

Tomorrow I'll paint the crown in the logo gold like it was when new.
Sunday or Monday I should have the base assembled and the frame mounted.
I also picked up the pocket castings and feet from the powder coater today and I couldn't be happier.
The pedestals finally have their feet back.
I also repainted the nameplate. It's not a dead on match, but it is good enough for me. First I sprayed Rustoleum Vintage Bush:
Then dusted some Krylon ColorMaster Rose Gold Metallic over the top:
The end result came out pretty good.
Tomorrow I'll paint the crown in the logo gold like it was when new.
Sunday or Monday I should have the base assembled and the frame mounted.
Last edited:
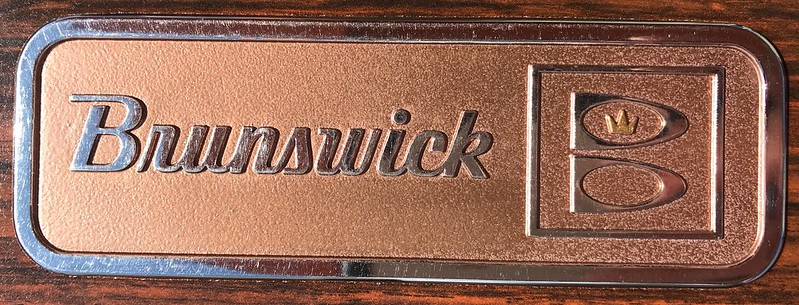
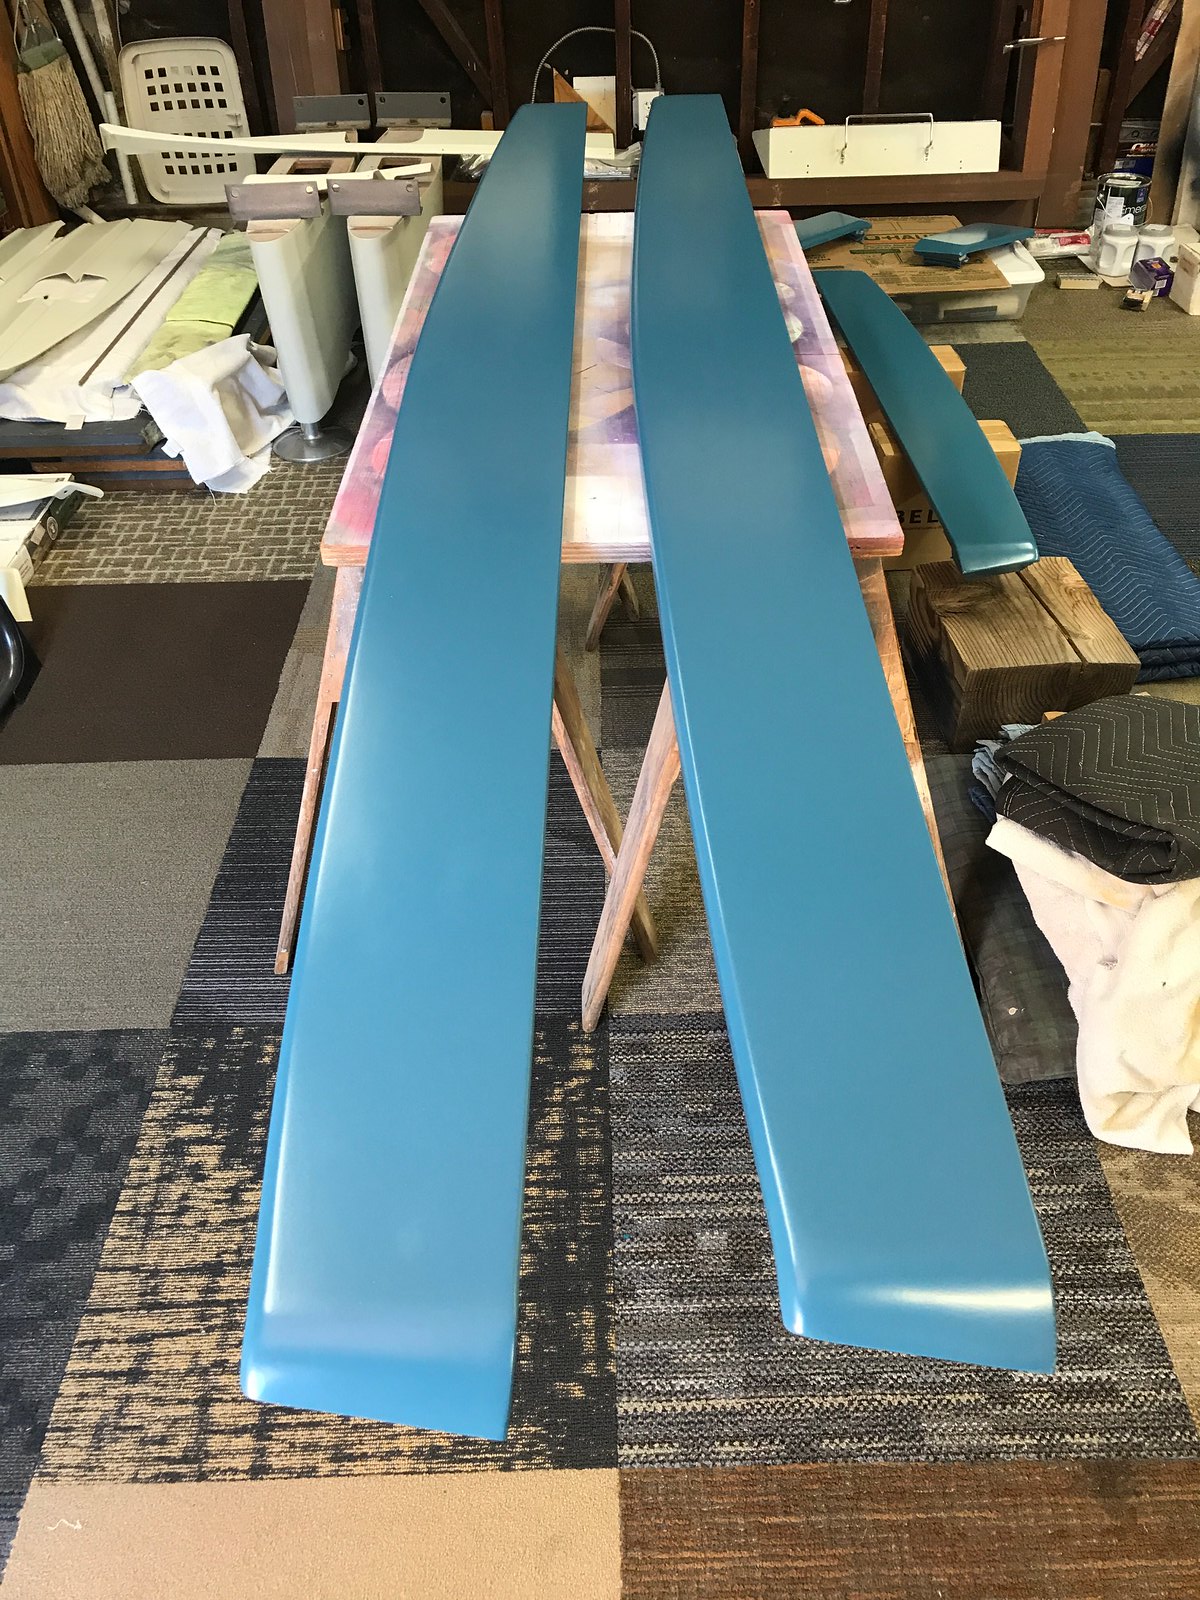

That blue is looking really good on there Scott. How many coats will you be applying? Your Brunswick badge has that final touch applied. Keep up the good work.
Thanks, man! I'm real happy to have some blue applied. I will do two, maybe 3 coats of the blue.
Looking pretty good so far, but 220 is to course between coats, 400 works better.
Looking pretty good so far, but 220 is to course between coats, 400 works better.
Thanks, man! I'll give it a go with 400. Any input on the fish eyes? Should scuffing it up fix the problem?
Thanks, man! I'll give it a go with 400. Any input on the fish eyes? Should scuffing it up fix the problem?
Yes it will, but 220 removes to much paint, and leaves scratches in the remaining paint finish. The fish eyes are caused by the imperfections in the surface your painting. By sanding between coats you're effectively flattening the surface of the painted finish, level to the lowest fish eye, then building the flatness back up with each additional coat of paint. When I paint my GCs, I use 4 coats of semi gloss black, no fish eyes.
Yes it will, but 220 removes to much paint, and leaves scratches in the remaining paint finish. The fish eyes are caused by the imperfections in the surface your painting. By sanding between coats you're effectively flattening the surface of the painted finish, level to the lowest fish eye, then building the flatness back up with each additional coat of paint. When I paint my GCs, I use 4 coats of semi gloss black, no fish eyes.
And I get rid of the seam between the outside pedestal caps and the leg panels.
Thanks, Glen!
I like the seam!


And I get rid of the seam between the outside pedestal caps and the leg panels.
How far off the ground should the playing surface be?
Keep these photos/posts coming Scott, I find them quite inspiring. I'm also keeping the seams on my GC1.
Thanks, man! You know I’ll keep the pics coming!