Hi all,
So I purchased this Brunswick a while back.
It was just slightly different to the other Gold Crowns that I've worked on.
So after some research and some help from you guys I've come to the conclusion that it's a Canadian table so I'm calling it a
Canadian Gold Crown 1.
To view the original post view the link below.

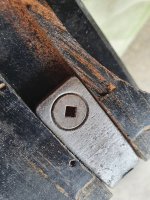
Robertson screws are used throughout the original table build.

I start by removing the old paint using a heat gun and scraper

This table is around 60 years old so it's to be expected to have some repairs.
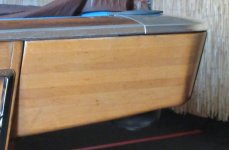
The ply wood was coming off on the leg pedestals so I bladed it off using a ruler and a sharp blade going beyond damage.

Some of the timber supports were missing so I glued in some new ones.


As you can see you can get a real tidy repair.


As far as paint goes I keep it real simple.
I use a quality water based primer. 1 coat.

Epoxy enamel 3 - 4 coats using a microfiber roller.
This is a single pack epoxy so there's no added hardener just stir and apply.

So I purchased this Brunswick a while back.
It was just slightly different to the other Gold Crowns that I've worked on.
So after some research and some help from you guys I've come to the conclusion that it's a Canadian table so I'm calling it a
Canadian Gold Crown 1.
To view the original post view the link below.
Hi all,
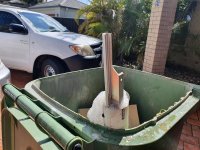
I purchased this Brunswick pool table yesterday, pulled it apart and got it it unloaded at my place.
Please find the pic's below at it's pick up location.
It has never been in a pool hall and was owned by an old guy for over 40 years.
It was then purchased as you see it from another guy who owned it for over 10 years until I picked it up yesterday.
This this is a bit of a find.
However I don't believe it's a Gold Crown as some things don't add up.
I have searched high and low for info on this table however I've come up blank, so I would appreciate your thoughts as to what model of...
- gazman100
- Replies: 18
- Forum: Pool Tables and Accessories Reviews

Robertson screws are used throughout the original table build.
I start by removing the old paint using a heat gun and scraper
This table is around 60 years old so it's to be expected to have some repairs.
The ply wood was coming off on the leg pedestals so I bladed it off using a ruler and a sharp blade going beyond damage.
Some of the timber supports were missing so I glued in some new ones.
As you can see you can get a real tidy repair.
As far as paint goes I keep it real simple.
I use a quality water based primer. 1 coat.
Epoxy enamel 3 - 4 coats using a microfiber roller.
This is a single pack epoxy so there's no added hardener just stir and apply.