100 year old Brunswick Old Mission B restoration

pupdog1243

AzB Silver Member
Silver Member
Guys,
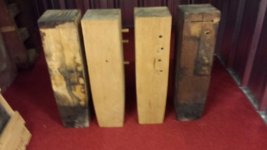
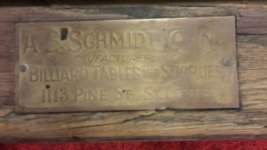
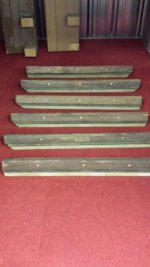
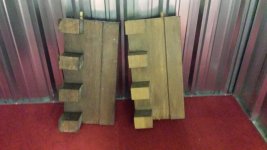
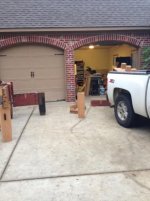
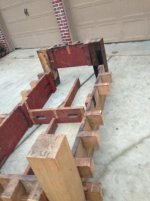
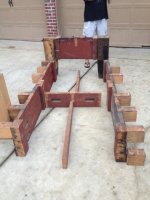
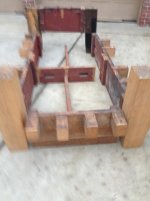
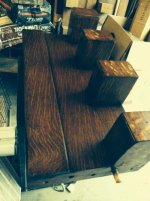
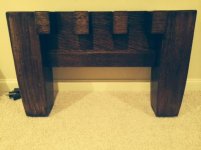
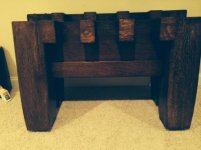
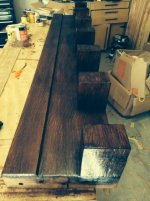
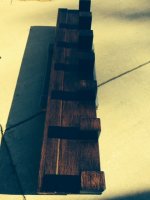
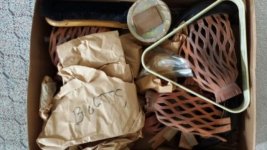
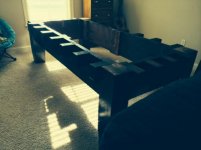
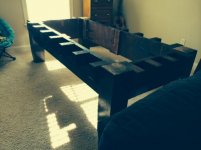
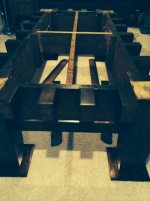
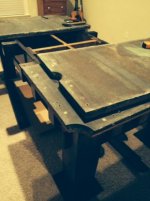
I'm new here and stalked this forum for several weeks before actually joining. I just want to say that I appreciate all of the information that I have picked up while stalking this forum. So, with that said, here goes: We recently moved to a new house and had a bonus room above the garage. I immediately wanted a pool table. I grew up with one in our house as a kid and can remember shooting pool before I could see over the table. So I began searching craigslist/ebay etc for a decent used table for cheap. Nothing crazy, just a decent slate table with drop pockets. I finally after a several months of looking found a craigslist add that peaked my curiosity, like many others had. No pictures, just an add for a dismantled antique pool table for $1.00. Not knowing any better, I texted the poster. Several texts later, I told the poster that I would take it. It was 3 hrs from where I live, so I had to wait until the weekend to pick it up, knowing that my teenage son and I would have to restore it. Nice father/son project I thought. The poster told me that all of the pockets and hardware were missing, so I knew I would have to source those, but figured that they were easy enough to find. Boy was I wrong about that, but more on that topic later. Here are the pics that he sent me before I went to get the table:
 

Attachments

  • legs.jpg
    legs.jpg
    64.2 KB · Views: 2,310
  • plate.jpg
    plate.jpg
    57.5 KB · Views: 2,292
  • rails.jpg
    rails.jpg
    72.7 KB · Views: 2,277
  • underpinning1.jpg
    underpinning1.jpg
    90 KB · Views: 2,281
  • underpinning ends.jpg
    underpinning ends.jpg
    92.5 KB · Views: 2,276
So, with those pictures in hand, I began by calling A.E. Schmidt asking about the table and replacement pockets/hardware. In a day or two, I get an email back from Kurt Schmidt saying that the nameplate is from the thirties, but they did not make it. It appeared to be a Brunswick mission B table. So with that information I began the normal web searches for information about that model. I found information on the Brunswick site that stated the Old Mission B style was produced from 1906-1911. The pictures matched what I could tell from the texed pictures. That then led me to a few other sites where there were examples of this table offered for sale. HOLY COW!!! I found three for sale and all had several zeros in the asking price. Keep in mind, I had not seen this table in person yet. This all happened in a matter of days. So, Saturday morning came and my son and I began our journey for an antique pool table to restore. We met up with the seller, and what a nice guy. He gave us seventy years of history on the table. It was in his parents house in Kansas when they purchased the house in 1940. He grew up playing on the table and when his parents where ready to sell the house and retire in 1990, he had his father crate the table up and ship it to him in Alabama. He had intentions of having the table restored and just never got it done. His wife bought him a new table and this one sat in storage in crates for the last 25 years. He had sold his house and wanted it to go to a good home. So that's where my story picks up. We loaded the table and I told him that I would keep him up to date on my progress. A friend of mine came over to help me unload and started drooling! So much so that he began a search for a table of his own!! Here is the table as we unloaded it at my house:
 

Attachments

  • IMG_2754.jpg
    IMG_2754.jpg
    41.3 KB · Views: 2,211
  • IMG_2790.jpg
    IMG_2790.jpg
    49.8 KB · Views: 2,214
  • IMG_2755.jpg
    IMG_2755.jpg
    97.1 KB · Views: 2,212
  • IMG_2756.jpg
    IMG_2756.jpg
    42.4 KB · Views: 2,220
Of course I had to mock it up so my wife could tell what she was looking at. A quick inventory revealed that two of the six blind rail aprons were also missing, but they were easy enough to reproduce. Someone had started to work on the veneer, but had put the wrong veneer on. What veneer was there on the legs was coming off as well. So began my search for veneer. All of the pictures I had seen of restored tables of this model had tiger striped oak,so I knew that was what I needed. I found the veneer that I needed for the legs and slate support tenons at Bob Morgans woodworking supplies. Great guy too. He was super helpful and friendly. So I started stripping the old veneer, or at least what I was going to replace. A week or so later I had all of the veneer glued down, sanded and was in the staining process. Ready to see it? Here are the legs and ends finished (sorry, no pics of veneer process):
 

Attachments

  • photo 32.jpg
    photo 32.jpg
    44.6 KB · Views: 2,178
  • photo 31.jpg
    photo 31.jpg
    52.2 KB · Views: 2,188
  • photo 35.jpg
    photo 35.jpg
    31.7 KB · Views: 2,177
  • photo 37.jpg
    photo 37.jpg
    32.6 KB · Views: 2,172
Last edited:
Looks great so far, keep up the good work and keep the pictures and story going. I bought a really nice privately owned GCII a few years ago and decided to stain the blinds to match the rails. What seemed like a little job got pretty time consuming trying to find stain to match. All said and done I must have tried at least 15 different colors and brands but it was worth it, it looks good.
 
Table

The table is a good 1, with that name plate on it is telling me that A E Schmidt has done some type of service or repair on the table. Schmidt would service the table and put their name plate on the table in place of a original... Very common.

Which brand of cushions are on the rails? Any name on the bare cushion?


Rob.M
 
Yeah, it is pretty hefty. My wife was worried about it falling through the ceiling. I told her not to worry, HER Tahoe would break its fall!! All of the extra time while not working on the table was spent trying to source pockets/hardware that wasn't going to cost me 15$/ bold and 60/ pocket iron!! Just in case anyone is wondering, there are two 1/2-13 x 12" (I think the length is correct, ill have to double check that) bolts plus two 3/4" dowels at each junction of the long frame and legs. The short ends have two 3/4" and two 5/8" dowel plus a lag bolt at the leg junction. the center slate support has one 1/2-13 x 6"? bolt on each side. I wound up contacting the craigslist seller to see if maybe he could dig through a couple of boxes he hadn't looked in for a while and what do you know? He found all six pockets, all of the bolts, and the original set of clay balls!!!!! He shipped them all to me and it was the best 37$ i think i ever spent!! by then I had moved on to the long frame sides. Here they are:
 

Attachments

  • photo 12.jpg
    photo 12.jpg
    46.2 KB · Views: 2,107
  • photo 14.JPG
    photo 14.JPG
    96.8 KB · Views: 2,108
  • 20140905_112919.jpg
    20140905_112919.jpg
    37.8 KB · Views: 2,090
Last edited:
The stain turned out to be not that bad since I was starting from a sanded state. I wound up doing one base coat of red oak, followed by a layer of special walnut, and then a final layer of dark walnut. the base coat was to get all of the new veneer to match the old veneer when the darker coats were applied. the top coat is hand rubbed teak oil. the three layers of stain really make the grain/tiger stripe stand out. I learned that making knife handles. that is also where the teak oil came from. finally, the entire thing is waxed with johnsons paste wax. really makes it shine!!
 
As far as the label goes, yes that is exactly what happened. IN THE THIRTIES on this one!! the cushions are k-66, but I dont remember seeing a name on them, but I will look again and let you know. Judging from the number of staple holes in the slate liner and rails, it was redone several times.
 
Welcome to the group. Looks like a great table. It is nice to see these old gems being restored to their former glory, rather than consigned to the dump.

I'm sure that it will be extra special for your and your son to play on, given all the work that you will have put into it.

Gideon
 
First off welcome glad u joined and 2nd the table is looking great can't wait too see more
 
Awesome project table , I would be jealous but my fingers still hurt from the last restoration, so yeah , enjoy the burn. Nothing more satisfying then making an old gem new again.

A word of advice. Pay close attention when it comes to replacing the cushions. The new cushion profiles do not match the old ones so you may have to modify your rails if you want the table to play like a modern table.

Best of luck with your project.
 
Thanks guys. It is a really cool project, and not just saying that because it's mine. I love the history and appreciate stories of the past. We have a lot of family pieces in our home and this is going to be an heirloom piece too. They just don't build things like they used to. The craftsmanship on this table is outstanding. It makes me wonder how they machined pieces like this 100+ yrs ago. So, continuing the story:

I took it inside piece by piece as I had them finished and did assembly upstairs. You have no idea how much heft these pieces have. I didn't weigh them but I'm guessing there's 500 pounds of wood alone. So I now had my most of my hardware and pockets, veneer for the frame mostly done and most of the frame refinished. I began assembly:
 

Attachments

  • photo 39.jpg
    photo 39.jpg
    31.9 KB · Views: 940
  • photo 46.JPG
    photo 46.JPG
    73.3 KB · Views: 938
  • photo 54.jpg
    photo 54.jpg
    32.2 KB · Views: 933
  • photo 58.jpg
    photo 58.jpg
    35 KB · Views: 932
You will probably notice the plates under the legs. I got to thinking about what my wife was worried about about the table falling through into the garage, so in order to distribute the force a little more evenly, I cut 12" x 12" plates out of 3/4" oak plywood and put them under the legs. This effectively cut the PSI force down by 75% by spreading that weight across 144 sq in instead of 36 sq in. Also it gave me a hard surface to shim to instead of the carpet. So I centered the table side to side and left myself enough room on the head (window) end to shoot from. Now came the slates!!
 

Attachments

  • photo 71.jpg
    photo 71.jpg
    35.9 KB · Views: 923
  • photo 67.jpg
    photo 67.jpg
    32.3 KB · Views: 929
Back
Top