Thanks!IMHO.... I've never seen a better looking Ball polisher, that's beautiful!
You are using an out of date browser. It may not display this or other websites correctly.
You should upgrade or use an alternative browser.
You should upgrade or use an alternative browser.
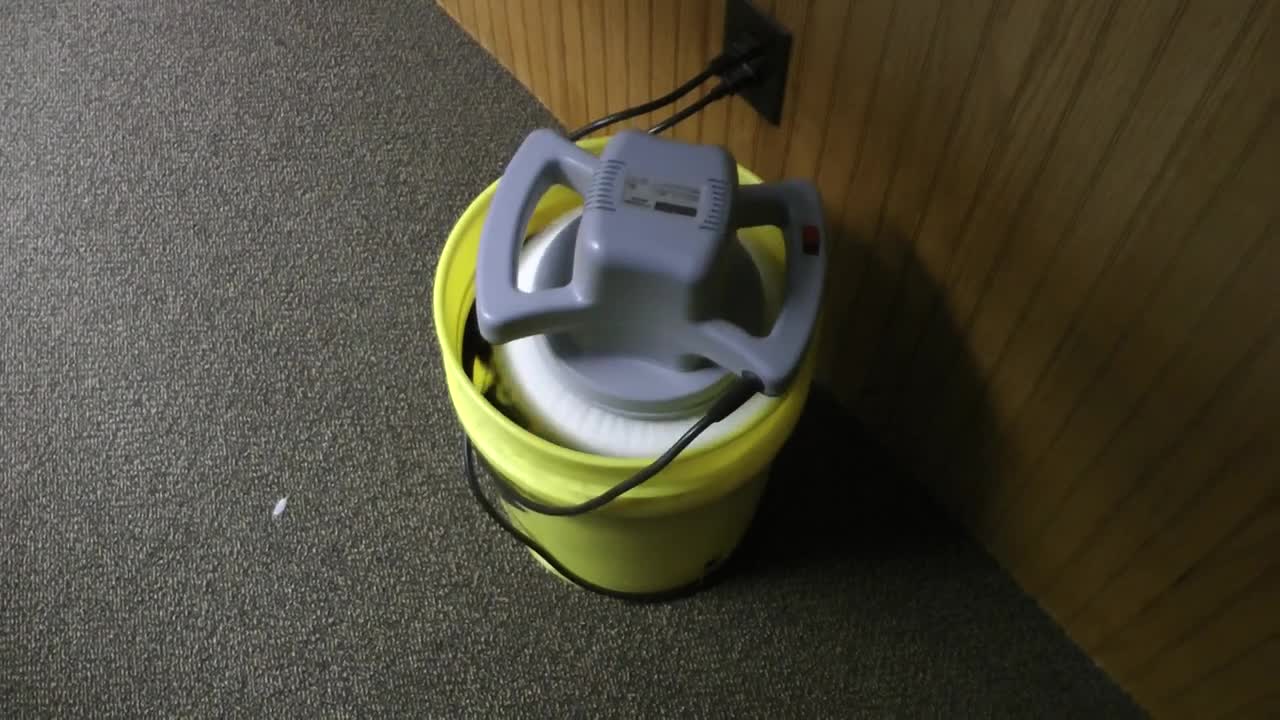
DIY Bucket Polisher Project.. best Buffer?
- Thread starter PickPocket
- Start date
If you're interested, here's a short video of the build.IMHO.... I've never seen a better looking Ball polisher, that's beautiful!
I did the same.... 10 lb weight in the bottom... cut ventilation holes. But I went one step further. I installed a small motor with a squirrel cage. It keeps that orbital buffer nice and cool.Here's my take as I've build a few of these over the years. I used the corded 10" Ryobi Orbital Buffer from Home Depot. The key to longevity is ventilation for the motor. Drilling ventilation holes in the side of the bucket is key but the head of the polisher also needs ventilation. I added rubber feet to the bottom of the bucket to raise it off the floor to allow for ventilation. I also affixed a 10 pound free weight in the bottom as the bucket polishers tend to wander when plugged in. This solved that issue and also provided added clearance for motor ventilation. You should also make some sort of divider for the balls. If they collide during a cycle, there's a possibility they will get white collision/burn marks left behind by the cleaning solution and friction from rubbing together. Some argue this, but that was my experience. Here's a couple pics of the last generation I built before I decided to go all in and build a Gold Crown themed Diamond polisher knockoff to match my table, light and cue rack.
Good luck with the project!

The last polisher I'll build/use:

Got any pictures?I did the same.... 10 lb weight in the bottom... cut ventilation holes. But I went one step further. I installed a small motor with a squirrel cage. It keeps that orbital buffer nice and cool.
Sure. I can get a couple shortly.Got any pictures?
More questions..... what Carpet/Mat/material is best suited for the inside?!
Kinda looks like thin entry way mats being cut to size verse carpet. Is that due to Lint?
Kinda looks like thin entry way mats being cut to size verse carpet. Is that due to Lint?
I use a microfiber bonnet on the wheel and carpet on the wall.More questions..... what Carpet/Mat/material is best suited for the inside?!
Kinda looks like thin entry way mats being cut to size verse carpet. Is that due to Lint?
Use a NON Nylon or low percentage nylon carpet. I use indoor/outdoor carpet.More questions..... what Carpet/Mat/material is best suited for the inside?!
Kinda looks like thin entry way mats being cut to size verse carpet. Is that due to Lint?
I want to try the micro fiber bonnet. All I have is wool right now.I use a microfiber bonnet on the wheel and carpet on the wall.
The material you use as the cleaning/buffing surface should be determined by the product you will use to clean the balls. High nylon content is great for a product that hazes and is buffed off. If you are using a liquid cleaner, pile carpet will work best as this help to dry the balls and polish them. I used the Diamond supplied carpet in my polisher using a small amount of the Tiger Ball Cleaning Solution and all that happened was the carpet smeared the product all over the balls. I changed the surface of the platter to microfiber and the wall to pile carpet and it worked great. I've since changed cleaning solutions to 2 tablespoons Aramith Ball Cleaner to 8 ounces of 91% Isoprophyl Alcohol. This performs even better and leaves the balls clean, shiny and they have that fresh out of the box feel; smooth but not slick.More questions..... what Carpet/Mat/material is best suited for the inside?!
Kinda looks like thin entry way mats being cut to size verse carpet. Is that due to Lint?
I have a couple of these, they seem to work just fine. YMMV.
"WEN 10PMR 10-Inch Waxer/Polisher" $25 at the moment:

Joey Bautista on Instagram: "Home made ball cleaner"
6 likes, 1 comments - cues_by_joey on December 16, 2022: "Home made ball cleaner".
 www.instagram.com
Coos Cues
Coos Cues
Buy what's on sale at your local parts store. Get two they're cheap. No matter they will be better than harbor freight.
Why two? Because if you're going to go with a bucket polisher this setup works best. Doesn't much matter what you line the side of your bucket with as long as it's not abrasive.
 rumble.com
Why two? Because if you're going to go with a bucket polisher this setup works best. Doesn't much matter what you line the side of your bucket with as long as it's not abrasive.
Dual Buffer Bucket Pool Ball Cleaner
Short video showing how you overcome the problem of the balls banging together with a bucket ball cleaner
rumble.com
2 bucks apiece is pretty good!
Well.... not 100% sure what would be causing this... but I believe it's the "Kiss/Friction" point of the balls as the touch in the polisher...
I can buff by hand but still seems to be faintly there. (Good thing this was an extra set of older balls).
Adding the 2nd buffer on top helped! Also I'm think I'll try the 3D printed spacer & see where I land.
I can buff by hand but still seems to be faintly there. (Good thing this was an extra set of older balls).
Adding the 2nd buffer on top helped! Also I'm think I'll try the 3D printed spacer & see where I land.
I've never had an issue with the balls banging together. The centrifugal force spreads them apart and they don't touch each other.
What do you do when you need the top sides of the balls cleaned? When I had my bucket polisher with the microfiber divider, I would just give the bucket a shake (while running) to change to orientation of the balls. Can't do this without a divider of some sort. I'm also pretty sure when the balls are unevenly dirty, all will not spin at the same RPM due to varying friction on each ball. The cleaning solution will also cause varying degrees of friction on each ball. This may cause collisions. In your video, it appears all the balls are clean and dry so they should spin in the same place.I've never had an issue with the balls banging together. The centrifugal force spreads them apart and they don't touch each other.
Here's a little secret I discovered... If you overlap the carpet lining the bucket wall, the balls will re orientate themselves every time they come up on the overlap. It makes them jump a little. I'm using thinner carpet than what the picture above has.What do you do when you need the top sides of the balls cleaned? When I had my bucket polisher with the microfiber divider, I would just give the bucket a shake (while running) to change to orientation of the balls. Can't do this without a divider of some sort. I'm also pretty sure when the balls are unevenly dirty, all will not spin at the same RPM due to varying friction on each ball. The cleaning solution will also cause varying degrees of friction on each ball. This may cause collisions. In your video, it appears all the balls are clean and dry so they should spin in the same place.
Determine Which way the balls want to rotate and overlap the carpet against the direction of rotation. You can overlap it both ways and see what works best for you.
I've had one made with an HF one for a few years, been fine. Probably the more you pay the better your chances it will last but mine's okay at 20 or 25 bucks.So Don't go with the HF one?