Gluing the seams?

realkingcobra

Well-known member
Silver Member
I like this stuff more than bondo or glazing putty. It dries extremely hard but takes overnight. when you mix it it goes very watery, but it hardens up, as the name implies, hard like rock.

it may not matter if you are just filling a crack, but if it's a place on the table where someone may slam a ball down, that's a different scenario, and of course people shouldn't be slamming balls down , Reality is, some do.

Do you personally set tables up using Duram's rock hard?
 

snookered_again

Well-known member
I wouldn't use the putty for a big blowout but for minor imperfections I like it a lot better. Nothing sticks well to a dirty surface.
 

snookered_again

Well-known member
if the gap is so large you are able to fit a piece of drywall tape folded in half , what you can do is separate the slates. clean the edges with a razor or boxcutter so they slide together closer.

If the slates are butted but there is something in the gap preventing the coming together, , try putting a thin blade or a feelier guage through and draw it along. That will help you find out what the problem is. it can be junk in the pin hole itself too. all it takes is one speck of dirt and you have a gap.
you might need to fill a screw hole and make a new one if the problem is that inaccurately drilled screw holes are pulling the slate apart when it's being tightened down.
Sure its faster to fill the gap, but It depends what you wish to let go.
 

realkingcobra

Well-known member
Silver Member
if the gap is so large you are able to fit a piece of drywall tape folded in half , what you can do is separate the slates. clean the edges with a razor or boxcutter so they slide together closer.

If the slates are butted but there is something in the gap preventing the coming together, , try putting a thin blade or a feelier guage through and draw it along. That will help you find out what the problem is. it can be junk in the pin hole itself too. all it takes is one speck of dirt and you have a gap.
you might need to fill a screw hole and make a new one if the problem is that inaccurately drilled screw holes are pulling the slate apart when it's being tightened down.
Sure its faster to fill the gap, but It depends what you wish to let go.
Drywall tape acts as a wick, and helps draw the superglue down the inside edges of the seams, making it work more efficiently. Not only that, but the paper rips in half when you take the slates apart, unlike slate seams that have simply been superglued together, no differently than when I repair a cracked or broken slate, taking that apart is not all that easy, trust me.
 

GoldCrown

Pool players have more balls
Gold Member
Silver Member
The torch and bees wax sure looked cool:cool:
The low-end mechanics don't like you asking questions about their work.
How was the mechanic.. work ok.. eh.. get his name? If so and don’t want to post publicly please PM. Do they still have the bumper pool table. I’ll play you 1p on that. You just got challenged. Cash only. No cards, checks,IOU’s, promises, gifts, etc.
 

fastone371

Certifiable
Silver Member
How was the mechanic.. work ok.. eh.. get his name? If so and don’t want to post publicly please PM. Do they still have the bumper pool table. I’ll play you 1p on that. You just got challenged. Cash only. No cards, checks,IOU’s, promises, gifts, etc.
I love bumper pool! The pool hall by us has a bumper pool table, now whenever I go with a friend we finish the night up on the bumper pool table.
 

snookered_again

Well-known member
sometimes the holes are a bit off and you need to close up the gap.
what one can do is affix the center slate, fill the screw holes for the other ( loose slates) in with toothpicks or splinters and glue, then clamp the loose slate up snug, , then drill fresh pilot holes for the slate which is not bolted yet, That way when you tighten the screws down for the second slate a misaligned screw hole isn't causing the slates to be drawn apart.
If you want to put paper there its' ok but I think its best if you can have a close fit.

mine had a few marks and imperfections so what I did was just coat the whole table with the Durhams and then basically wipe it off to level it , removed all but what stuck into any crack, which was very little material. there isn't a lot there to chip out. If you are building the surface up trying to make up for a warp or something yes it could perhaps chip and maybe bondo is ok. Im quite familiar with using glazing putty and bondo but what I really liked about the Durham's stuff, its easy to level, water based, and not a stinky glob of goo so being able to draw it out over the surface and remove any but what fell into the depressions went better.. I think it's a lot nicer to work with than bondo or glazing putty
I don't think the Durham's product will tend to glue slates together and cause damage by trying to separate them. crazy glue or epoxy might.
beeswax is ok if it's a hairline crack of course if it's a large enough area that dropping a ball down can dent it, the beeswax isn't going to stand up to that.

my table has some wood pieces that are basically the shelf of each pocket, they took a bit of filler in there as sthere si a slight gap between the wood and the slate, some of this is a surface that balls roll upon. I had some chunks missing which are below the cushions , unseen,, for that I use epoxy and wood dust mixed 50/50. a couple of those wood pieces had been replaced but the shape wasn't quite correct so I copied the ends that were untouched and original.

sometimes if there are odd chunks of wood missing from antiques and its difficult to do a proper wood fill, then Ill mix epoxy and wood dust 50/50 and use that but I try to keep any such repairs very localized.
Ill make a dam or cover any flat surface with plastic like from bubble packaging to get it very level then remove the plastic when it's dry. that leaves a near perfect finish. I also surround any undamaged wood with masking tape keeping the repair as small as possible. If I can do a dutchman and patch in simiar replacement wood that's nicer, depends on the shape what it is and what will show. I restore antiques and epoxy is used, but extremely sparingly.

I think all these products have their place and you can use what you prefer in the situation. in my case it's a 100 year old table that doesn't need to get coated in modern bondo etc. I think the durams is a bit more in keeping with the aspect of period restoration.

I had some punky edges where the cloth staples. I took the time to remove some 1x1" strips and replaced with wood cut to fit accurately. It will only show to a person taking it apart but felt it deserved a bit of restoration there rather than just an epoxy or bondo fill. I could have made all new wood parts but they are all stamped with the same ID number. I liked keeping what was there better than replacing too much.
I restore other old antique furniture, lots is a labor of love but I try not to rush and to try to recreate its' originality . some take a different approach and try to meake a restoration look brand new. To me retoration should be more minimalist, my goal is to try to make a piece look like it would if it were well cared for and not to try to make it look like it's new.

There is a certain amount of pride in workmanship for all that, hard to profit from, so few doantique restortion for profit, I enjoy such things more as a labor of love.

the reason for a business is to profit so different approaches are used by a business that flips pool tables or other antiques, or does refelting, than an antique restorer, museum curator etc. There are similarities but also different approaches that make sense for different reasons.

as an example Ill take some old radio found in a barn that spent half it's life as housing for a mouse, then take months to restore it to its former beauty. There's no profit in that, there is a great deal of pleasure and pride. often the only pay is in the sense of accomplishment. Its a really bad way to try to make any money. I've seem many try and the results are often ruined antiques that I wouldn't care to ever own after.

some of these principles aply to antiquepool tables they are antiques and in many ways similar to old furniture.

right now I have a friend with a very old early 1930's snooker table, the pockets have come apart. they have the beautiful and rare brass rings which you lift to dispense the ball from the bottom. the nets are a hemp fiber, and while I can get replacements they are nylon not the old hemp fiber that lasts 100 years, and not as beautiful and ornate.
Some of the leather parts that surround this brass mechanism is old and tattered and one was coming apart. its very thin soft leather. I found a used and very similar leather jacket with the same thickness and color so Im carefully sewing it all back together, replacing just what is necessary .
Id rather see it restored than new pockets which might be around $600 dollars or so.
I can get the other pocket leather parts like the molded pieces that are pre formed and new and quite nice, or I can try to restore what is present. It takes a time investment to get it right.

the owner doesnt; care as much as I do, he just wants it fixed but doesn't really want to spend 500 on new pockets either so Im happy to do him a favor and do a bit of restoration work. he in turn lets us play and it's just really healthy and good situation so for me a bit of labor is just somethign to be proud of. If he called in a mechanic he'd likely try to get him new pockets that are as similar as possible and be on with it. the mechanic can't always just charge the owner by the hour for several hours of sewing and fine workmanship on each pocket. - maybe only if it's a rich cutomer who values his antique table to that extent.


Im a bit different in that I really do admire the originality and think its worthwhile spending some time on the details.

one of the others with all good intentions did some repairs using fishing line and basically he took an approach of just fix it so it works, but I like to thin if I repair it authentically it can stay like that and it's a beautiful thing. the table is Burrows & Watts. it has little wooden cups that swing out from under the rails to keep chalk and it's all beautiful quartersawn oak. steel backed rails. They don't make them like this anymore.
he has a great mechanic that will look after the felt replacement, also a close friend. I won't do that table. I don't think the mechanic would want the pocket repair job.
 
Last edited:

realkingcobra

Well-known member
Silver Member
sometimes the holes are a bit off and you need to close up the gap.
what one can do is affix the center slate, fill the screw holes for the other ( loose slates) in with toothpicks or splinters and glue, then clamp the loose slate up snug, , then drill fresh pilot holes for the slate which is not bolted yet, That way when you tighten the screws down for the second slate a misaligned screw hole isn't causing the slates to be drawn apart.
If you want to put paper there its' ok but I think its best if you can have a close fit.

mine had a few marks and imperfections so what I did was just coat the whole table with the Durhams and then basically wipe it off to level it , removed all but what stuck into any crack, which was very little material. there isn't a lot there to chip out. If you are building the surface up trying to make up for a warp or something yes it could perhaps chip and maybe bondo is ok. Im quite familiar with using glazing putty and bondo but what I really liked about the Durham's stuff, its easy to level, water based, and not a stinky glob of goo so being able to draw it out over the surface and remove any but what fell into the depressions went better.. I think it's a lot nicer to work with than bondo or glazing putty
I don't think the Durham's product will tend to glue slates together and cause damage by trying to separate them. crazy glue or epoxy might.
beeswax is ok if it's a hairline crack of course if it's a large enough area that dropping a ball down can dent it, the beeswax isn't going to stand up to that.

my table has some wood pieces that are basically the shelf of each pocket, they took a bit of filler in there as sthere si a slight gap between the wood and the slate, some of this is a surface that balls roll upon. I had some chunks missing which are below the cushions , unseen,, for that I use epoxy and wood dust mixed 50/50. a couple of those wood pieces had been replaced but the shape wasn't quite correct so I copied the ends that were untouched and original.

sometimes if there are odd chunks of wood missing from antiques and its difficult to do a proper wood fill, then Ill mix epoxy and wood dust 50/50 and use that but I try to keep any such repairs very localized.
Ill make a dam or cover any flat surface with plastic like from bubble packaging to get it very level then remove the plastic when it's dry. that leaves a near perfect finish. I also surround any undamaged wood with masking tape keeping the repair as small as possible. If I can do a dutchman and patch in simiar replacement wood that's nicer, depends on the shape what it is and what will show. I restore antiques and epoxy is used, but extremely sparingly.

I think all these products have their place and you can use what you prefer in the situation. in my case it's a 100 year old table that doesn't need to get coated in modern bondo etc. I think the durams is a bit more in keeping with the aspect of period restoration.

I had some punky edges where the cloth staples. I took the time to remove some 1x1" strips and replaced with wood cut to fit accurately. It will only show to a person taking it apart but felt it deserved a bit of restoration there rather than just an epoxy or bondo fill. I could have made all new wood parts but they are all stamped with the same ID number. I liked keeping what was there better than replacing too much.
I restore other old antique furniture, lots is a labor of love but I try not to rush and to try to recreate its' originality . some take a different approach and try to meake a restoration look brand new. To me retoration should be more minimalist, my goal is to try to make a piece look like it would if it were well cared for and not to try to make it look like it's new.

There is a certain amount of pride in workmanship for all that, hard to profit from, so few doantique restortion for profit, I enjoy such things more as a labor of love.

the reason for a business is to profit so different approaches are used by a business that flips pool tables or other antiques, or does refelting, than an antique restorer, museum curator etc. There are similarities but also different approaches that make sense for different reasons.

as an example Ill take some old radio found in a barn that spent half it's life as housing for a mouse, then take months to restore it to its former beauty. There's no profit in that, there is a great deal of pleasure and pride. often the only pay is in the sense of accomplishment. Its a really bad way to try to make any money. I've seem many try and the results are often ruined antiques that I wouldn't care to ever own after.

some of these principles aply to antiquepool tables they are antiques and in many ways similar to old furniture.

right now I have a friend with a very old early 1930's snooker table, the pockets have come apart. they have the beautiful and rare brass rings which you lift to dispense the ball from the bottom. the nets are a hemp fiber, and while I can get replacements they are nylon not the old hemp fiber that lasts 100 years, and not as beautiful and ornate.
Some of the leather parts that surround this brass mechanism is old and tattered and one was coming apart. its very thin soft leather. I found a used and very similar leather jacket with the same thickness and color so Im carefully sewing it all back together, replacing just what is necessary .
Id rather see it restored than new pockets which might be around $600 dollars or so.
I can get the other pocket leather parts like the molded pieces that are pre formed and new and quite nice, or I can try to restore what is present. It takes a time investment to get it right.

the owner doesnt; care as much as I do, he just wants it fixed but doesn't really want to spend 500 on new pockets either so Im happy to do him a favor and do a bit of restoration work. he in turn lets us play and it's just really healthy and good situation so for me a bit of labor is just somethign to be proud of. If he called in a mechanic he'd likely try to get him new pockets that are as similar as possible and be on with it. the mechanic can't always just charge the owner by the hour for several hours of sewing and fine workmanship on each pocket. - maybe only if it's a rich cutomer who values his antique table to that extent.


Im a bit different in that I really do admire the originality and think its worthwhile spending some time on the details.

one of the others with all good intentions did some repairs using fishing line and basically he took an approach of just fix it so it works, but I like to thin if I repair it authentically it can stay like that and it's a beautiful thing. the table is Burrows & Watts. it has little wooden cups that swing out from under the rails to keep chalk and it's all beautiful quartersawn oak. steel backed rails. They don't make them like this anymore.
he has a great mechanic that will look after the felt replacement, also a close friend. I won't do that table. I don't think the mechanic would want the pocket repair job.
1912 Regina 5'×10' 3C with big blowouts in the seams originally repaired with Durham rock hard putty, which was all broken out. I put sheet rock tape between the seams to build a wall so that as I did all the bondo repair, the bondo wasn't stuck to the other side of the seam. After which I super glued the slates, mounted them only using 4 corner slate screws, don't need the rest of them. Spray pained the slates with slate gray paint, and finished the table.
20210703_175310_resize_20210711_090604.jpg
20210703_175333_resize_20210711_090603.jpg
20210704_195254_resize_20210711_090603.jpg
20210704_195303_resize_20210711_090603.jpg
 

snookered_again

Well-known member
yea I wouldn't trust the durham's for a great big chunk like that. Bondo might stick together in a large chunk like that. you can even mix in some fiberglass fibers to add strength to the clump. you cna just take scissors and make fibers form almost any type of fibreglass cloth to mix in.. maybe overfill and let sit to allow shrinkage, or fill again after.
in autobody 1/8 thickness is lots, It's not really meant to put an inch thick but of course it will harden up, because it hardens by its catalyst.

If I mix wood dust and epoxy abotu 50/50 that adds strength in a similar way. , also looks like wood because it is partly wood. you cna just keep adding as much dust as it can absorb without loosing strength.

do you think spray paint changes the slip between the cloth and slate? or makes no difference maybe? I guess that's cosmetic. looks nicer than a patch repair.
I did a table that I covered with a new sheet of particleboard so the cutouts were a bit rough and didn't want the edges coming apart.

I put JB weld on the edges, then stapled plastic strips so it had a nice smooth form, removed the plastic after, now the edges are a bit better protected from any hits, than they would be if just particleboard edges. it also was a quick way to remove the serrations from jigsaw
I had to lift the rails 3/4" of course, so I cut the particleboard 1" small and made a nice stained edge with an appropriate beaded profile so it didn't look too weird.

balls made a rough sound as it wasn't very smooth particleboard back then , had that cheap table rolling sound.. the new stuff is dead flat and after screwing them together it played nice, sounded nicer. now it's 1 1/2 " thick.

It was never a slate table but a nice little Brunswick portable from 1961. original rubber was tiny , only about 1/2" and long obsolete. I used 3/4" like from a later brunswick , i think maybe maybe a century table used that one.. had to trim the rails to keep the playing size equal, worked out well.

the pockets were a bit hard to fix as they are , also obsolete and they were white rubber. I used sheet rubber and some plastic trim pieces to fix up the edges. the pockets got 1/4" sheet rubber behind.
I cut a little strip from a leather belt and used that as a staple strip just below the edges of the trim, that helped any balls to go down. after that even the hardest shots don't shoot back out or do funny thigns, they just go down. I used 1/8th rubber for the cheeks, it worked out well , reduced pocket size to make it more challenging. copied the origianl profiles as close as possible otherwise.

we used it lots for about 2 years and moved up, I put it for sale, some interest, not many cute little vintage tables out there used. definitely not an easy way to profit, im asking 800 and it cost about 500 for materials, to do , plus the table which I was lucky to get for free.. its bright orange which is kind of cool.

i occasionally see old brunswick 7" later ones, after abotu 1964 they used some sort of honeycomb material for the top. they dont have the side ball returns like mine.

all the department store 4x8s came a bit later, none of them were comparable quality. I do have a slate 4x8 that's brunswick, 1970. I've had it up for free for a while. It's taking more time to give it away than it's worth ;-) thought I'd set it up, but I like the old BBC one I found a lot better.

It was a brute to move though, frame is one big piece, does not disassemble. moved it by myself up the steps through the door, lots of rollers , winching etc. had a buddy help a bit to lift and carry the slates.. didn't want to lift slates myself. I got them all up out of my van onto my trailer then up onto the boulevard ( two ladders with planks to bridge the sidewalk and wall.. then up my big front staircase all by myself, rollers plywood ,come-along etc.
here's the little Brunswick

you can see the frame of the BBC below. I got it up my stairs to my door and drats, would not fit ! finally I removed some trim, gave it a shove and it only just fit in through my door.

some of these old BBC tables have a frame that disassembles, this one is not made to disassemble, its all doweled together. the cross-bracing comes out but that big frame is a lot harder to move than the slates for it.
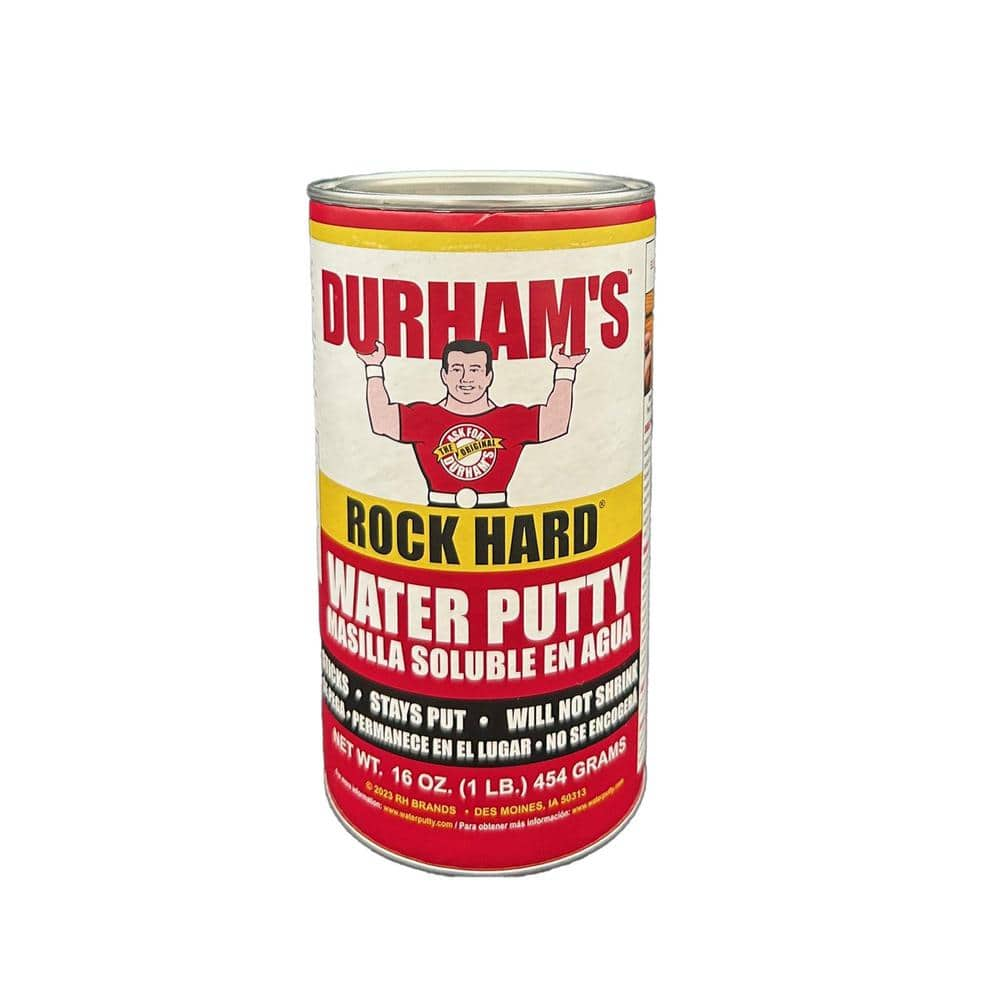
table s .jpg
bbc frame.jpg
bbc table.jpg
 
Last edited:
Top