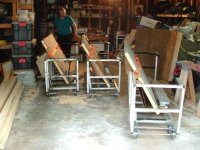
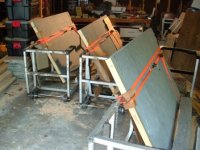
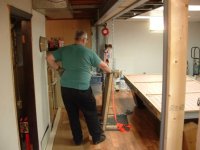
The slates are so heavy on these tables that I had Diamond put one slate in each dolly so as to make it easier to move them around once I reached the location they were going to. 2" thick slate is just a nightmare to deal with, as they weigh about 500lbs each.
You are using an out of date browser. It may not display this or other websites correctly.
You should upgrade or use an alternative browser.
You should upgrade or use an alternative browser.
Installation of a Gabriel 10ft Billiards Table.
- Thread starter realkingcobra
- Start date
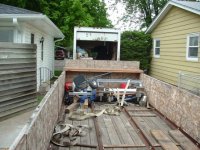
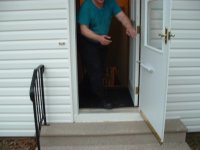
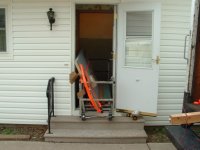
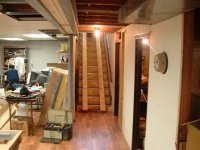
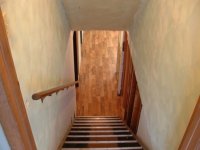
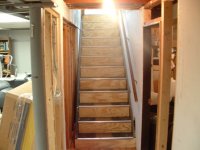
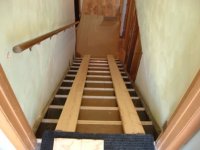
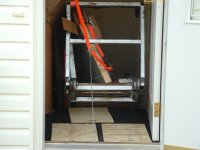
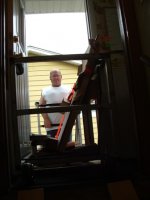
These steps are at a 40 degree angle downstairs, 12 1/2 feet down, so we had to build a ramp to run the dollys down the stairs.
Attachments
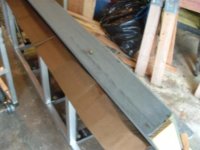
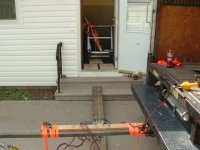
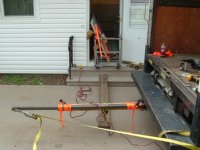
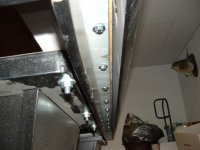
Time for the slates. I had to make a makeshift mount attached to the tow hitch on the back of my truck in order to have some place to attach my hoist, so a 2 x 2 square pipe 6 foot long worked out real good. Notice the 2inch ratchet strap going from the end of the pipe to the bumper of my truck...LOL. I wasn't taking any chances on bending the pipe or tearing off my tow hitch.
Attachments
-
 Taking the slates down the stairs.JPG51.2 KB · Views: 520
 -
 Taking the slates down the stairs (2).JPG48.7 KB · Views: 496
 -
 Taking the slates down the stairs (3).JPG50.2 KB · Views: 498
 -
 Taking the slates down the stairs (4).JPG50.4 KB · Views: 479
 -
 Taking the slates down the stairs (5).JPG50.8 KB · Views: 503
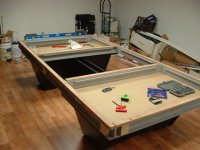
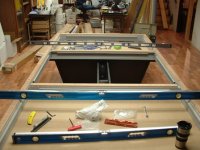
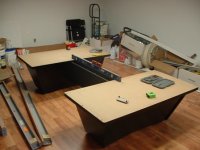
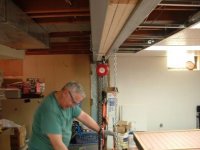
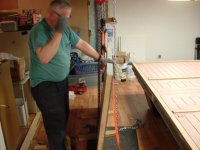
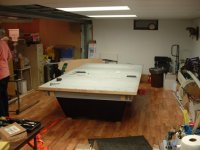
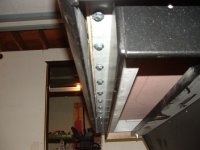
Next, we had to get the slates out of the dollys first, before we could install them on the frame of the table, that's Joe, the home owner helping out. We used a 2 ton engine hoist mounted to his steel beam as an anchor to lift the slates out of the dollys, and to stand them on end so that we could lay the on the table frame.
Attachments
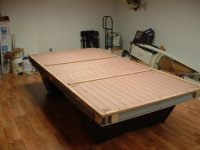
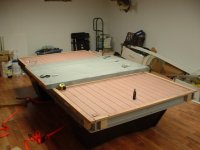
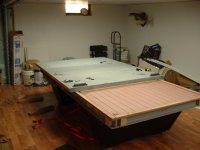
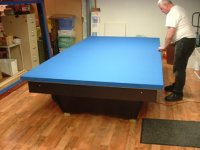
Finally got the last piece of slate on the table...13 hours later.
Attachments

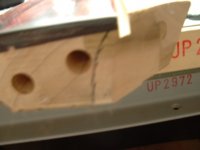
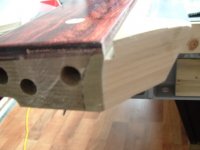
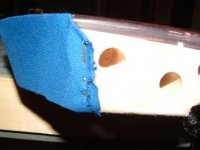
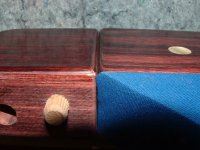
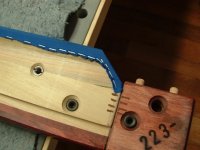
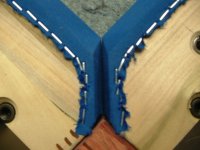
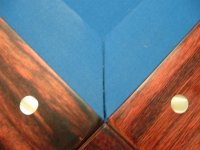
When I recovered the rails, I didn't like how Gabriels expects you to close the end of the rail cloth, so I created a relief in the end of the rail with my belt sander so that I could wrap the cloth around the end of the rails, without causing the rails to have a gap between the rail and the corner blocks.
Attachments
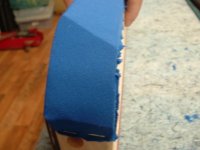
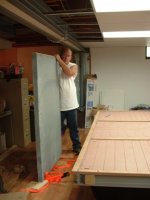
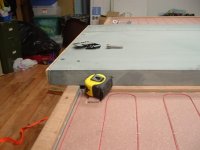
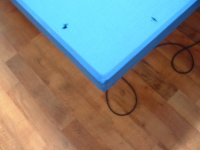
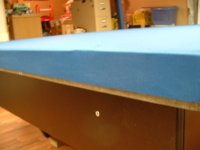
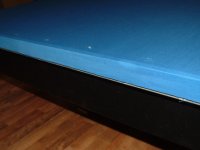
Next, I installed the Simonis 300 bed cloth with a 2 1/2" stretch from side to side without the use of staples. I pulled so hard on the cloth to get it as tight as possible that I had to have Joe hold the table to keep it from sliding....LOL
Attachments
-
 Installed bed cloth with no staples.JPG47.1 KB · Views: 495
 -
 Installed bed cloth with no staples (2).JPG40.4 KB · Views: 493
 -
 Installed bed cloth with no staples (3).JPG34.8 KB · Views: 473
 -
 Installed bed cloth with no staples (4).JPG39.5 KB · Views: 473
 -
 Installed bed cloth with no staples (5).JPG50.2 KB · Views: 499
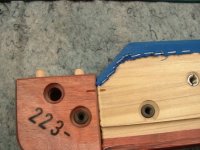
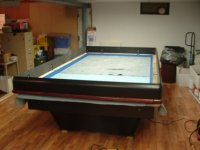
Well, the table finally got done. Take a look at all them rail bolts...LOL, there's 42 of them.
Attachments


Wow! Thats a "ton" of work!
I have to admit, this table is at the top of my list as one of the hardest tables I've ever installed...LOL, but Joe was a true champion when it came time to help, as well as putting up with my timely schedule...LOL It took 3 days overall to get this job done. After getting the slates in, I felt like someone beat me with a baseball bat everywhere on my body...LOL At 50 years old...I'm to old for this shit...I know that now!...LMAO I had just spent 2 days installing a Diamond Pro 8ft down 16 stairs in a guys house just before I installed this Gabriel, I was still sore from that one...LOL But, I have to say, Joe was one of the best homeowners I've ever had the pleasure of working with in my 24 years in this business. After we got the slates in, that night he didn't get much sleep, cuz the next day he hurt like hell all over....LOL serves him right for ordering such a monster of a table....LMAO
Sometimes my job is not just being a billiards technician, sometimes my job is fulfilling the dreams of others, as in this case for Joe.
I thank Joe for the opportunity to deliver and install his dream table, and for giving me one of my greatest challenges in this business over the last 24 years, I truly enjoyed it.
Glen
PS. And for those of you wondering, the job paid $1,100.00 for delivery and set up...with a BIG tip of $250 from Joe, and all the coffee I could drink...LOL I was very happy, BUT...this was a one time price...LOL the price just went UP for any more of this damn tables!!!!!!!!!!!!!!...LOL
Hi Glen
That is a great install! I just bought a old 10' Brunswick Madison and the slate is only an inch and a half and it is really heavy. I can't amagine it being a full two inches! I need to buy a good stapler. Do you have a suggestion? By the way did you finish your instructions for installing cloth?
Thanks
Gary
I buy my staplers from Harbor Freight, they're anywhere from $10 to $40 depending on if they're on sale or not. I use the 1/2" crown staplers, but you'd need to buy an air compressor to go along with it, total cost is about $80 to $120 for everything. As far as the DVD's go, I have to wait until after the upcoming BCA trade show before Simonis is ready to start making them, so that'll be somewhere around the end of June, to the beginning of July.HPbyGD said:Hi Glen
That is a great install! I just bought a old 10' Brunswick Madison and the slate is only an inch and a half and it is really heavy. I can't amagine it being a full two inches! I need to buy a good stapler. Do you have a suggestion? By the way did you finish your instructions for installing cloth?
Thanks
Gary
Glen
Is a metric ton lighter than a standard ton?.....LMAFAO...my back STILL hurts...uuuughn10spool said:On the Madison table I read somewere the three slates add upto 1463 lbs for the set I think its on brunswick web site just think what the Gabrials way @ 2" sure those slates are not metric could be lighter. lol
Craig
Nice work. That is nuts,makes my job look easy!
Glen,
I used to think you were freakin' nuts.
Now i KNOW you are. Wow. Hell of a job. I'm glad you put the info about what you charged for the job, cuz that was sure as hell going to be my first question. I think you're right in coming to the conclusion that 1100 is not nearly enough!!!
To be honest I've only done a couple of three cushion tables, and even then NEVER down stairs. I think you need a short vacation after that one.