Looking for some feedback

Bumlak

AzB Silver Member
Silver Member
20171130_135632.jpg

20171130_135353.jpg

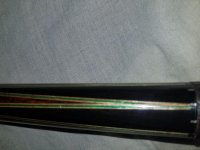
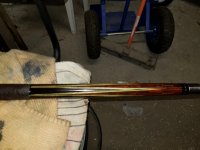
20171128_190309.jpgSeveral firsts here for me and I'm really looking for some feedback on where I need to prioritize my focus on improvements.

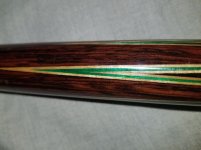
6 point hi/low ebony with natural,emerald,natural veneers. African Blackwood buttsleve. Silver stitch rings at a,b,c,d and e. 5/16-14 stainless.

I'm learning this craft thankd to the kindness of a few makers and about 20 years of cue repair experience. Any honest feedback would be appreciated.
 

Jon Manning

AzB Silver Member
Silver Member
Good looking cue!
One thing that jumps out to me is the ring spacing in the butt, don't get me wrong I like the cue. I remember talking to a maker once and we were talking about ring size and spacing, and I'm paraphrasing of course, but the point was the spacing changes as the cue diameter changes. Never really thought about it till then, but now I notice it on cues.
 

Bumlak

AzB Silver Member
Silver Member
Makes perfect sense actually. I just wonder how it would actually be achieved with the indexing. I'll have to put some thought into that one.

I fought with myself on using veneered rings instead of silver stitch rings as well. I think aesthetically veneered would have been a little nicer in hindsight.
 

ideologist

I don't never exaggerate
Silver Member
So the spacing of the stitches always stays proportionate to the diameter, that's the nature of circles with a fixed number of points around the circumference.

I love the veneers on this cue and might have gone with slotted veneer rings here instead of metal, but this is a solid looking cue and you're on a good track. How did you do the veneers? I don't see seams but I also see a little curve to them in a couple of spots so I'm not sure what I'm looking at, could just be distortion from the photo.
 

Bumlak

AzB Silver Member
Silver Member
So the spacing of the stitches always stays proportionate to the diameter, that's the nature of circles with a fixed number of points around the circumference.

I love the veneers on this cue and might have gone with slotted veneer rings here instead of metal, but this is a solid looking cue and you're on a good track. How did you do the veneers? I don't see seams but I also see a little curve to them in a couple of spots so I'm not sure what I'm looking at, could just be distortion from the photo.

I used an overlap method. Eventually I'll either buy or figure out how to build a 45 jig. The natural color veneers yellowed quite a bit when I sealed the cue but the colors came out well in the end. I have SO much to learn about veneers but Eric Crisp said at his shop 2hen I went to visit him something along the lines of "you're going to be scared of it until you just do it." First few forearms were horrible learning experiences and they're finally getting better.
 

Attachments

  • 20171130_233929.jpg
    20171130_233929.jpg
    181.4 KB · Views: 360
  • 20171130_233856.jpg
    20171130_233856.jpg
    201.6 KB · Views: 352

Michael Webb

AzB Silver Member
Silver Member
Great job on the veneers. I do both methods but the overlapped is by far my favorite. When I wanted mitered veneers, I went thru about a grand in veneers til I was happy. Got the miters tight but not as much fun as the overlapped. I like the ring work all the same size. Creates good registration. Is that a super glue finish? If so, very few pull that off nicely. You can get good results with West system 105/207 and a body filler applicator. Bonds well and doesn't pop as easy when you cut the wrap channel.
Very nice cue. Wood puzzles are fun.
 
Last edited:

Bumlak

AzB Silver Member
Silver Member
Mike,
Thanks for the feedback. It is a CA finish. Eric Crisp was kind enough to walk me through it and I've been pretty successful so far with it. Brent actually gave me some good advice on the wrap channel. I'm learning....slowly. I love classic cues but I wanted to see if I could pull off a 6 pointer. As Eric said, you're gonna be scared of it until you do it. Give me 3 to 5 years and maybe I'll be making some great cues. The community has been fantastic in giving advice and I've been so appreciative.
 

Michael Webb

AzB Silver Member
Silver Member
This is already a great cue. Don't be scared of anything. Embrace it, then define it. Great job.
 

cueman

AzB Gold Member
Gold Member
Silver Member
The cue looks great and the points look great. Areas to improve are ring alignment in the forearm. I suggest drawing a line down the wood on the lathe to give a point to line up the ring work. Also when you have points always glue the ring work to the forearm and not the handle to make sure it lines up with the points. It could be the pictures, but it looks like the wrap is a little above the finish and the finish bulges a little above the stainless joint. And like I said that could just be the pictures, but those are minor things that could be improved. Over all you have a great looking cue and I had to look closely to find those items. You are to be commended for asking for advice on how to improve. I look forward to seeing the next cue.
 

qbilder

slower than snails
Silver Member
Looks good! Glad my tips could help you a little with finishing. Some practice and experience with sanding/polishing and that finish will be as fine as any.
 
Top