My home-made ball polisher.

mattman said:
A "hole-saw" and yes, they make them in all sizes....they just attatch to the end of a drill.

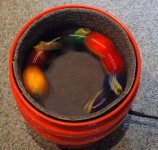
The only problem I see with this is I doubt the balls would spin well, if at all. Now, if you made it to where the bottom was stationary and the plywood spun, that would work. If you just like building and want it to look professional, this might be the ticket. Although, I think it's way over designed. There is nothing wrong with the balls touching each other and as already stated, they don't touch each other all that much anyway.

ok, then ill probably will go the easy way. :D
saves me work.

well it doesnt cost much to try it either. if its overdesign, just take it off.
 
mattman said:
Yeah...I think about any kind of glue would work, even if you have some elmers laying around. I think I hot glue gun would work better. It would probably be easier to remove to replace the carpet after time. Somebody on here used some spray adhesive.

Yeah....I think you will have to change it over time, but it might be a while. Like I stated above, you might consider something less permanant, so that you could easily replace the carpet.

I seen a picture of one on here that had one of those very large paper clamps holding the carpet to the bucket.

Mattman

One alternative is to use Industrial Velcro to hold the carpet to the inside of the bucket. I had a big box of it lying around the house and tried it. Damn if it didn't work really well. The velcro is 2 inches wide so it holds really tight and it is very easy to remove the carpet if I have to.

One problem that I am having is the Ryobi orbital buffer is near the bottom of the bucket and it is hitting the sides of the bucket when it is rotating. The rotation is stifled, sometimes to the point of not rotating at all. If I can redesign it to get the buffer closer to the top of the bucket, which is a little wider, it may work better.

You said you were using a smaller bucket for the top bucket. One question I have is: what is the width of the bucket?

When I go to Lowes of Home Depot all of the buckets are generally of the same size. I would like to get one about a half inch or so wider than is generally available.

Thanks for the help.

Stephen
 
thelanz said:
Mattman

You said you were using a smaller bucket for the top bucket. One question I have is: what is the width of the bucket?

Stephen
The width of the is probably like you said, about 1/2" wider that the buffer pad. It does rattle against the bucket while spinning, but it does not come close to slowing down. The circular handle sits flat on the bucket because of the hole cut in the bottom to accomadate the motor and that probably helps in stabalizing the unit. The use of velcro is a great idea, especially since you have some laying around.

Post some pics when you finish the project...I would like to see it.

Matt
 
mattman said:
Post some pics when you finish the project...I would like to see it.
Matt

I just finished it tonight although I want to get a smaller bucket for the lower bucket. Once I get it and put the appropriate holes in it I'll post pics and prices of all of the parts, velcro included.

This was a fun and useful project. Thanks for starting the tread.

Stephen
 
JimS said:
Maybe the polisher has a round handle on the top and this these straps tie it down so it doesn't spin?

Bingo!!......round handle orbital buffer (harbor freight), set in the bucket upside down hovering just above the bottom of the bucket secured with the tie straps. the buffer touching the bottom of the bucket is fine as long as when the tie straps are tightened the buffer is not using the bottom for a support. if so it might push the center/bottom of the bucket out and the bucket will not sit flat.

Polisher.gif
 
skins said:
Bingo!!......round handle orbital buffer (harbor freight), set in the bucket upside down hovering just above the bottom of the bucket secured with the tie straps. the buffer touching the bottom of the bucket is fine as long as when the tie straps are tightened the buffer is not using the bottom for a support. if so it might push the center/bottom of the bucket out and the bucket will not sit flat.

Polisher.gif
That looks just like the buffer I have, but made of a different plastic. In fact, they both look like they came from the same mold. The Ryobi is not a smooth plastic like that, it's like a rubber grip material....if I remember right. The local Harbor Freight was out of stock, so I had to pay $5 more...no big deal.
 
Laura here. Sir, I am really impressed with your creativity and what I call 'out of the box' thinking. It is not about mehanical skills, but when a
psychologist displays those characteristics, it is a 'breath of fresh air'

Why a psychologist? I worked for 13 years as a 'school psychologist'. I saw many psychologists including PHD ones. Rarely did I meet one that was not a 'pompous idiot'. They thought that PHD gave them 'power', yet it did not. While I think arrogant people are silly and foolish, they can be frustrating to deal with.

I know you spent years as a professor. Those 10+ teachers I had from elementary school through college will be always remembered. 10-1 you shaped many minds in a way that you will never know.

"there are some whom in crossing your path, change the fabric of your life forever"

blu
 
I just finished mine and gave it a try. Very similar design to the ones posted.
It seems to do a great job!!
What a great idea!!
 
Please post some pics.

I'm gonna give making one a try myself and would like to see how everyone else has done.

Thanks
 
Ball Cleaner Instructions - 1

I finally got some time to do a write up with photos of making the ball cleaner based on mattman's, stokerz and other designs.

The first thing that I would like to do is thank all of them for the work they did so the I could have an inexpensive ball cleaner for home use. It was a real service to the AZ community.

In order to get the photos to show in the thread postings I am posting individual replies with a photo and a description. This way everyone can see the how I put the cleaner together.

First I want to describe the parts and tools necessary to make the cleaner. The parts are:

1. Ryobi Buffer (Home Depot) 1 @ $24.97 = 24.97
2. 3.5 gallon buckets (Walmart) 2 @ 3.97 = 7.94
3. Power Switch (Home Depot) 1 @ 3.82 = 3.82
4. Compass (you have to have one around the house)
5. 1 1/2 inch hole cutter (Already had in my toolbox)
6. Mat Knife (Already had in my toolbox)
7. Spray Adhesive (Excess craft supplies)
8. Industrial Velcro (Excess lying around the house)
9. Scrap Commercial Carpet (Excess lying around the house)

Total out of pocket cost was 36.73 plus tax (about $40). It would be a little more if you had to purchase some carpet and Velcro.

The picture below is of the finished ball cleaner.

Enjoy!

Stephen
 

Attachments

  • 1-Ball-Cleaner.jpg
    1-Ball-Cleaner.jpg
    56.6 KB · Views: 3,311
Last edited:
Ball Cleaner Instructions - 2

First thing is the Ryobi buffer. I cut a piece of commercial carpet to the size of the buffer wheel. I chose commercial carpet because it is a little rougher/harder than some of the other carpets used (berber, shag, etc.) Also, the Diamond Ball Cleaners that I have seen look like they use commercial type carpet. The carpet is thinner which leaves a little extra room for clearance. I then used some spray adhesive to secure the commercial carpet to the buffer wheel.

One problem that I may have in the future is that removing the carpet from the wheel may be very difficult as it is held on pretty good. If I were to cut it off I might destroy the wheel. If I had to do it again I would use an adhesive that would pull apart more easily or use Vecro to attach it. I'll cross that bridge when I get to it.
 

Attachments

  • 2-Ryobi-Buffer.jpg
    2-Ryobi-Buffer.jpg
    50.2 KB · Views: 3,243
Ball Cleaner Instructions - 3

Next up is the upper/inside bucket. I cut a 4.5 inch hole in the bottom so that the Ryobi buffer would hang upside down. The hole size allows the buffer motor housing to fit snuggly eliminating the need for something to hold the buffer in place. I also used the 1.5 inch hole cutter to cut two holes, one on top of the other, for the power cord to fit through. I then used the mat knife to clean up the rough edges of the holes.

In addition, I cut a piece of industrial Velcro (2 inches wide) approximately 36 inches long to fit around the inside of the bucket. I used the harder loop part of the Velcro in this bucket.
 

Attachments

  • 3-Upper-Bucket.jpg
    3-Upper-Bucket.jpg
    37.7 KB · Views: 3,179
Last edited:
Ball Cleaner Instructions - 4

The lower/outside bucket is next. The only thing I did was cut a hole for the power cord similar to the one cut into the inside bucket. In fact, I cut them so that they would line up when the buckets were one inside the other. I then cut 4 air holes, 90 degrees apart for venting any heat from the buffer motor.
 

Attachments

  • 4-Lower-Bucket.jpg
    4-Lower-Bucket.jpg
    30.4 KB · Views: 3,236
Ball Cleaner Instructions - 5

This picture is of the buckets one inside the other with the power cord access holes lined up and one half of the Velcro laid into the bucket. You will need to cut a piece about 36 inches in length and cut the edge to fit.
 

Attachments

  • 5-Buckets-Together.jpg
    5-Buckets-Together.jpg
    39 KB · Views: 3,219
Ball Cleaner Instructions - 6

I then inserted the buffer upside down into the inside bucket with the power cord threaded through the lined up access holes. I snugged the motor housing into the 4.5 inch hole at the bottom of the inside bucket.
 

Attachments

  • 6-Buckets-With-Buffer.jpg
    6-Buckets-With-Buffer.jpg
    53 KB · Views: 3,176
Ball Cleaner Instructions - 7

Now it was time to cut a piece of carpet about 36 inches in length and around 4 inches wide to fit into the inside bucket above the buffer wheel. Here is a picture of the Velcro partially pulled back. Of course, you will have to cut the carpet and Velcro to the proper length. The 36 inch size I mentioned is a starting point. The actual Velcro and carpet are a little smaller so a little trial and error is in order here.
 

Attachments

  • 7-Carpet-Attached-With-Velcro.jpg
    7-Carpet-Attached-With-Velcro.jpg
    61.7 KB · Views: 3,257
Ball Cleaner Instructions - 8

The power on/off switch I used.
 

Attachments

  • 8-Power-Switch.jpg
    8-Power-Switch.jpg
    31.5 KB · Views: 3,199
Ball Cleaner Instructions - 9

The cleaner with balls in it before cleaning.
 

Attachments

  • 9-Balls-In-Cleaner.jpg
    9-Balls-In-Cleaner.jpg
    69.4 KB · Views: 3,199
Ball Cleaner Instructions - 10

The ball cleaner in action.

This thing was pretty easy to put together at a very reasonable price. Again, thanks for everyone's help with their designs.

Enjoy!!

Stephen
 

Attachments

  • 10-Balls-Being-Cleaned.jpg
    10-Balls-Being-Cleaned.jpg
    45.2 KB · Views: 3,164
Back
Top