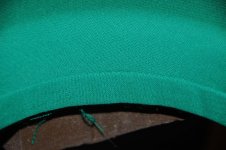
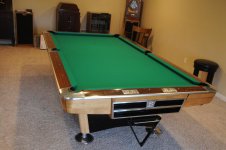
Well I finally finished my Gold Crown I do it yourself table re-cloth and rail cushions so I thought I would give my post project review. If you have a table at home and thought you might want to undertake this project these comments might help. First this is not easy to get right and mine is far from right but will be fine for my level of play. The mechanics earn their money as it would take experience to do a great job. If you take this on and screw up you can be out the cost of cloth and or cushions or maybe both if a pro does the job they never screw up. My time line went something like this. Break down table 3 to 4 hours ( I put it together so I did have a clue what to do). Remove old cushions and prepare surface mine took forever the previous idiot stapled all the cushions to the rails but it should only take an hour. Replace cushions add facings (very hard to do be careful) 2 to 3 hours. recover rails wow this was hard to get right and I can see it takes a few times to get this process down, corner rails are hard to get all the puckers out. Prepare slate, fill any gouges with bondo 1 to 2 hours. level slate, I found it best to do with the cloth off roll the ball over the slate slow rolls will tell you allot about how level you are or if you have access to machinist levels that might work ( a good level is 200 bucks). Cloth over state, very hard to get the side pockets right but take your time I had to redo mine about three times before I got it right, 2 to 3 hours. I want to thank all the mechanics who are so kind in giving out helpful information. Remember my project took me around 10 hours that I spread out over 4 days and I new how my table was constructed. Contact the professions on this site and they can probably put you in touch with someone you can trust. I would say my work was probably on par with a fair mechanic but not up to the standards of the best mechanics. I love the way my table plays now and am happy with my results.
You are using an out of date browser. It may not display this or other websites correctly.
You should upgrade or use an alternative browser.
You should upgrade or use an alternative browser.
new cloth and rails do it yourself project gold crown 1
- Thread starter ballafish
- Start date


fix my time line a little
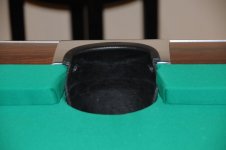
I forgot to add the 2 hours to replace the pockets and sides that when done by one person can be a real pain. I did find that using duck tape to hold the sides in place as you bolt them together did the trick. All of my times are estimates as I took 4 days to do this project off and on between other projects and golf.
I forgot to add the 2 hours to replace the pockets and sides that when done by one person can be a real pain. I did find that using duck tape to hold the sides in place as you bolt them together did the trick. All of my times are estimates as I took 4 days to do this project off and on between other projects and golf.
JC
Coos Cues
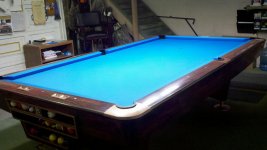
Just curious, I see you poot the foot spot on the had of the table. Did you do that intentionally? Do you move the foot spot from head to foot occasionally to help level out the wear lines?
Not critiquing, just curious!
Thanks!
I have a drop pocket GC table also and have a spot at each end in order to rotate ends and even the wear. IMO this is the one big advantage to drop pocket over ball return.
JC
I have a drop pocket GC table also and have a spot at each end in order to rotate ends and even the wear. IMO this is the one big advantage to drop pocket over ball return.
JC
Thanks. Makes sense. I see that is what the Kaiserman did on his table in the pic earlier in the thread.
Sorry for the thread derail. Nice job there to the OP.
spot at head
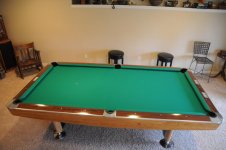
My reason to put the spot at the head was I have glass doors at the foot end. Nothing more as a matter of fact I didn't dawn on me at the time that I was putting the spot on the wrong end or I might of set the whole table up in reverse") a little late now!
a little late now!
My reason to put the spot at the head was I have glass doors at the foot end. Nothing more as a matter of fact I didn't dawn on me at the time that I was putting the spot on the wrong end or I might of set the whole table up in reverse
a little late now!Nice work. I like seeing the older GC's fixed up and customized a bit!