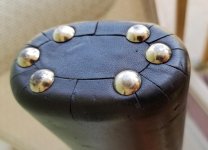
Refinishing a Fellini case?

That's tougher.

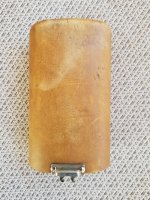
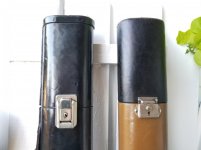
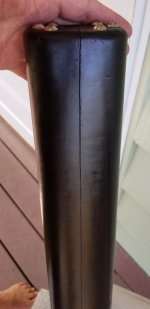
Replacing them is problematic. I have a couple spare new locks.

But....they can be rechromed/replated in place.

I have never done it, but there are plating kits you can buy for doing such things. I have read about them, watched some videos, etc, but never done it.

Apparently it can be done with the part in place, without removing it. It is something I have seen done in other kinds of restorations. I haven't looked at it in a couple years so I don't have any links. It can be done with chrome, brass nickel, etc...multiple kinds of plating of small parts without removing them.


.


What do you think doc?
How bad is it?
Will they live?

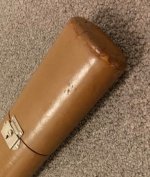
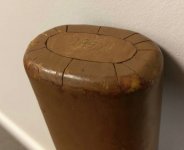
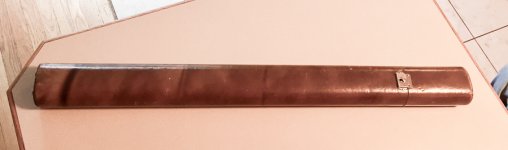
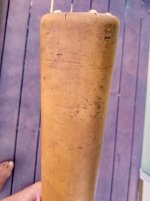
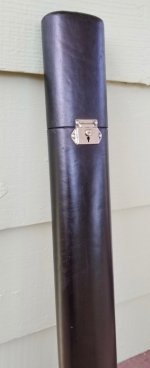
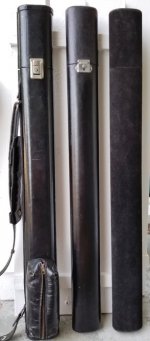
3 different lengths, 33, 34, 35" or so


002.jpg

005.jpg
 
Honestly, that's just character.

Nice cases. :smile:

The nicks and scuffs in the leather can be touched up nicely without refinishing at all. And the leather conditioned and protected.

Why would you not buff out and wax an old car?

I wouldn't bother with the locks beyond cleaning. I was investigating that whole replating thing because of this type of issue, that's how I know it can be done. In the end I say leave them alone, just clean the locks.

.
 
Lots of good information in this thread.

I too enjoyed reading the other one from years past. You wouldn't by chance have the images of the other case available? Wouud love to see it.

Thanks and luck on this current one.

Here you go. You can see where someone wrote in ink over some of the tooling. It was tooled very faintly with something like: "Presented to Mildred Babe Didrickson by Ruth McGinnes"
 

Attachments

  • DSC01231_3.jpg
    DSC01231_3.jpg
    179 KB · Views: 143
  • DSC01232_3.jpg
    DSC01232_3.jpg
    138.8 KB · Views: 146
  • DSC01233_3.jpg
    DSC01233_3.jpg
    108.9 KB · Views: 135
Thank you for reposting the images. I'm sure there are many here that haven't seen this case before.

Very nice!
 
You can buy NOS Fellini lock set on eBay.

Yes you can.

But replacing it can be a can of worms.

The lock part was installed before the inner tube was glued in. Taking the glued tubes apart will usually break them.

So replacing means using longer rivets to go through the double tube. And of course that means getting the lining loose, which needs to be done carefully. Finding the rivets with heads that match the original but longer is almost impossible.

But it can and has been done.

I know. I have done it.


.
 
Are those latches typically solid brass or a brass/copper plate over another metal or something else entirely?
 
Thank you for reposting the images. I'm sure there are many here that haven't seen this case before.

Very nice!

My pleasure. This cue and case were a real debaucle for me. The cue was a purpleheart Model 26 1/2 with finish so aged that the PH looked grey and ugly. I was dying to refinish it, knowing it would be incredible, but just couldn't mess with it. It also had a silk wrap that was dirty and grey - impossible to restore. With that going on, and the case such a mess, I sold it, hoping the next owner would figure out what to do.

In retrospect, since most of the wear and aging was almost certainly due to mishandling by owners after Babe Didrickson, I should have taken professional-quality 'before' pictures, then refinished the cue AND the case, having the leather tooling and refinish handled by an expert.

I can only imagine how great the two would have looked back in their original condition.
 
Are those latches typically solid brass or a brass/copper plate over another metal or something else entirely?

They seem to be a steel stamping with a thin chrome or brass plating.

They easily corrode and it is clearly rust like a carbon steel. Although they can dent and bend they are surprisingly strong for how thin they are, so they are a decent steel I think.

I think JB once called them "diary locks" as they were originally intended for a diary book. I have only seen them on one or two items outside pool cue cases and they were little boxes like for jewelry.

There is/was a version of them exactly the same that does not lock. I found them a few months ago. An online place has them NOS.


.
 
After looking at a beautiful Ron Thomas in the for sale area, I decided to go with a matte finish rather than glossy. I have only done the cap so far, and I'm glad I decided to do it that way, as I learned a few things, as this is a different animal from an old soft Hoppe Pro wrap. I'm very happy with how it turned out and will post details of the process once I have completed the bottom. If you haven't done this before, it's important to note that the de-glaze step only breaks up the glaze - it doesn't remove all the dye. With black dye this presents no issues.

Pictures: before (2), de-glazed (2), dyed, completed (next post-3)
 

Attachments

  • Before.jpg
    Before.jpg
    62.3 KB · Views: 149
  • Before-top.jpg
    Before-top.jpg
    51.4 KB · Views: 157
  • De-glaze.jpg
    De-glaze.jpg
    191.8 KB · Views: 167
  • De-glaze-top.jpg
    De-glaze-top.jpg
    112.2 KB · Views: 151
  • Dyed.jpg
    Dyed.jpg
    121.9 KB · Views: 163
Last edited:
Here are the 'completed' pics. You'll notice there are a few rough spots. I was not expecting this, as the conditioning steps brings up the soft leather wraps on Hoppe Pros, including eye sores, and then everything flattens out with dyeing. These hard finishes are quite different, but I wasn't expecting it to come out looking brand-new. The actual final finish is exactly what I was looking for, so no complaints.
 

Attachments

  • End-on Bottom.jpg
    End-on Bottom.jpg
    92.8 KB · Views: 150
  • End-top.jpg
    End-top.jpg
    158.5 KB · Views: 153
  • End-with George.jpg
    End-with George.jpg
    94.2 KB · Views: 150
Last edited:
Sorry this is off topic a bit, but it seems like a good place to mention that this Fellini case was stolen from a friend of mine earlier this summer in New England. So please keep an eye out for it -- thank you. Of course by the time you see it it will probably be a different color thanks to this thread lol.
 

Attachments

  • Fellini-1005.jpg
    Fellini-1005.jpg
    164.7 KB · Views: 142
  • Fellini-1003.jpg
    Fellini-1003.jpg
    70.9 KB · Views: 148
  • Fellini-1002.jpg
    Fellini-1002.jpg
    64.9 KB · Views: 144
Here are the 'completed' pics. You'll notice there are a few rough spots. I was not expecting this, as the conditioning steps brings up the soft leather wraps on Hoppe Pros, including eye sores, and then everything flattens out with dyeing. These hard finishes are quite different, but I wasn't expecting it to come out looking brand-new. The actual final finish is exactly what I was looking for, so no complaints.

Excellent!

I am kicking myself for not grabbing that case now. LOL!

:thumbup::thumbup:

The black will minimize the appearance of the seam gaps as well.


:thumbup::thumbup::thumbup:

.
 
Excellent!

I am kicking myself for not grabbing that case now. LOL!

:thumbup::thumbup:

The black will minimize the appearance of the seam gaps as well.


:thumbup::thumbup::thumbup:

.

Thanks. Don't kick yourself too hard - it's my first Fellini and in a good home with a good cue waiting for it.

I had to dye it twice - after the first time the brown showed in the seam so I had to flood the seam area. Good to figure this (and other things) out on the smaller cap. The matte-finish also hides the dings better than gloss would.

I am glad it has a good home. The fact you put so much time into it makes it even more your own.
 
Done. This thing was really a pain to strip - I did not realize how difficult it must be to get a finish that is that flat, hard and glossy. Fortunately I prefer the simpler finish that brings out the leather grain a bit more.

I went a bit further with stripping the bottom. I quickly ran out of Fiebing's deglazer and went to denatured alcohol, which works exactly the same:
 

Attachments

  • 20170903_115147 (1) 2.jpg
    20170903_115147 (1) 2.jpg
    148.7 KB · Views: 115
  • 20170903_115205 (1) 2.jpg
    20170903_115205 (1) 2.jpg
    128.5 KB · Views: 112
  • 20170903_115211 (1) 2.jpg
    20170903_115211 (1) 2.jpg
    112.5 KB · Views: 113
Finished case and its brothers:
 

Attachments

  • 20170903_144406 (1).jpg
    20170903_144406 (1).jpg
    42.9 KB · Views: 116
  • 20170903_144657 (1).jpg
    20170903_144657 (1).jpg
    105.5 KB · Views: 116
  • 20170903_144719 (1).jpg
    20170903_144719 (1).jpg
    136.3 KB · Views: 117
  • 20170903_145152 (1).jpg
    20170903_145152 (1).jpg
    58.9 KB · Views: 109
Back
Top