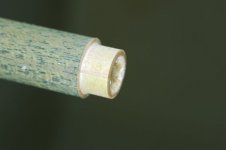
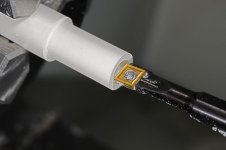
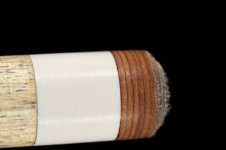
I have now got the Z2 shaft discussed earlier back again,
see http://forums.azbilliards.com/showthread.php?t=90346
We discussed Daves method and Dick recommended keeping the tenon in place even if it is very thin.
The shaft came to me today, and I have to start on it tomorrow morning to finnish it for the customer in a couple of hours so he could get it back (tomorrow).
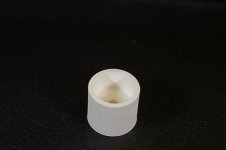
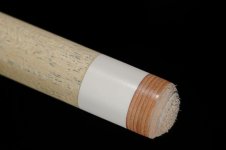
I have received titan plastic and I'm not sure which method to use, normal capped titan or a tenon made with Daves ideas. Also I'm not sure if I have the time to use epoxy (cure over night) so I'm considering the Loctite 454 (gel superglue) but I'm not sure if this is a wise decision.
EDIT: I also have elforyn but the owner would like to have it as close to the new shaft he had to buy, as possible. Elforyn feels very heavy, and I'm not sure how it compares to titan http://www.dzcues.com/ferrule_weight_comparison.htm
So I'm just trying to prepare my self for a early start tomorrow and making my mind up on what to do so I don't spend to much time judging what to do or how to.
Any one recommendations and feedback would be highly appreciated.
Kent
see http://forums.azbilliards.com/showthread.php?t=90346
We discussed Daves method and Dick recommended keeping the tenon in place even if it is very thin.
The shaft came to me today, and I have to start on it tomorrow morning to finnish it for the customer in a couple of hours so he could get it back (tomorrow).
I have received titan plastic and I'm not sure which method to use, normal capped titan or a tenon made with Daves ideas. Also I'm not sure if I have the time to use epoxy (cure over night) so I'm considering the Loctite 454 (gel superglue) but I'm not sure if this is a wise decision.
EDIT: I also have elforyn but the owner would like to have it as close to the new shaft he had to buy, as possible. Elforyn feels very heavy, and I'm not sure how it compares to titan http://www.dzcues.com/ferrule_weight_comparison.htm
So I'm just trying to prepare my self for a early start tomorrow and making my mind up on what to do so I don't spend to much time judging what to do or how to.
Any one recommendations and feedback would be highly appreciated.
Kent
Last edited:
")