Trouble removing a shaft insert

cueguy

Just a repair guy
Silver Member
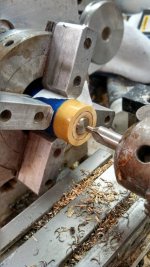
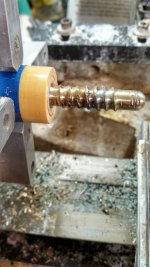
Hello all... I am trying to remove an insert. I am using a solder gun and letting it sit in the whole for a while. It should be long enough - the outside of the shaft is very warm. But I can't get a hold of the insert to unscrew it... Not even sure if it is hot enough to liquify the glue. I would think so, though...
Ideas?
Thanks!
 
I use a screw extractor and a torch. It will destroy the insert, but usually it's already screwed up by the time it gets to me...
I put the extractor into the insert and snug it tight, then use a torch on the end of the extractor until redhot, then hold the shaft with the joint down for about 1 minute then using vicegrips on the HOT extractor I give a firm twist to unscrew it...if doesn't move...repeat above until it gives.
Dave
 
Great idea!

I use a screw extractor and a torch. It will destroy the insert, but usually it's already screwed up by the time it gets to me...
I put the extractor into the insert and snug it tight, then use a torch on the end of the extractor until redhot, then hold the shaft with the joint down for about 1 minute then using vicegrips on the HOT extractor I give a firm twist to unscrew it...if doesn't move...repeat above until it gives.
Dave

I didn't even think about extractors - that seems so easy ;-)

Do you have any similar tips for removing pins from the butt?

Thanks!
 
I didn't even think about extractors - that seems so easy ;-)

Do you have any similar tips for removing pins from the butt?

Thanks!
I do pins pretty much the same, without extractors. Torch on the tip of pin with pin higher than butt, then once red hot, take away torch and put the pin end down and let the heat rise up the pin. Vicegrips then come out about a minute later and give it a spin. I also use a rubber matt to grip the cue butt with, it gives a better grip on the butt when breaking the pin loose from the glue....that's it, that's all I got.
There was someone on here, Maybe Chris Byrne, that had a electromagnetic thingy with a halo that heated the pin thru electromagnetic waves, but it was buccu bucks for the setup.
Dave
 
I do pretty much the same as Dave on removing pins. I use one of the pencil torches I got from Harbor Freight and just heat the tip of the pin until it is glowing, which is also about the same time you'll smell the wood start to burn, clamp on some vise grips, and it just spins right on out. I've removed connecting pins AND A-joint pins using that method several different times now with great success.
 
I do pretty much the same as Dave on removing pins. I use one of the pencil torches I got from Harbor Freight and just heat the tip of the pin until it is glowing, which is also about the same time you'll smell the wood start to burn, clamp on some vise grips, and it just spins right on out. I've removed connecting pins AND A-joint pins using that method several different times now with great success.

Excellent advice... I have had some where I put the pin in a vise and turn the butt to get them out. That way I could use both hands to grip and turn the butt. :thumbup:
 
For inserts I use a boring bar, plug the hole and start fresh. For joint pins I have carbide milling bits that chew through them easily. I used to do the torch thing but I find, for me, that boring or drilling them out is less time.MHO
 
for pins, putting the cue through the headstock of the lathe works well. then you have your hands free to remove the pin with heat, vice grips, etc
 
Insert Removal.

If it is 5/16-18 go get two nuts and a bolt. Screw it into the insert and then lock one nut against the insert. Then lock the other nut tight up against that one as jam nuts. Lock the head of the bolt in a bench vise. Heat the bolt with a torch and then unscrew the insert right out.

If it is 5/16-14 then tap out two of the 5/6-18 nuts with your 5/16-14 tap. Use a joint screw instead of the bolt and follow the same process.

To remove a joint pin lock in the vise and heat the pin red hot with the torch and unscrew it. The faster it gets hot the better. So I don't advise using a soldering iron. Then blow air into it to cool it back down.
 
Last edited:
Is there a good way to get the pins out so you can save them in a bind? Putting a flame right on them discolors them. I need to take one out and clean it up and reinstall. Any ideas?

Sent from my XT901 using Tapatalk
 
Stainless steel will discolor from hi-heat/open-flame but can be easily polished back to a nice shine.
Buffing wheel works well with compound.

Double nutting the pin for removal does the least damage to the pin.
If it's not a thrd pitch that you have nuts for or otherwise can't make the nuts,
vise-grips on the very end of the pin will work.
You'll have to clean-up the end of the pin and will likely lose 1/4" in length.

Another method is to heat the pin to the point of removal
and clamp the pin in a vise equipped with 'soft-jaws', usually aluminum.

To hasten the breakdown of the epoxy, turn the cue in both directions.
Once movement is detected quickly remove the pin and flood the hole with cool air.

HTHs, KJ
 
Thanks KJ....I will try it tomorrow on my personal cue and see if I am successful. I have a G-10 ready to go in it's place.

Sent from my XT901 using Tapatalk
 
For odd threads such as a radial or SW as long as you have a tap, it is easy to make nuts. Get some hexagonal brass rod. chuck it up, bore the appropriate hole for the tap then slowly tap the hole deep enough to cut off what will be the nuts. You can tap the nuts after cutting them off and you can vary the thickness of the nuts as desired. I made them for 3/8 X10, SW, radial, 5/16X14.
 
Great idea Paul... if there are any stores open today I will try this.

Sent from my XT901 using Tapatalk
 
Allen,
. . . . . never mind - should have read the whole thread to begin with :(

Gary
 
Last edited:
Great Advice!!!!

KJ and Paul always been very helpful with great advice:thumbup:

HAPPY NEW YEAR!!!!


:clapping::clapping::clapping:
Stainless steel will discolor from hi-heat/open-flame but can be easily polished back to a nice shine.
Buffing wheel works well with compound.

Double nutting the pin for removal does the least damage to the pin.
If it's not a thrd pitch that you have nuts for or otherwise can't make the nuts,
vise-grips on the very end of the pin will work.
You'll have to clean-up the end of the pin and will likely lose 1/4" in length.

Another method is to heat the pin to the point of removal
and clamp the pin in a vise equipped with 'soft-jaws', usually aluminum.

To hasten the breakdown of the epoxy, turn the cue in both directions.
Once movement is detected quickly remove the pin and flood the hole with cool air.

HTHs, KJ


:clapping::clapping::clapping:
For odd threads such as a radial or SW as long as you have a tap, it is easy to make nuts. Get some hexagonal brass rod. chuck it up, bore the appropriate hole for the tap then slowly tap the hole deep enough to cut off what will be the nuts. You can tap the nuts after cutting them off and you can vary the thickness of the nuts as desired. I made them for 3/8 X10, SW, radial, 5/16X14.
 
So I had lots of fun removing this one. :( I tried heating it with the brass jam nuts that I made. This actually was a great idea and I would urge anyone to use this method in the future. Unfortunately I took the advice of fellow members and used a better epoxy. The epoxy didn't break down even after 3 heatings and finally clamping the pin in a vise. So I ended up cutting it out and inserting it.

Sent from my XT901 using Tapatalk
 

Attachments

  • uploadfromtaptalk1388777618743.jpg
    uploadfromtaptalk1388777618743.jpg
    62.2 KB · Views: 169
  • uploadfromtaptalk1388777631880.jpg
    uploadfromtaptalk1388777631880.jpg
    59 KB · Views: 172
  • uploadfromtaptalk1388777648114.jpg
    uploadfromtaptalk1388777648114.jpg
    67.5 KB · Views: 207
  • uploadfromtaptalk1388777705836.jpg
    uploadfromtaptalk1388777705836.jpg
    33.6 KB · Views: 170
  • uploadfromtaptalk1388777735395.jpg
    uploadfromtaptalk1388777735395.jpg
    48.8 KB · Views: 177
A couple of observations, maybe you can use them, maybe you can't.
They're only my opinions anyway.

The pin looks no where near as discolored as it should/could be.
Meaning, you didn't get it hot enough. What heat source are you using?

You are correct to be concerned about open-flames and exposed wood, joint collars
and finish damage but there's a way to address those concerns.
Fab an aluminum disc about 1/8" thick by 2-1/2 to 3" in diameter.
Drill a 3/8+ hole in the center. This will be a heat shield that slides over the pin.
It will deflect flames away from the joint and components of the cue.
I also suggest a stream of cool air on the joint area while you're heating the pin.
Now you can apply some serious heat to the pin while protecting the cue.
I heat a stainless pin to cherry-red for most of it's exposed length.

Your first indication that she's ready (I know there's a joke in there) is that
there will be a small wiff of epoxy gas escaping from around the pin, most times.
I say most times because I've loosened pins and not seen the gas.

Your phenolic plug, good choice in mtrl. but the lateral rings aren't needed.
The cut finish of phenolic is sufficient for proper bonding.
You can relieve the trapped pressure in the hole by drilling the length of the plug
with a 1/4" drill prior to installation. This makes the longitude sluts unnecessary as
well but they're not going to hurt. Since your plug isn't threaded anywhere the long
slots will act as a key-way for the epoxy to lock into.

When machining stainless, carbide tooling is your friend. A very good friend.

I'll bet you learned quite a bit from your experience.

HTHs, KJ
 
Back
Top