pooling around
Registered
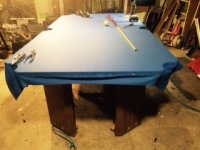
I'm on a budget and I wanted a pool table. I found a Brunswick Ranchero for free on Craigslist. This model has been (not without reason) derisively reviewed in around this site; however, it does have a slate top. Before I agreed to take the table home, I broke a rack and all the balls slowly migrated to one side of the table- it was badly out of level! The felt was intact and the returns worked okay, so for the money, I took it home.
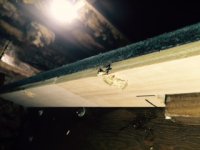
The first project to tackle was the lack of sturdiness in the legs. I used construction adhesive on pressure treated wood through-bolted onto the legs- big change in stiffness! Then I mounted two 3/8" carriage bolts (heads toward the floor) with nuts/washers on either side (see picture of a leg upside down). This gave me infinite adjustment over a range of about 1.5"- more than enough to level things in my basement. I set up the table with the felt and got to playing. The felt was slow, glacially slow. I decided to upgrade to new felt and replace the dead bumpers (U56) at the same time. Since I don't have good ventilation, I used Titebond Neoprene Plus contact adhesive. It doesn't dry immediately, but I also didn't get high on the fumes. Several coats on the rails to seal the particle board on on the cushions and viola! the cushions were attached and my brain remained intact.
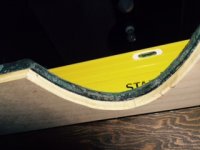
Once the rails were done, I moved on to the felt. The ranchero slate does not have a backerboard, so the original intention was to use Super 77 or similar adhesive and attach the felt that way. I did this the first time, in the summer with ventilation and just about fainted- nasty stuff. Additionally, I couldn't also play with the tension much. This time around, I used the Titebond to attach pieces of birch plywood to the underside of the slate. I needed to drill out the rail bolt holes and then countersink the wood so that the rail bolts would fit the new config. Stapling was simple and straightforward and all went together well. I used Mercury 3045 Championship felt.
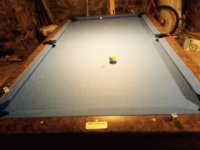
I used a 7.5' plate level to check for straightness of the slate and found a significant bow in the middle of the table. Initially, I was going to make a truss, but settled on the much simpler method of two additional legs in the middle of the table with the same style of foot adjuster. After the bolt heads contacted the floor, two or three turns of the bolt made the table dead flat. The table was level from the previous summer install, but I wanted to double check things after the new legs. I set up my rotary laser so that the beam just grazed the top of the cue ball, splitting the beam and leaving a much thinner laser line that showed up on a piece of paper behind the ball. Turned out that one end of the table was about 1/32" low, which was corrected by a half turn of the 3/8" -18 carriage bolts on the feet.
The above improvements coupled with new bumpers and felt have made a world of difference in how this table plays. While I would love a sweet 9' table, this little rig is doing a fine job for now!
The first project to tackle was the lack of sturdiness in the legs. I used construction adhesive on pressure treated wood through-bolted onto the legs- big change in stiffness! Then I mounted two 3/8" carriage bolts (heads toward the floor) with nuts/washers on either side (see picture of a leg upside down). This gave me infinite adjustment over a range of about 1.5"- more than enough to level things in my basement. I set up the table with the felt and got to playing. The felt was slow, glacially slow. I decided to upgrade to new felt and replace the dead bumpers (U56) at the same time. Since I don't have good ventilation, I used Titebond Neoprene Plus contact adhesive. It doesn't dry immediately, but I also didn't get high on the fumes. Several coats on the rails to seal the particle board on on the cushions and viola! the cushions were attached and my brain remained intact.
Once the rails were done, I moved on to the felt. The ranchero slate does not have a backerboard, so the original intention was to use Super 77 or similar adhesive and attach the felt that way. I did this the first time, in the summer with ventilation and just about fainted- nasty stuff. Additionally, I couldn't also play with the tension much. This time around, I used the Titebond to attach pieces of birch plywood to the underside of the slate. I needed to drill out the rail bolt holes and then countersink the wood so that the rail bolts would fit the new config. Stapling was simple and straightforward and all went together well. I used Mercury 3045 Championship felt.
I used a 7.5' plate level to check for straightness of the slate and found a significant bow in the middle of the table. Initially, I was going to make a truss, but settled on the much simpler method of two additional legs in the middle of the table with the same style of foot adjuster. After the bolt heads contacted the floor, two or three turns of the bolt made the table dead flat. The table was level from the previous summer install, but I wanted to double check things after the new legs. I set up my rotary laser so that the beam just grazed the top of the cue ball, splitting the beam and leaving a much thinner laser line that showed up on a piece of paper behind the ball. Turned out that one end of the table was about 1/32" low, which was corrected by a half turn of the 3/8" -18 carriage bolts on the feet.
The above improvements coupled with new bumpers and felt have made a world of difference in how this table plays. While I would love a sweet 9' table, this little rig is doing a fine job for now!


") .
.