You are using an out of date browser. It may not display this or other websites correctly.
You should upgrade or use an alternative browser.
You should upgrade or use an alternative browser.
My Titlist Project...
- Thread starter Cue Guru
- Start date


I have some titlists that are wrapless with an added buttsleeve similar to yours. One is a Toeboy and one is a Hunter Classics. I really enjoy the look of a wrapless titlist with a butt sleeve added. There is just so much you can do with that type of thing.
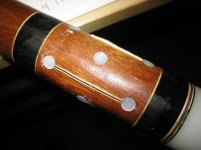
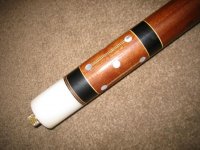
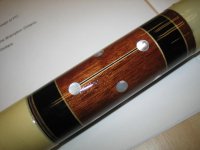
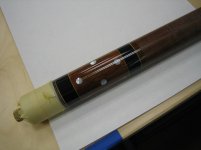
Now, to your cue....I think you have a great looking blank to work with and the butt sleeve with rings looks great! It would have been fine without the inlays, but I do like barbelss! So, with that said, I think you have done a great job with this cue!
I may have missed this, but is this going to be your new player or is it sold? PM me if you are interested in selling it!
It takes some king size balls to cut into such a nice cue. Inlays look great, thanks for posting!
Larry
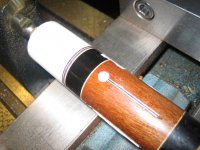
Well, if you had a look at what I started with, I think you'd agree that I salvaged a potential piece of kindling...
") It really wasn't a 'sacrifice' at all- and I'll have a nice cue when I'm done (hopefully).
It really wasn't a 'sacrifice' at all- and I'll have a nice cue when I'm done (hopefully).I have some titlists that are wrapless with an added buttsleeve similar to yours. One is a Toeboy and one is a Hunter Classics. I really enjoy the look of a wrapless titlist with a butt sleeve added. There is just so much you can do with that type of thing.
Now, to your cue....I think you have a great looking blank to work with and the butt sleeve with rings looks great! It would have been fine without the inlays, but I do like barbelss! So, with that said, I think you have done a great job with this cue!
I may have missed this, but is this going to be your new player or is it sold? PM me if you are interested in selling it!
I make cues that I like, for me. I had not thought about selling it.
Plus, I would not sell anything before it was completed and tested fully by me. This is something I have thought about, and I think I will make cues the way I like them, finish them, play with them, and if someone (like you for example) happens to like what I have constructed, maybe they'd want to buy it.
BUT, because of so many things that we all think we control, but really don't, I am VERY hesitant to make cues 'to order' at this time, or the foreseeable future.
Also note this cue is the third I have ever made, so it is FAR from perfect in my opinion. I have a way to go before I am in league with the craftsmen I look up to as well.
But, to actually answer the question, it was not made for any 'customer', is not 'spoken for' and will indeed see a great deal of table time from me (and therefore could quite possibly replace my current player- my first cue). Note the shafts are both made from very old Tru-Balance cues as well- this thing is a true resurrection of some old, neglected Brunswick cues, and hopefully it will play well, because that is my first and foremost concern!
Thanks for the interest- that is a strong vote of confidence in my abilities! If I do offer this for sale at some point, I will certainly keep you in mind, as you are the first to offer to purchase one of my cues.
Keep watching, as I have to block and buff, and then do (my first) leather wrap...
dave sutton
Banned
nice project.
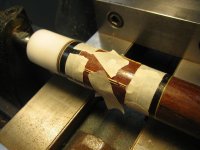
an idea for the veneer rings is instead or reenacting the lizzie borden murders simply glue the square veneers to the round ring and chuck it up in the lathe drill and bore to size. simple
an idea for the veneer rings is instead or reenacting the lizzie borden murders simply glue the square veneers to the round ring and chuck it up in the lathe drill and bore to size. simple
dave sutton
Banned
But I LIKE the Lizzie Borden murders!
yea.. i know... they interest me too but i like to focus on the build lol :grin::grin::wink:

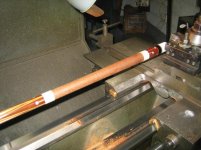
Here's some more photos...
Finish as-sprayed, and then blocked and buffed. It is VERY thin (anorexic thin actually) so I might have to put more clear on after I play with it for a while...
Anyway, here you go!
Finish as-sprayed, and then blocked and buffed. It is VERY thin (anorexic thin actually) so I might have to put more clear on after I play with it for a while...
Anyway, here you go!
Attachments

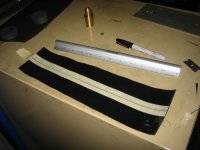
Well, it was a busy evening Friday, but I made a lot of progress.
I installed my first leather wrap, and it is not the worst one I have ever seen, so that's nice...
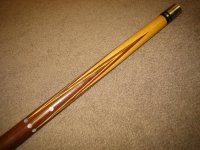
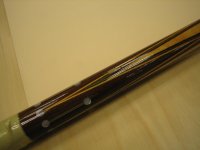
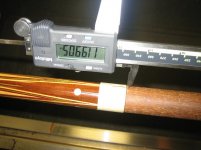
I also installed the pin, so this is ready to play! I have to finish the shafts, but my purple heart cue shaft fits, so we can do a side-by side of the two cues.
Final weight will be 19.9-20 oz; balance is about 18.5 from the butt. Note this is a 59" cue with a 1.3" diameter butt...
Enjoy the pics!
I installed my first leather wrap, and it is not the worst one I have ever seen, so that's nice...
I also installed the pin, so this is ready to play! I have to finish the shafts, but my purple heart cue shaft fits, so we can do a side-by side of the two cues.
Final weight will be 19.9-20 oz; balance is about 18.5 from the butt. Note this is a 59" cue with a 1.3" diameter butt...
Enjoy the pics!
Attachments


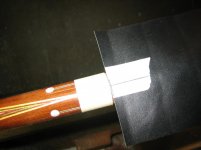


Not much to show from the joint pin... Too much working and not much photographing...
What I do is bore the pocket 0.003 inch over the pilot diameter (so the pocket is .503) with about 0.050 additional depth.
then, when I set the pin, I use the insert to ensure the pin is held perfectly on center as the epoxy sets. Needless to say, it worked perfectly for me!:wink:
What I do is bore the pocket 0.003 inch over the pilot diameter (so the pocket is .503) with about 0.050 additional depth.
then, when I set the pin, I use the insert to ensure the pin is held perfectly on center as the epoxy sets. Needless to say, it worked perfectly for me!:wink:
