Carpet Feet for GC - I built my own

iusedtoberich

AzB Silver Member
Silver Member
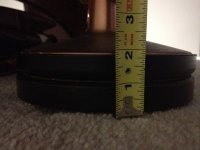
Glen has posted pictures of GC carpet feet before. These are designed to not damage the carpet from the weight of the table. This is especially important to me, as I'm installing the table in an apartment, and I don't want to be charged for damaging the carpet.

I decided to build my own for a GC4 I have coming very soon. I thought you guys would enjoy the pictures. I'm not a mechanic, just a guy with a woodworking background...
IMG_3036.jpg
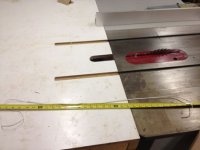
I measured the circumference with a length of wire and a magic marker on an existing GC4 table at the local pool hall.
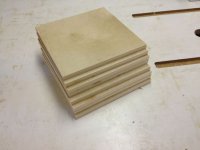

IMG_3037.jpg
Qty 8: 1/2" nominal plywood cut to oversize squares
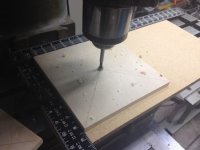
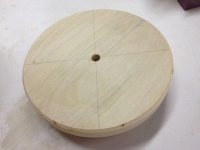
IMG_3041.jpg
1/2" hole drilled in center for future work indexing purposes.
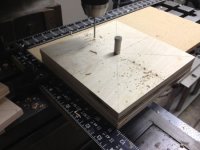
IMG_3042.jpg
1/2" pin aligns all work pieces. Nail holes gang drilled through all 4 boards.
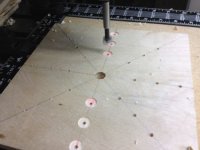
IMG_3043.jpg
Counterbore for nail heads made with forstner bit

.... Continued next post....
 
Last edited:
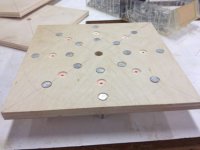
IMG_3045.jpg
Here you can see the counterbore allows the nail heads to be flush, so that they don't cause a gap when the two boards are sandwiched together. I decided not to use the center row of nails. I put them in at first, and decided there were too many nails. I also noticed that the roofing nail length tolerance was not great. They ranged +/- 0.050". THis was very obvious when I dry fitted one set. So I measured all the nail lengths, and grouped the like ones together on the same boards. (I'm quite anal, lol)

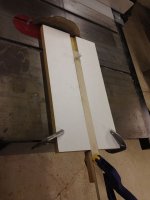
IMG_3047.jpg
The boards are screwed and clamped together. The screws don't really do much (they are drywall screws, and plywood doesn't really hold screws well). They are more for clamping pressure while the glue sets. In fact, I put the screws in the corners where they will be cut off.

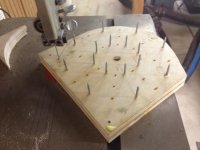
IMG_3052.jpg
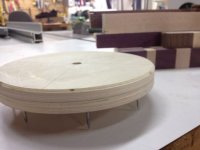
Cut to a circle on the bandsaw, about 1/16" oversize.

IMG_3051.jpg
This is an adjustable circle sanding jig. I don't have a pic with the feet on it, but the feet would go on the pin, and you spin the feet by hand as the disc sands them perfectly round. This works jam up. Funny, I couldn't find this jig that I made almost 20 years ago for a project at the time (I have all my jigs....), so I was forced to make one to complete this project.

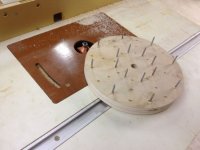
IMG_3054.jpg
Here on the router table I'm machining a 45 degree chamfer into the top edge of the feet. This will match a chamfer on the bottom of the GC4 feet adjusters, for a cleaner appearance.

.... Continued next post....
 
Last edited:
IMG_3055.jpg

IMG_3056.jpg
Here you can see a better view of the chamfer and how nicely the two boards came together because of the counterbore. I used birch plywood from Home Depot ($14 for the whole project). Birch plywood has very few voids and is higher quality than construction grade plywood.

IMG_3057.jpg
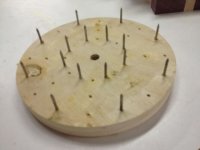
Here you can see the bottom of the feet, and the nails sticking out. I messed up earlier, and had to shift the nail holes. I had a slight clearance fit between the holes and the nails, so they just dropped in. I also had the counterbore slightly deeper than the thickness of the head. When I dry fit the boards and tested on my carpet, the whole thing wobbled because the nails were moving. So I decided I needed to make the fit a tight interference fit, and to make the counterbore the exact depth of the nail head thickness. That's why a second set of unused nail holes are there. The improved fit resulted in a much more solid test on my carpet.

Next, I have to paint the feet black. I will see how they look painted. However, if I'm not happy, I'll smear the sides with some putty and paint them again. I don't know how well the exposed plywood edges will look until I try. I looked for iron-on melamine edge banding to apply, but I only found it in white, not black, and it was not wide enough anyway.

I'll update the thread once I have them painted, and the table installed.

Thanks for looking:)
 
Last edited:
IMG_3250 - Version 2.jpg
Before painting, I put some wood putty in any voids on the edge of the plywood. I used spray paint from HD. A few coats of grey primer, then a few coats of black topcoat, with sanding at 120 grit between the early coats. Only the edge shows, so I did not waste time or paint on the top surface. Plus, I was painting inside my apartment in front of the screen window, so the less spraying the better! lol.

One mistake I made is I didn't mask the nails while paining. The overspray coated the nails. I had to scrape and sand the paint off of all of them for two reasons: 1. I was afraid the paint would transfer to the carpet. Wiping a cloth on the cured paint on the nails did in fact pull paint onto the cloth.
2. The paint made the point of the nails blunt, and I was afraid they would not pierce the carpet well.

IMG_3273.jpg
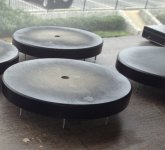
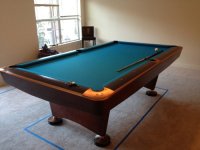
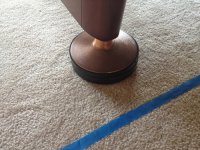
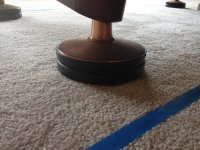
Installed table. The installers were a bit apprehensive about using these feet, and that was understandable. I assured them that their standard table level warranty would not apply, and it would be at my risk and cost if the table went out of level and I had to call them back, or any other problems arose from the use of the carpet feet.

IMG_3304.jpg
Closeup.

IMG_3305.jpg
Here you can see the affect of the chamfer I added.

Closing thoughts:
I have had the table for over a month now. It rolls flawlessly. It has not settled one bit. Bumping into the table feels about as sturdy as any GC. So far, no detrimental affects of the carpet feet.

The nails seem to have "pushed" the carpet slightly, before piercing it. If I put my head down on the floor, I can see some small gaps under the feet. If I were to do it again, I'd probably try to have the nails protruding about 1/4" less.

Thanks again to Glen (realkingcobra) for the idea and letting the forum know about it.
 
Last edited:
The table is now installed. I have updated the earlier posts with the installed pictures, and my experience thus far with the feet.
 
Those look great. I'm just wondering if the weight of the table would eventually push the nails into the wood, in effect nailing the pads to the floor?
 
Those look great. I'm just wondering if the weight of the table would eventually push the nails into the wood, in effect nailing the pads to the floor?
No chance, weight devided by all the nails used to keep the table up off the carpet is only a few pounds per nail actually:grin:
 
Those look great!!! I run a company called Houston Pool Table Movers and have been interested in making those myself. Wood working is my other hobby after pool for me but never got around to making them. Nice to see yours in action there.

Im with KingCobra on the nails pushing into the floor, that shouldn't happen. If, by chance the nails do, a fix would be to cut the nails point off.

Anyway, looks very nice and good job!!:thumbup:
 
Back
Top