JC
Coos Cues
After getting my feet wet with the Blud beast for a year or so I have decided to build my own and improve many of the shortcomings.
Linear rails for accuracy
Move the lead screw to pull from the tail stock end so it's not getting blasted with chips and clogging up all the time.
Open design end to end for efficient dust collection.
A stepper motor and lead screw between the head and tail blocks for adjusting span between centers. Will control this with the Z axis on mach. No more unbolting anything to set up for different lengths.
Increased wood capacity at the limits. Will be able to turn stock from practically zero to 34 inches. Blud's was barely able to reach a 30 inch span and no hope for short stuff.
X axis on saw pinion height adjust instead of a taper bar. Did this to my blud and it worked great. This Delta saw has .002 backlash which mach can manage easily.
Home switch on X axis for blade height for repeatability.
Tail stock will be spring loaded but will not rotate. A dab of lube in the wood seems to work more accurately.
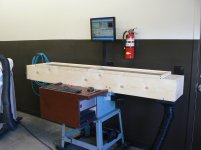
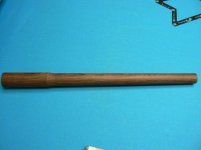
That's what I have for now and here's a couple pics of where I'm at. Will update as the project progresses.
Thanks for looking
JC
![001 [800x600].JPG 001 [800x600].JPG](https://forums.azbilliards.com/data/attachments/313/313046-5e867c395d87c732c5e1dd24b3bbcf0b.jpg?hash=XoZ8OV2Hxz)
![002 [800x600].JPG 002 [800x600].JPG](https://forums.azbilliards.com/data/attachments/313/313047-ae72478471d671fcdb41b493f78f0474.jpg?hash=rnJHhHHWcf)
![003 [800x600].JPG 003 [800x600].JPG](https://forums.azbilliards.com/data/attachments/313/313048-824128908a635d410e7c71a87e961786.jpg?hash=gkEokIpjXU)
![004 [800x600].JPG 004 [800x600].JPG](https://forums.azbilliards.com/data/attachments/313/313049-193cd97f9bd18dd2de2d388f8f1cf23e.jpg?hash=GTzZf5vRjd)
![006 [800x600].JPG 006 [800x600].JPG](https://forums.azbilliards.com/data/attachments/314/314303-746be9717700300df29cb62009b7d642.jpg?hash=dGvpcXcAMA)
![003 [800x600].JPG 003 [800x600].JPG](https://forums.azbilliards.com/data/attachments/314/314304-9c4f76abeec5ecfa724325883ca515fe.jpg?hash=nE92q-7F7P)
![004 [800x600].JPG 004 [800x600].JPG](https://forums.azbilliards.com/data/attachments/314/314305-a0808e013005ecfbb461a9d23694e1de.jpg?hash=oICOATAF7P)
![005 [800x600].JPG 005 [800x600].JPG](https://forums.azbilliards.com/data/attachments/314/314306-965c0a84399e68a738bae729be623495.jpg?hash=llwKhDmeaK)
![007 [800x600].JPG 007 [800x600].JPG](https://forums.azbilliards.com/data/attachments/314/314307-04789793334441d2fb80fe9059434ae0.jpg?hash=BHiXkzNEQd)
![001 [800x600].JPG 001 [800x600].JPG](https://forums.azbilliards.com/data/attachments/314/314578-dd1b7fe40761f99c071cf330773b086d.jpg?hash=3Rt_5Adh-Z)
![002 [800x600].JPG 002 [800x600].JPG](https://forums.azbilliards.com/data/attachments/314/314579-be1cdcbf6035932a59ea00a79d6c7570.jpg?hash=vhzcv2A1ky)
![004 [800x600].JPG 004 [800x600].JPG](https://forums.azbilliards.com/data/attachments/314/314580-59a18d0937202c5fd4b0d37ea9346d90.jpg?hash=WaGNCTcgLF)
![005 [800x600].JPG 005 [800x600].JPG](https://forums.azbilliards.com/data/attachments/314/314581-d25254e6d2284b697651541e9c59e92f.jpg?hash=0lJU5tIoS2)
![006 [800x600].JPG 006 [800x600].JPG](https://forums.azbilliards.com/data/attachments/314/314577-909db852c1b02bd61a8062a92d578745.jpg?hash=kJ24UsGwK9)

