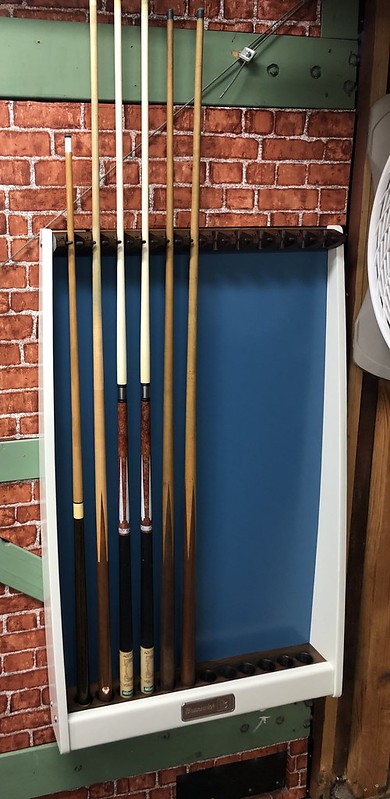
Brunswick Gold Crown Cue Rack Restoration

I finally dug out the end pieces. I'm fairly certain they were glued in at one point. Coat hanger did the trick but it took a while.
 
I finally dug out the end pieces. I'm fairly certain they were glued in at one point. Coat hanger did the trick but it took a while.

I see you're back to honing the mad skills again ! Good job !

Most likely the screws have pushed a burr into the cross hole.
You could use a metal bore brush to clean the cross holes, just bend the shaft 90° leaving the length you need for the depth of the holes.
Or pull a boresnake thru the cross holes if it will fit between the wood protrusions that hold the cue.
Last resort...or first, pick the putty out of the end, then use a cable installers drill bit to clear the holes.

As far as lubricant, you might consider using bar soap. It works well with wood without wicking. Say that 3 times fast, lol.

Good luck.

Thanks for the tips! Putty? Mine seems to be solid wood at the ends although I'm not sure how they would have drilled all those holes. Perhaps it is doweled at the ends?

I'd rather not get that deep in the woods with this project. I'm going to give the dowel/sandpaper method a go.
 
Thanks for the tips! Putty? Mine seems to be solid wood at the ends although I'm not sure how they would have drilled all those holes. Perhaps it is doweled at the ends?

I'd rather not get that deep in the woods with this project. I'm going to give the dowel/sandpaper method a go.

If you need to knock down the OD of the rubber pegs a little a cordless drill and a piece of 80 grit sandpaper works well.
 
Made some progress today using my father in law's machinery. We made quick work of the sanding. All that's left are the holes for the cue butts in the bottom portion. I might be able to stain tomorrow. I plan on going with Brazilian Rosewood topped with semi gloss poly.

49671595487_a110a7062b_c.jpg


49670756678_abc2f9fb6e_c.jpg


49671297236_7afc795c6c_c.jpg


49671587552_c9fd9ed0b0_c.jpg


49670755658_9393560fbd_c.jpg


The ends are in fact doweled.
49670756818_0e62082b70_c.jpg
 
Made some progress today using my father in law's machinery. We made quick work of the sanding. All that's left are the holes for the cue butts in the bottom portion. I might be able to stain tomorrow. I plan on going with Brazilian Rosewood topped with semi gloss poly.

The ends are in fact doweled.
49670756818_0e62082b70_c.jpg

Good call, it does make more sense that it would be doweled rather then putty.
 
Well, the sandpaper method did not work so I shortened an old 9/32 drill bit and worked it in the holes by hand and with a pair of pliers. The nibs go in like butter now.

49674161176_80977694ab_c.jpg


49674161011_3259d104c0_c.jpg


I also stained the top and bottom portions. I started with Brazilian Rosewood stain but the color wasn't dark enough for my liking. I put a coat of Ebony on top and topped that with another coat of Brazilian Rosewood and this is what I got. I really like it. I'll shoot the semi gloss polyurethane in a couple days to finish it off.

49674160841_f117095c43_c.jpg
 
Thats a damn fine job!!!!!
Care to do mine when you are done with yours?? I have been wanting to do mine for so long that I was planning on painting the back board green to match the cloth on my table, now that my cloth is worn out I am thinking to put blue cloth on it, I guess I just saved myself some work by not having refinished my cue rack yet. :grin::grin::grin:
 
I made a lot of progress today!

I got the final coat of finish on the stained pieces and was able to install the nibs.

49684948702_0f03ece73a_c.jpg


The bottom portion has some "character" which is to be expected from something that's seen commercial service for the better part of 50 years.

49684117048_390af9bc81_c.jpg


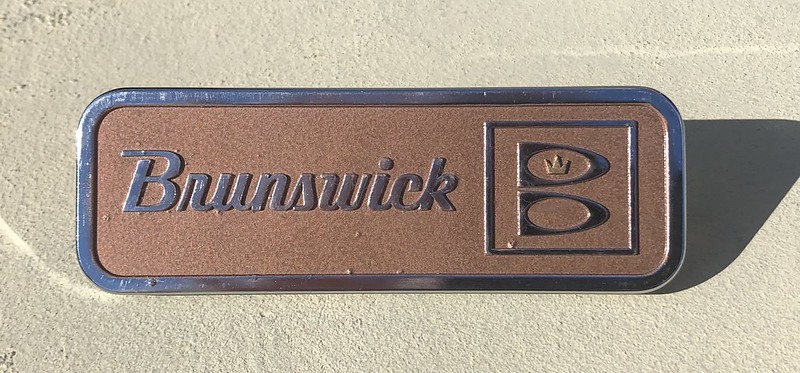
I also wrapped up the painting of the nameplate. I wouldn't be upset if this was the last one I ever do.

49684936242_dcb9fd53c8_c.jpg


I also got the final coat on the white parts.

49684624331_764beed293_c.jpg


49684624611_35f9164133_c.jpg


49684090923_60dddcd0d1_c.jpg


Last but not least, the masonite backing.

49684624031_fdc3ef049f_c.jpg


All that's left is letting the paint cure and assembling!
 
Last edited:
Back
Top