3D printed pool cue

iusedtoberich

AzB Silver Member
Silver Member
This was my issue with 3d printing joint protectors. On a 5/16 joint pin, it was too fragile to stay in one piece - twist a little too firmly and it just snaps off. 3/8 will fare better, but as a cue joint, still may face the same outcome.

I didn't read the whole thread, but I will assume yours is pla or petg. I plan on trying out nylon very soon to see if there more rigidity.
I think the only chance a 5/16” thread will work with RP technology is with SLS printers. Those parts are homogeneous and as strong as injection molded. None are in the consumer space. In the commercial space a joint protector would be about $400. At least 10 years ago those were the prices. We bought all the parts for an infant stroller at my dayjob and it was 20k. That’s the closet tech to real parts.
 

bpeacock

Active member
Do you have the capability to add carbon fiber to your printer? We can at our office and I am told that it greatly increases the strength. We could give it a shot...
 

justnum

Billiards Improvement Research Projects Associate
Silver Member
Do you have the capability to add carbon fiber to your printer? We can at our office and I am told that it greatly increases the strength. We could give it a shot...

Will you let others play with the finished product inside or outside? Or is it a keep it in house thing?
 

iusedtoberich

AzB Silver Member
Silver Member
I flew from Philly to Florida to Atlanta today, and decided to take the 3D printed back half with me. I remembered I have a Revo shaft at my home in Atl with a Radial pin. It is a larger diameter than the 5/16-14 314 shafts I have in Philly, so a better chance of working. I also ordrered a Radial stainless steel pin from ebay that should arrive in a few days.

Zero problems at Philly TSA.

At Florida TSA, I forgot my water bottle inside my schoolbag, and it of course flagged me. A TSA lady searched my whole bag, per their protocol. She trashed the water bottle, then kept fishing around. She found 1 of the printed pieces, then the rest. She had a confused look on her face, and said "what are these?" I replied: "They are a walking stick. They screw together to make it longer". She looked at the ends and saw the threads. She said "ok, you can go".
 

iusedtoberich

AzB Silver Member
Silver Member
I'm back in Atlanta, and recieved a radial pin here to match up with a Rhino radial shaft I just got.

1703652430705.png

Goal is to replace the weakest link in the prior version, which was a printed 5/16-14 thread, with a steel radial (knock-off) pin. That means I needed a female thread to accept the male radial pin threads. There is no available information for the radial thread design, so I reversed engineered it. I made radius gauges and pitch gauges. After several iterations, I had a duplicate of the male thread. I then made a female counterpart.

1703652463773.png

Radius gauge.


1703652499094.png

Pitch gauge.

1703652536696.png

The radial pin fit perfectly in the butt. It was a tight fit, without glue, which is just what I was going for. I had to use pliers to install it. The pin was perfectly straight. The entire cue rolled straight all screwed together.

1703652826835.png

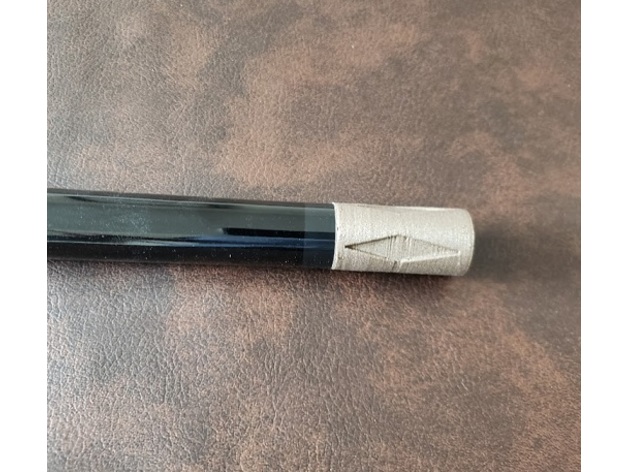
I really like the colors. The matte white goes great with the matte CF. I think cuemakers should offer this color combination for CF shafts.

The cue worked. I hit a couple racks, and it played ok. The sound was bad though. It was super, super, super pingy. Like no other cue I've ever heard. Almost the sound of an aluminum softball bat. I may try some foam inside somewhere to see if I can tone it down. The cue was also too heavy. If I re-do it, I can add hollow sections to bring the weight down, and also add foam to the hollow sections to hopefully reduce the pinging.
 
Last edited:

Shannon.spronk

Anybody read this?
Silver Member
I just went through this entire thread. Cue broke exactly where I expected it to. I also figured the sound would be dead. I think lowering the infill would improve the sound and feel. If you stick with this I look forward to your progress.
 

kling&allen

AzB Gold Member
Gold Member
I'm back in Atlanta, and recieved a radial pin here to match up with a Rhino radial shaft I just got.

View attachment 734806
Goal is to replace the weakest link in the prior version, which was a printed 5/16-14 thread, with a steel radial (knock-off) pin. That means I needed a female thread to accept the male radial pin threads. There is no available information for the radial thread design, so I reversed engineered it. I made radius gauges and pitch gauges. After several iterations, I had a duplicate of the male thread. I then made a female counterpart.

View attachment 734807
Radius gauge.


View attachment 734808
Pitch gauge.

View attachment 734809
The radial pin fit perfectly in the butt. It was a tight fit, without glue, which is just what I was going for. I had to use pliers to install it. The pin was perfectly straight. The entire cue rolled straight all screwed together.

View attachment 734814
I really like the colors. The matte white goes great with the matte CF. I think cuemakers should offer this color combination for CF shafts.

The cue worked. I hit a couple racks, and it played ok. The sound was bad though. It was super, super, super pingy. Like no other cue I've ever heard. Almost the sound of an aluminum softball bat. I may try some foam inside somewhere to see if I can tone it down. The cue was also too heavy. If I re-do it, I can add hollow sections to bring the weight down, and also add foam to the hollow sections to hopefully reduce the pinging.

Great thread. Consider open sourcing some of your work if you haven’t already. Your radial threads look better than the ones I made for these joint protectors:


justnum

Billiards Improvement Research Projects Associate
Silver Member
How small are the pinholes to optimize directional air pressure?
 

iusedtoberich

AzB Silver Member
Silver Member
Great thread. Consider open sourcing some of your work if you haven’t already. Your radial threads look better than the ones I made for these joint protectors:

I can link you the threads later in the native cad if you’d like to print. I use Onshape, it’s free.
 

iusedtoberich

AzB Silver Member
Silver Member
I decided to test the longevity of the cue and used it as a break cue, after hitting a couple racks worth of balls with it. It snapped at the second joint back on the first break.

15 sec video of it breaking:


1703731855420.png


1703731898232.png

Caveat, it broke on the exact place where my printer ran out of filament, and I had to change spools to another color I had. Unknown if it broke due to the filament change, or due to that being the weakest point of the cue (geometrically). Both are highly probable, IMO. I will reprint that piece and try again.

On the plus side, the radial pin area, which was what previously broke, held up great.
 
Last edited:

iusedtoberich

AzB Silver Member
Silver Member
Replacement part printed. Sound testing video below, short, only about 1 min. Shows the pinging sound and how it changes with different lengths attached. I also added foam ear protectors between each joint, one at a time, and it did not seem to make a difference. Today's pinging sounded better than yesterday's. Maybe that piece where the filament ran out was the main culprit?


iusedtoberich

AzB Silver Member
Silver Member
Lost 6-7 to the ghost. I was up 4-0, and all I was thinking was I'm going to blank the ghost with a 3D printed cue. Well, you know the rest. The ghost is relentless. ha ha.

I used the cue for the entire set, including the breaks. I did not blast the break, but did hit it a decent speed. It held up great. I'd say the cue breaking at the joint yesterday was due to the filament running out, not a geometric weak area.

Video is edited to remove all dead space, but keep the sounds to hear the cue. (first rack is the same as the prior post, I was actually starting a set and happened to run the first rack, so made that a separate video on the spot).
 

sammylane12

AzB Silver Member
Silver Member
This will be updated as I make progress. Right now I'm in the early design stages. Goal is a multi-piece pool cue I can bring inside my schoolbag carryon on a plane. I travel light and don't bring a suitcase. The first 16" will be cut from a Predator 314 shaft. The rest will be 3D printed.

View attachment 730725
First pass just roughing something in, not paying much attention to the dimensions.

View attachment 730726
Working on thread design of joint for the multiple 3D printed pieces. Will try to print the thread, rather than use a traditional pool cue joint pin. The thread will be much larger with that in mind. These are standardized 60 deg V threads, with a size of 5/8" OD, 10 threads per inch.

View attachment 730727
The threads worked, but they were not clean. The 60 deg angle is not ideal for printing.

View attachment 730728
I changed the thread angle to 45 deg. This is more ideal for printing. These threads are also 5/8" OD, 10 TPI, but a non-standard thread form.

View attachment 730729
This turned out much cleaner. I also experimented with the clearance between the male and female, and got the fit really nice when turning them together. I'm happy with the thread design, and will put it at each joint. It will scale in diameter at each joint to best match the diameter of the cue at that location.
Very clever. Such an ambitious project, I wish you luck.
 
Top