Custom Pool Room

Were you required to have a city inspector come and check your work or were you allowed to build as you please since this room is not considered a permanant fixture since its built on a compacted soil base and then set on conc. pads then blocks? I understand why you didnt build on a conc. slab you would have to have soils tested/sampled a PE seal and sign a set of plans (which is spendy!! dont ask me how I know!).

I remember you saying that you also built your own house. I assumed you have had your lot surveyed and have a plat of survey in hand signed and sealed from a Prodessional Land Surveyor or at least know where your lot corners are and have a Subdivision Plat recorded in your local courthouse.

I know you know these answers but some folks in the community might not understand the process you have to go thru. Some times these things get overlooked and often ignored.

It would be nice if you could tell the AZ followers the process you have to go thru before your dream could become a reality since you have inspired a lot of people here.

Yes every project I ever built, I have always pulled permits which require the city Inspector to come out and inspect every stage. And Permanent structure or not it has to be inspected. Even if a small 8’x8’ shed were to be built, you need to pull a permit and have it inspected. And whenever I submit plans to the city it includes a Site Plan, and the official city’s survey plat which can be retrieved at your local County records office at no charge.
There’s a lot of other things to consider regarding inspections and permits but I’d rather not get into that. I know I’ll open the flood gates people saying “well that’s not required here”, or “that’s not how it’s done here” , Every City and county has different requirements. I know some will say you don’t have to pull a permit for everything, and some people choose not too. The best advice I can give is, if anyone has plans to build, talk to your local Inspector or Building Official. Some may say that’s the worst thing to do because they will require too much! But I once read in a Architectural magazine, if you build to meet code ; its like passing a test with a 70. So no, they are not requiring to much, they are just requiring the minimum building standards, and you don’t want to build your project to the lowest standards.
Well sorry I didn’t get into specifics on the permitting and inspections, but I have already gotten statements regarding codes and how certain things are required, but what people seem to forget is in Austin, we don’t have Hurricanes or earthquakes. Some city’s compensate for those issues and that effects codes drastically. But that’s a whole different Thread on a whole different forum.
Thanks for the question.
:smile:
 
Aren't we due for a weekend recap, with photos of course! :thumbup:

YES, but let me get some work done before I jump onto the internet. lol:rolleyes:jk.
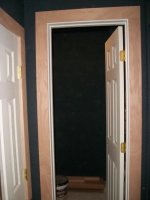
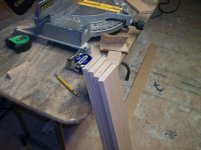
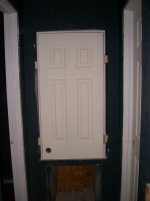
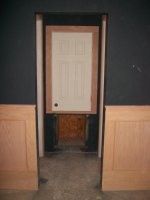
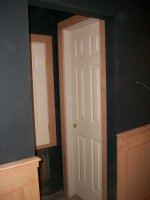
Well, I‘m very excited that I accomplished everything I wanted to this weekend. My father showed up Friday morning and we continued the shoe mold trim and were making progress until we had to stop and run out to pick up more materials.:angry: After lunch we finally completed all the shoe mold! We then hung the interior doors and installed the case trim around them. This is time consuming considering I had to make the trim by ripping all of the pieces then applying the veneer. By this time it was 5:00 and time for my dad to go. I then started to work on the window trim. I ripped more trim pieces and applied the veneer and also finished the last of the chair rail trim. It was a good day, even though I was eating dinner at 2:30 in the morning.
I don’t mean to brag but I need to throw this in; you know your wife is awesome when she makes dinner at 6:00pm doesn’t get upset when you don’t come in, but rather waits up till 2 oclock in the morning to heat your dinner up for you.
 

Attachments

  • doors-0.jpg
    doors-0.jpg
    97.6 KB · Views: 1,236
  • doors (1).jpg
    doors (1).jpg
    96.9 KB · Views: 1,235
  • doors (3).jpg
    doors (3).jpg
    97.3 KB · Views: 1,250
  • doors (4).jpg
    doors (4).jpg
    93.8 KB · Views: 1,231
Last edited:
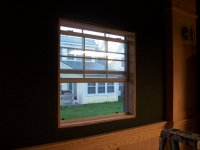
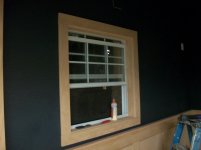
Here are pics of the windows (before and after) Im really glad I dont have to ripp and work with veneer any more.
 

Attachments

  • win-1.jpg
    win-1.jpg
    94.9 KB · Views: 1,213
  • win-2.jpg
    win-2.jpg
    96.2 KB · Views: 1,229
  • win-3.jpg
    win-3.jpg
    95.6 KB · Views: 1,223
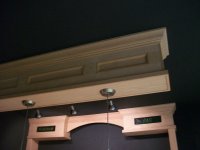
After spending the day with the family I headed back out Sat evening around 6:00. As soon as I started setting up, my Dad drives up. I was supprised to see him but he said my mom gave him permission to come over again. We stared the crown molding for the top of the build-outs. While he got the measurements I cut and put them together then he would install them while I continued the next one.
 

Attachments

  • 3-25 038.jpg
    3-25 038.jpg
    95.2 KB · Views: 1,219
  • 3-25 039.jpg
    3-25 039.jpg
    94.9 KB · Views: 1,205
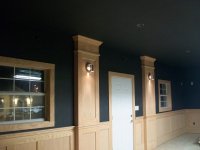
Here's a pic of the build-outs with the Crown. I think they came out nice. The trim around the windows really make a difference.

wall trim.jpg

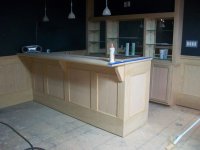
Here's a pic of what the shoe mold looks like under the bar. It may not seem like much but this phase was by far the most time consuming of the whole project. It was a lot of measuring and angle cutting!

bar.jpg

And of the fur down while I was addin gthe shoe mold.

fur down.jpg
 
Last edited:
I don’t mean to brag but I need to throw this in; you know your wife is awesome when she makes dinner at 6:00pm doesn’t get upset when you don’t come in, but rather waits up till 2 oclock in the morning to heat your dinner up for you.

YOU HAVE EVERY RIGHT TO BRAG ABOUT THIS ONE!!! We all know you have a keeper!!! ;)

Just a note to once again say "thank you" for including us in this and allowing us to live vicariously through you!

Jason
 
I don’t mean to brag but I need to throw this in; you know your wife is awesome when she makes dinner at 6:00pm doesn’t get upset when you don’t come in, but rather waits up till 2 oclock in the morning to heat your dinner up for you.

You were bragging at "wife making dinner". ;)

You've probably answered this before but what are your plans for flooring?
 
You've probably answered this before but what are your plans for flooring?

I am going to lay out commercial carpet. I have a pic somewheres. If I can find it I'll post it. But for the Bar area I have plans to lay down hardwood flooring, not just for fear of spills and stains but also because it will help define the Bar area. I've learned there are techniques you can apply to seperate and define certain areas without the use of walls.

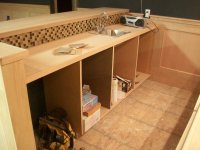
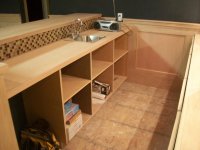
Also this past weekend I was also able to cut and install the bottom bar shelves (i figured i'd post these too). I wanted to get as much cutting done so we can start cleaning and vacuuming.

BEFORE
3-25 069.jpg
AFTER
3-25 071.jpg
 
Last edited:
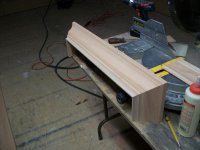
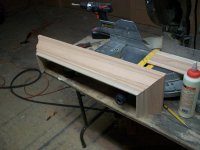
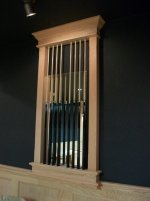
Here's a pic of the Rack with the Crown molding. It really helps to complete the design. It fit so snug it's just hanging there with no nails. I'll have to bring it and the rack down to stain it. I also have to cut the mirror and place it in before attaching it to the wall permanently.
 

Attachments

  • rack-1.jpg
    rack-1.jpg
    102.7 KB · Views: 1,159
  • rack-2.jpg
    rack-2.jpg
    96 KB · Views: 1,190
Last edited:
A while back, I made a post about the "black" room which wasn't a high-five kind of post. Now that I have seen the enormous amounts of lighter woods that you are using throughout the room, I'm liking the "black" more and more.

Great job and great journey.

Give your wife a hug for me. I like those after midnight snacks but I just can't seem to wake my wife to heat them up. :D
 
This project has to be finished soon! Even after I think I can't be impressed any more, you do it again. I'm running out of things to say! Simply amazing is getting old, but it just fits both the work you do and your wife. They are both simply amazing!
 
I was looking back at the pics of your fur down above the bar area. I would have incorporated a cabinet look toward the bar area with a few doors, knowing your talent that can still happen, but just my 2 cents you can never have enough storage area.

Theres a critic in every crowd :)
 
Any plans on adding a kegerator with a CO2 system? Might look kinda nifty with an antique style tapper within the bar area. Your neighbors might get a little suspicuous with a Bud Truck making a delivery to a residental area.
 
Back
Top