Designing new light, projector mount, and camera for table

IMG_4697.jpg
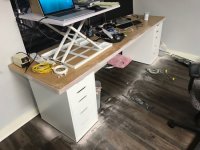
The "new to me" Mac Pro is under this desk, and the HDMI cable dangling on the right side of the cue rack will fit in the channel there, and go into the Mac. That will happen later. Right now, I'm just using the camera card to record, and climbing up on the pool table to start and stop the recording.

IMG_4698.jpg
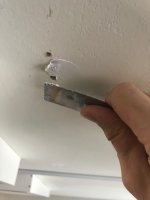
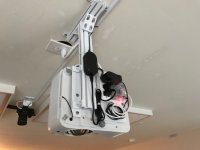
Lots of holes to patch on the ceiling from the old light.

IMG_4710.jpg
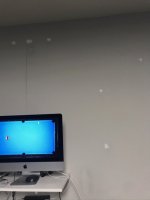
Holes on the wall too where the old camera was. This computer will probably go away, once the Mac Pro under the desk is all set up.

IMG_4705.jpg
Off topic, I put bondo on the door edge to smooth it. The original edge was particleboard.

IMG_4831.jpg
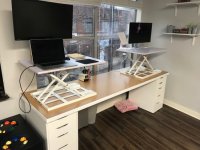
Here is the fished desk, with the bonded edge now painted white. The gf loved it. Oh, you can see the Mac Pro peeking out from under the desk.
 
IMG_4853.jpg
Here I went back and redid all the wire ties to be the off white, translucent ones, instead of those neon colored ones I had before. I also got the shortest wires I could find on amazon so there would be less wires in the coils. Yes, I'm anal;)
 
Back to the camera on the wall (not the ceiling).

IMG_4712.jpg
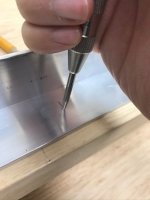
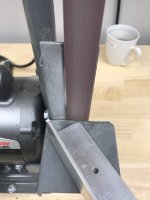
Marking bracket for drilling.

IMG_4713.jpg
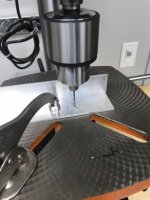
Pilot holes.

IMG_4714.jpg
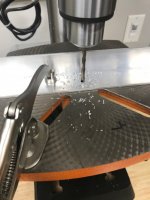
Clearance holes for screws.

IMG_4715.jpg
Rounding corners.

IMG_4724.jpg
Painting. This is actually my wall color. The maintenance people at my apartment gave me touch up paint.
 
IMG_4726.jpg
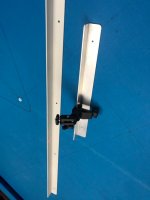
Here is the old mount from the old camera on the right, and the new one on the left.

IMG_4725.jpg
Here I'm using a laser level to project the centerline of the table onto the blue tape on the wall. From there I used a traditional bubble level to go upwards.

IMG_4860.jpg
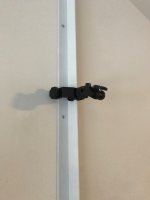
Angle channel mounted on the wall, with the bracket. You can see it can go up and down wherever I want.

IMG_4888.jpg
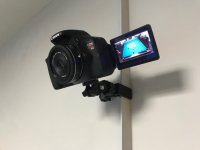
Closeup of camera. A 24mm prime lens works great from this distance. Once I figure out the software situation on the camera, I will run power and HDMI to this camera also. Right now, this one is running on the battery and recording to its camera card. That will be later.

IMG_4889.jpg
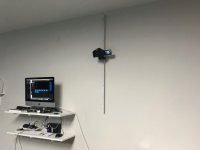
Here is a wider shot so you can see the whole thing. I don't know how often I'll end up using this location, as I really like the overhead shot. (I have 2 cameras, one for each location). For now, I'm keeping them both. Oh, I can also put my original Panasonic camcorder on top of this canon, and put it higher up close to the ceiling. That way I would have 3 cameras. Again, probably overkill. But, that camera is sitting doing nothing right now.
 
https://www.youtube.com/watch?v=-UGMz-alGzw&feature=youtu.be

Here is the final output. 1 rack, recorded with both cameras simultaneously. 5 min total length. The first 2.5 min is the overhead camera, the second 2.5 min is the wall mounted camera.

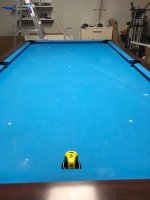
The overhead camera the lines are all straight, but the balls get non-round as you get further from center. You can see I have lines drawn on the cloth with marker, and the lines closest to the top and bottom of the screen are slightly further apart than the lines in the center of the screen. Still, I think it is a pretty good representation of the table, and the angles of the shots look about right. Its also the best I've personally seen with an overhead camera that was not one of the big boys.

The wall mount camera for some reason the picture quality looks better. I think this might be a youtube thing, as they both look great from a quality standpoint on the video saved to my computer before uploading to youtube. This view, the balls are all round. Of course, its harder to see the angles of the shots and if balls clear each other. On the other hand, this view is more "human", as you can see more of the shooter, and I think the view itself is more interesting due to that.

I definitely like them both. What is your favorite?
 
You sir are one incredibly talented individual. I hope you enjoy your setup as much as I've enjoyed this thread. Everything looks amazing and the functionality is phenomenal!
 
After several year's worth of using it, what's your review of the projection pro system?
Do you feel you've gotten your money's worth out of it?
 
After several year's worth of using it, what's your review of the projection pro system?
Do you feel you've gotten your money's worth out of it?
The system is good. I wish the user interface was better, but it’s good enough.

I also prefer making my own drills to the ones built in. (Which is fairly easy to do).

The problem comes down to my laziness to practice. Even with this system, I prefer to just play sets vs the ghost:)

Value wise it’s there if you are really dedicated to practicing. IMO.
 
I have not updated this thread, but in the past couple of years I must have tried 2 Sony modern mirrorless bodies with 6 or 7 different lenses. The goal being to not have to climb the table to turn the camera on, have good picture quality, and control it all from my computer. It's been a complete no-go. I last fooled around with it a year ago.

Also, in the past few months I have started streaming some of my own action matches at the pool hall, and have gotten some experience with different phone based options, and dedicated streaming camera options.

I'm back on the hunt now for my GC at home permanent overhead option, after I saw a post on FB from I think it was lil chris? He recommended this camera, which I just bought. The key is it needs 120 deg FOV.
1744042357213.png


It is TINY. Here it is next to my DSLR I've had up there.
1744042941230.png


I was able to reuse my DSLR mount. Its not perfectly centered on the table, but good enough for testing.
1744043252445.png

It does everything I want. It has a manual focus ring (which I want), so that when your body blocks the camera during a shot the lens does not "hunt". It connects to the computer with a usb cable, nothing else. And I can control it completely with OSB. (ps, I just finally did some tutorials on it to learn that software this week. It's definitely the way to go for me now).

The downside is the quality is not that good. The picture is a bit pixelated. Here is a screenshot from OBS.
1744042624217.png


The camera is 1080P. I decided to look for 4K versions, and during that search, I found these, which are not even webcams:
1744042718949.png

1744042893011.png

The lens is interchangeable, like a DSLR. Everything is manual, including focus, zoom, and aperture. It has USB out, and HDMI out. If this works well, I think it might be the perfect pool streaming camera for a static setup. WAY cheaper than a DSLR, and only the things needed for pool. I ordered two of them, the body is the same on each, but the lenses are different. My plan is to put one for overhead, and one for the rack view of the table. They don't have a microphone, so I'll need to handle that separately. I'll update when I get them this week.
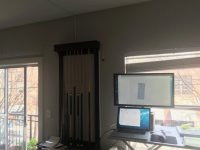
 
I have that nexigo camera. It gets the whole table in the pic. My issue is it won’t work with my usb extension. It only works plugged directly in to my laptop. Other cameras work fine with that extension cable.


Sent from my iPhone using Tapatalk
 
I just recorded at 1 min clip hitting balls. This is with the Nexigo 1080 P camera. The quality is not as good as my SLR (I think), but the convenience of controlling everything from the computer is completely worth it.


Edit: here is the DSLR overhead (first 2.5 min), and mounted on the wall (last 2.5 min), from 5 years ago. The DSLR is def way better picture quality.
 
Last edited:
I have that nexigo camera. It gets the whole table in the pic. My issue is it won’t work with my usb extension. It only works plugged directly in to my laptop. Other cameras work fine with that extension cable.


Sent from my iPhone using Tapatalk
I have 3 shorter usb extensions on it now (that I already had in the house), totaling about 20 feet and it seems to be working. I did order an "active" usb 24 foot extension as the post on FB said it would need that. It should be delivered to day. I'll update if it improves anything.

This one:
1744049049597.png
 
The active USB cable just came in. I think it looks about the same as post #90 which had a 3 regular USB cables spliced together.

TOP with "active" 24' USB cable.
1744054037161.png


BOTTOM with 3 regular USB cable spliced together to about 18' total length.
1744054114695.png
 
Right now I don’t get any picture because the camera gets disconnected on the usb extension. I only need about 15’. I might try an active extension over what I have now.


Sent from my iPhone using Tapatalk
 
All of those screenshots have spherical aberration. Is there software you can use to correct for this?

If not, is there a market for a “homographic and aberration” corrector device? I am thinking HDMI input, HDMI output with separate companion software, that processes HDMI streams in real time and corrects the image based off of the defined table outline. Would be a neat project.

I think there’s a company that will combine 2 camera streams to create 1 picture. I don’t remember the company but I’ll look.


Sent from my iPhone using Tapatalk
 
I think there’s a company that will combine 2 camera streams to create 1 picture. I don’t remember the company but I’ll look.


Sent from my iPhone using Tapatalk
Yes, you would need two cameras for the correction.
 
We are getting somewhere! These ELP brand industrial cameras are sharp as anything I've personally ever seen. As good or better than the SLR's I was using.

The body is the same. The one on the left has a 5-50mm lens. The one on the right has a 2.8-12mm lens. The lens screw on and off like an SLR camera and a bunch of different lenses are on Amazon for cheap. I bought a few different ones to try later. I can't believe how small these are and no extra junk that a full camera has, menus to go through, battery adapters to use AC, etc.
1744156781098.png


They both had this thin sheetmetal piece for adjusting the angle (left camera). I removed it (right camera).
1744156603255.png


Wow, the focus it can get on the tip is amazing. I could change it to see the individual chalk particles. Everything is manual, so easy to control. One USB3 cable to connect to the computer and power it. It also works with HDMI out, into an HDMI Camlink converter. That's how I had prior Camcorders and DSLR and Mirrorless cameras connected. When connected with the HDMI, it still needs USB but for power only. They connect to OBS well. OBS is the app on the computer screen.
1744156747572.png


Overhead:
1744158306874.png


Foot rail. Looks like I never touched up the ceiling from 5 years ago, when I was trying the projector there, ha ha.
1744158373542.png
 
This is the 5-50mm, set widest to 5mm. The focus looks really good throughout the table. Maybe the 15 is a hair off. The foot rail has a slight arc, but I don't think anything to worry about.
1744158584095.png


OBS has a barrel distortion filter. Here I straightened out the end rail, but the side rails are now curved inward.
1744158900718.png


Here is the filter with a bit less correction. I think if I use this camera, I'll leave it either here, or the first picture with zero correction.
1744159045517.png
 
Back
Top