First Case Build (In Progess)

victorl

Where'd my stroke go?
Silver Member
Hey all, first post in a very long time lol.

Just wanted to share some pics from my first attempt at a cue case build, which I started last month due to being stuck at home.
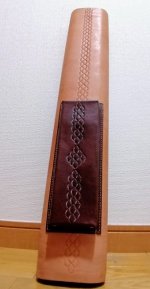
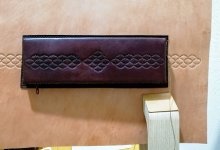
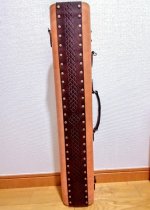
I wanted to try something original, but I figured I should play it safe and just stick with the standard cue-case style for my first build.

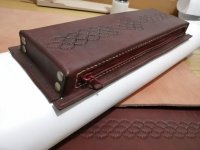
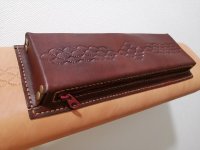
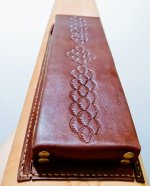
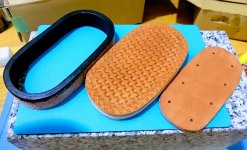
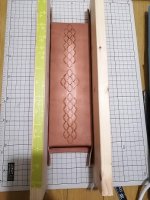
I'm using Japanese Tochigi vegtan leather, and the interior is the molded foam tubing taken from an old case.
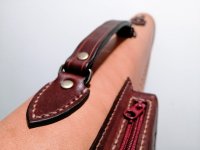
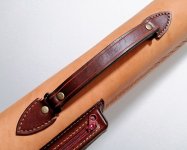
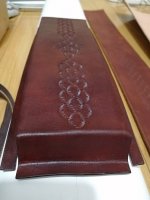
The main body and pocket are mostly finished, I just need to add a handle, rivet everything together, and then I'll start building the lid.

A few things I would do differently next time:
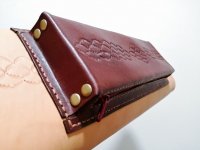
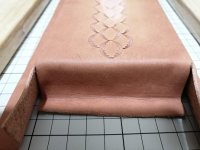
1. Add more height to the pocket to make it easier to use.
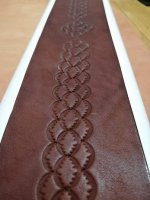
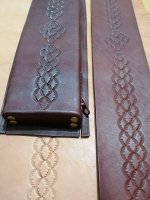
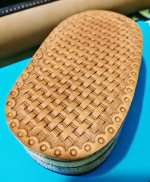
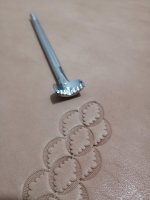
2. Add a border or more accents to the tooling.
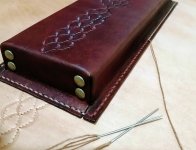
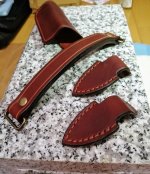
3. Get some better sewing thread. The hemp thread I used isn't bad, but comes overwaxed and frays easily.

Making the pocket:
 

Attachments

  • IMG_20200502_092318.jpg
    IMG_20200502_092318.jpg
    45.4 KB · Views: 878
  • IMG_20200410_055050.jpg
    IMG_20200410_055050.jpg
    73.7 KB · Views: 871
  • IMG_20200410_055959.jpg
    IMG_20200410_055959.jpg
    59.2 KB · Views: 882
  • IMG_20200419_182825.jpg
    IMG_20200419_182825.jpg
    52.2 KB · Views: 879
Last edited:
Finishing the pocket and backplate, and sewing to the body:
 

Attachments

  • IMG_20200502_033211.jpg
    IMG_20200502_033211.jpg
    50.7 KB · Views: 870
  • IMG_20200502_033410.jpg
    IMG_20200502_033410.jpg
    65.1 KB · Views: 874
  • IMG_20200502_032350.jpg
    IMG_20200502_032350.jpg
    75 KB · Views: 865
  • IMG_20200504_165239.jpg
    IMG_20200504_165239.jpg
    91 KB · Views: 879
Pocket attached and finished wet-molding the body to the tubing:
 

Attachments

  • IMG_20200506_171319_resized_20200510_100011356.jpg
    IMG_20200506_171319_resized_20200510_100011356.jpg
    68.8 KB · Views: 883
  • IMG_20200506_170735_2_resized_20200510_100010844.jpg
    IMG_20200506_170735_2_resized_20200510_100010844.jpg
    55.6 KB · Views: 872
  • IMG_20200506_170833_3_resized_20200510_100011095.jpg
    IMG_20200506_170833_3_resized_20200510_100011095.jpg
    66.4 KB · Views: 857
  • IMG_20200505_232808.jpg
    IMG_20200505_232808.jpg
    83.5 KB · Views: 872
Last edited:
That's really cool. Would love to see more pics as it comes along.

Sent from my Pixel 2 XL using Tapatalk
 
OK. Now that I look at it with my glasses I can see the hand stitching. Awesome work. I did leather work a lot back in the 70's. Mostly floral carving on my custom holsters and belts and also carved live oak blanks for a local saddle maker. I miss working with leather. You do nice work. Keep us posted.
 
OK. Now that I look at it with my glasses I can see the hand stitching. Awesome work. I did leather work a lot back in the 70's. Mostly floral carving on my custom holsters and belts and also carved live oak blanks for a local saddle maker. I miss working with leather. You do nice work. Keep us posted.

Wow, oak blanks too? That is pretty awesome, would love too see that.
One of my goals is to do a case with floral carving someday, but I would need a ton of practice to get my carving level up to where I want it to be.
 
must be a ***** to saddle stitch such an inaccessible tight spot such as the pockets to the body
 
must be a ***** to saddle stitch such an inaccessible tight spot such as the pockets to the body

Yea, that wouldn't be fun at all... actually the sewing was done while the body was still flat, so I could mount the whole thing onto a pair of stitching ponies.
It was a little unstable, but still a lot easier than sewing inside a tube.

Here's what it looked like:
 

Attachments

  • IMG_20200503_101749_resized_20200511_065233577.jpg
    IMG_20200503_101749_resized_20200511_065233577.jpg
    44.2 KB · Views: 719
Hand stitching the zippers to the pocket and the pockets to the body, is usually the longest part in the case assembly! Believe me I know. Lol
Keep up the great work.
 
Some updates on the cue case build...
Getting a little more done everyday!


Built the handle and attached it to the body:
 

Attachments

  • IMG_20200517_184513.jpg
    IMG_20200517_184513.jpg
    77 KB · Views: 459
  • IMG_20200526_081906.jpg
    IMG_20200526_081906.jpg
    41.3 KB · Views: 434
  • IMG_20200526_081957.jpg
    IMG_20200526_081957.jpg
    47.5 KB · Views: 448
Back plate and hardware attached to the body
 

Attachments

  • IMG_20200602_063040.jpg
    IMG_20200602_063040.jpg
    73.3 KB · Views: 460
  • IMG_20200602_063549.jpg
    IMG_20200602_063549.jpg
    55.8 KB · Views: 482
Last parts are the lid and bottom piece (in progress):
 

Attachments

  • IMG_20200606_032033.jpg
    IMG_20200606_032033.jpg
    92.5 KB · Views: 350
  • IMG_20200606_032220.jpg
    IMG_20200606_032220.jpg
    73.8 KB · Views: 362
As the case maker, artistry of the finished product must be very important to you.
Two tone leather designs can accentuate the style and appearance of the case.

IMO, not really this time because the darker brown leather you chose is fabulous.

It looks so rich and luxurious that the entire case would be more attractive if you
built the case using just that instead of the two tone design. But you do got talent.
 
Thanks for the comments everyone, much appreciated!

As the case maker, artistry of the finished product must be very important to you.
Two tone leather designs can accentuate the style and appearance of the case.

IMO, not really this time because the darker brown leather you chose is fabulous.

It looks so rich and luxurious that the entire case would be more attractive if you
built the case using just that instead of the two tone design. But you do got talent.

Thanks for the input. The dye actually came out a different color than I expected, but it was a pleasant surprise. You're right, a case with just the brown would be amazing, perhaps an envelope style with some floral carving :smile:
 
Back
Top