Hi,
Sorry about the bad pics, my good camera is on the fritz.
Thanks to all who wanted to know more about our process for obtaining almost perfect joint concentricity while using different machines during the overall process without turning the shafts in on the cue butt in the lathe or using sanding mandrels. I have been working with this for about 2 years now and think I have tweaked about 95% of the efficiency out of this procedure.
The heart of this method is the use of one of our pins that have been parted in the center barrel area, then faced and then a 60 degree center is installed to create a business end (custom drive pin). This will act as the driver in the shaft tapering machine and the wood lathe for final sanding and burnishing between centers. By engineering a very tight fit of the threads to the pin via a stepped minor dia. we obtain a condition whereby the out side taper diameter is always concentric to the centerline axis of the work piece. "In Theory".
During this explanation, some of these details described may seem a little over the top at first but they are all critical in obtaining the end result. At the end of the description I will recap some of the details for clarification purposes.
To start out with, I dowel the 5/4 x 5/4 maple into 1" X 30" pieces. These dowels sit in a open barrel for years as dowels. At some time, I taper them down to .960 on the joint end and store them in a vertical shaft caddy with shaft inserts installed.
Before we drill and tap a shaft unit, we drill a .500 hole to the desired depth of our pin insertion length. A Garolite LE insert is machined to a dia. of .488 and a 1/8 hole is drilled through the center for a glue relief. This unit is epoxied in to the shaft hole and allowed to cure. Having this insert allows a more stable foundation for the taping and very important in this overall process. Without the insert it works most of the time but not all of the time because the wood hardness varies when viewed on a 360 degree basis within the hole dia.
When we decide to make a shaft we chuck up the tapered unit in the jaws of our lathe while holding it centered on the back chuck. My 6 jaw is adjusted to less than .001 run out and I check it a lot. My back chuck is not as accurate but it is close.
We do not use a collet on the wood and take a pretty firm grip on the wood with the jaws for pin installs and shaft taping. I have found that this is the most accurate way for me to perform the facing, drilling and taping of the shaft. Once you face and tap your threads the centerline axis will automatically go perpendicular to the face after the outside taper gets established. A collet can introduce a error to the mix. After I center drill, drill a.287 hole to my desired depth for pin insertion I bore the hole to about .312 + or minus .003.
At this point I use a 3/8 x 14 CNC Drill-Tap to drill out the bored hole to a depth of only .375. The drill size on the drill-tap is the correct minor dia. (I think it's .320 or so) for this 3/8 x 14 tap that is part of the spiral fluke of the tool. At this point I don't allow the tap to engage as I just use this drill part of the tool to create the .375 hole depth.
I remove the drill-tap and replace it with an exact duplicate tool that has had the drill dia. precision ground down to a dia. that is - .004 from the stock size. This tool is used to tap the thread into the wall of the hole but it also creates a stepped minor dia. within the insert due to the slightly ground drill part. After the cue is finished and ready for sale a bottom tap is used to chase the threads as a final step. Note, only the drill part dia. is ground, not the tap part. If I just use the standard Drill Tap you don't get that very tight fit needed for repeatability.
The end result of all of this reveals a threaded shaft insert that is 5 times stronger than wood that will thread onto the pin in a normal fashion for the first .375 and then become a very tight fit for the next .600 + until facing occurs with the butt joint. The insert material has a ductility and tensile strength that lends itself to a better taped thread and will not allow the thread to distort or fail like wood fibers ofter do when over torqued by the player.
Our custom drive pin is then screwed in to the shaft. Because of the tight fit, we have to use a hand adjustable drill chuck to hold the pin to turn it into the shaft. If the pin can be put into shaft by hand, you won't get the concentricity you are looking for with a repeatable end result.
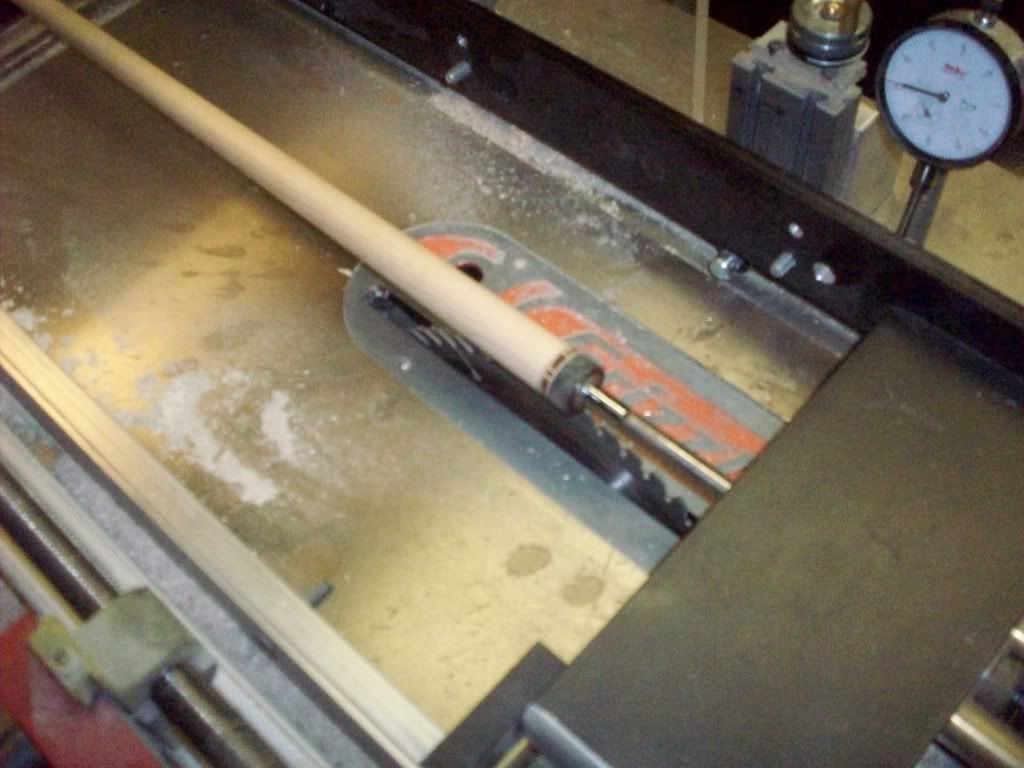
The shaft is placed in the tapering machine between centers with this pin acting as the driver. The shaft is then tapered in the desired cut dia. in a sequence with sanding sealer applied between cuts.
Observation: Before putting the shaft in the machine that is set with a spring weight calibrated for 30" your must correct the for the length because the pin is sticking out. I cut our shaft to 29 and 1/8 and make the custom pin barrel stick out .645 from the end of the joint side. The 1/8 is for facing if needed later or it can be adjusted when the ferrule is installed. By experimenting with different pin shank lengths, I was able to find the optimum spring weight by controlling length rather than changing springs.
My units now have very light spring pressure and when I am making the final passes I don't get any distortions or swirl lines at all, just a very smooth rms finish. This was a very good collateral advantage learned by using this pin device.
I land the joint at +.002 from my finish number. When you put the shaft on the wood lathe to sand you must leave the pin driver in to creat the same concentricity on the new machine. In fact, I leave the pins in all of the shafts during the epoxy coats, sanding, finish coats, wet sanding and buffing processes. I have made a lot of the pin devices as they are on many shafts that are being worked on in the shop.
As for the butt tapering, I believe that for this concentricity process to work 100% of the time that the pin must be installed when the cue is a dowel rod so as the 60 degree center on the nose of the pin creates the axial centerline of the cue with the butt center and needs to be there sooner rather than later. In fact when doing CNC floating point cues, we build the entire cue with a 29" dowel at the center of all of the cored components. After the entire cue has been taken to 1 3/8, we install our pin while the cue is a 29" rod at 1 3/8 dia. Then off the the tapering machine for a hogging of the initial taper.
Clarification:
By holding the following details as a discipline, I have got the cues to mate up with fantastic concentricity before any coatings are applied:
1. The shaft and the butt must be chucked on the bare wood while facing, drilling or taping is being performed in the early stage of production. If you take out the cue or shaft from the chuck you can't go back and re chuck it again. You must put in a new insert and start over. When I was using a collet I did not get the same results and they varried. After chucking hard on the wood before facing and taping the results changed to great repeatable concentricity.
2. After you tap your hole put a 60 degree chamfer on the edge face of the hole so your can face later between centers using the drive pin if you have to whisker face for decor ring alignment. Also to let the repair man drive the shaft for maintenance. After the coating you can lose the cocentricity a little if you spray more material on one side than the other. Another reason to make sure you wet sand clear coat in the wood lathe with the pin in place.
3. I believe that using an insert is also critical because the material machines so much better than wood and also will be stronger without distorted or failed threads down the road from over tightening by the player. By using the the stepped tighter minor dia. the threads and the wall interface are so closely aligned that the concentricty can't be denied with the taper OD. The insert and the tight minor also assures that once the facing has been contacted when joining the cue, you can't make it rotate any further. After the cue is finished a rolls perfect on the table we use the bottom tap for the final tap pass clean up.
4. The pin must be installed early on in the process so that you have concentricity with the OD from the get go. When I make veneered point cues with an A- Joint, I put the pin in when the forearm wood is is a 1 3/8 dowel. I then take tapering cuts between centers with the pin center of the live side to create a geometry where the pin and the other center is aligned on the axial centerline with the joint at .925. When I cut the v grooves the piece is mounted on a 5c collet chuck and my pin is tightened into a special 3/4" OD maintenance pin centered in the collet. Because the points don’t move on the floating point CNC cues the cue is assembled and tapered down without worrying about the critical A-joint fit up.
5. Before we ground the drill part of the CNC Drill-Tap we were getting good results but they were not always consistent. Making that slight change in the minor dia. was like magic as the cues started to have almost perfect concentricity.
Note: This pin driver system was not easy to control and took me a lot of time trying different things. It works even though these shafts and butts are made on two separate table saw tapering machined, one metal lathe, and one wood lathe. The fact that these parts are made and moved from one machine to another with predictable concentricity is the payoff for the credibility of the process.
Thanks to Ray: Although I have painstakingly developed this process, I give all the credit to my partner and mentor Ray Hernanzez who was a tool and die engineer for 40 years. He thought of the idea and came up with the grinding of the Drill Tap which was the milestone that made this repeatable. His thoughts created the process, my sweat and trial and error refined it to to a procedure.
If any of you guys try this stuff and come up with a new twist that will make it work better, I would appreciate your feed back, peer check and review.
Sorry for this very long description but I wanted to express all the things that we did to bring this concentricity ship into the harbor.
Disclaimer: Just so everyone does not think I am some kind of internet loser who has nothing better to do with my time:
I am addicted to cue making and I know most of you guys share the same passion. I do have a life and all of this text I have spent two hours composing will be taken apart and used in my written QA/QC Procedure concerning this phase of the total process. So sharing this info and asking for peer check and review is and integral part of my Procedure guidelines overall. I am killing 2 birds with one stone!
I look forward to any suggestions or comments as I know we can always raise the bar.
Thanks,
Rick Geschrey
See pics below:
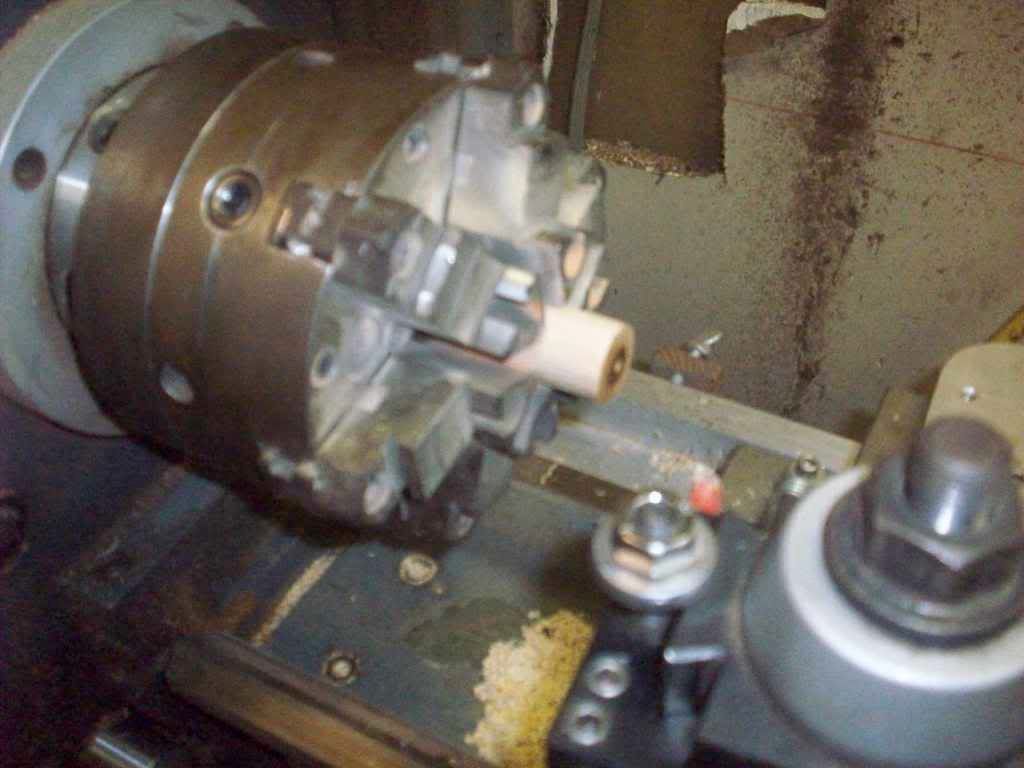
Chucking without a collet

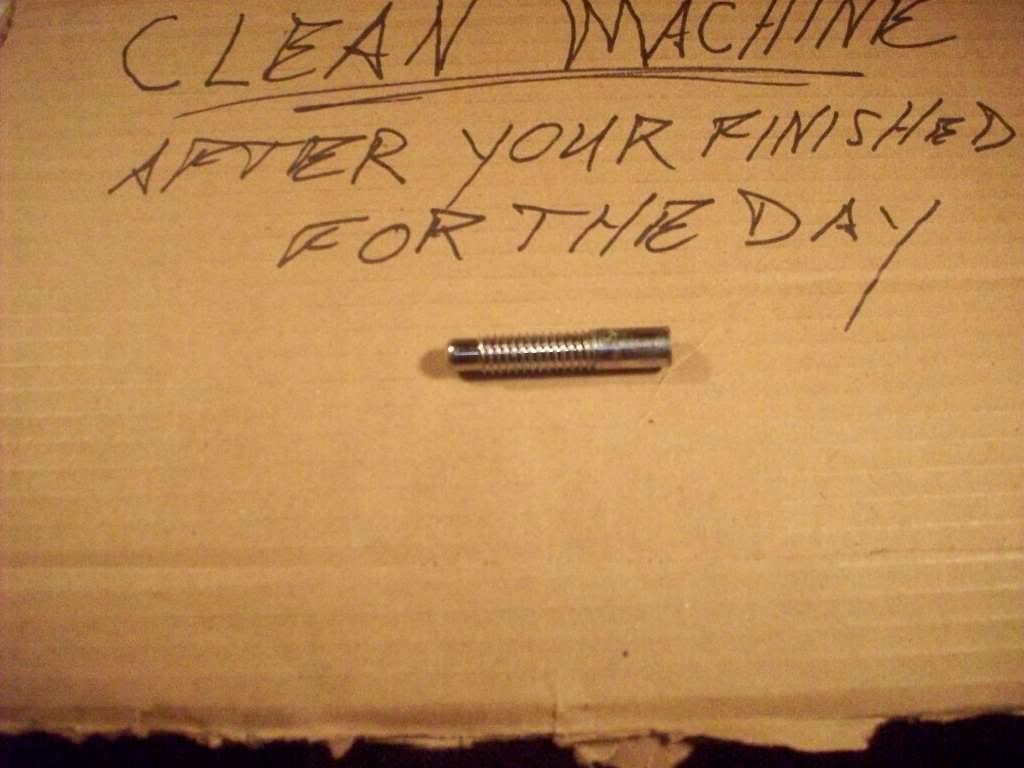
Pin driver made from our joint pin - OD of the barrel looks bad as it has been exposed to schellac and clear coat overspray

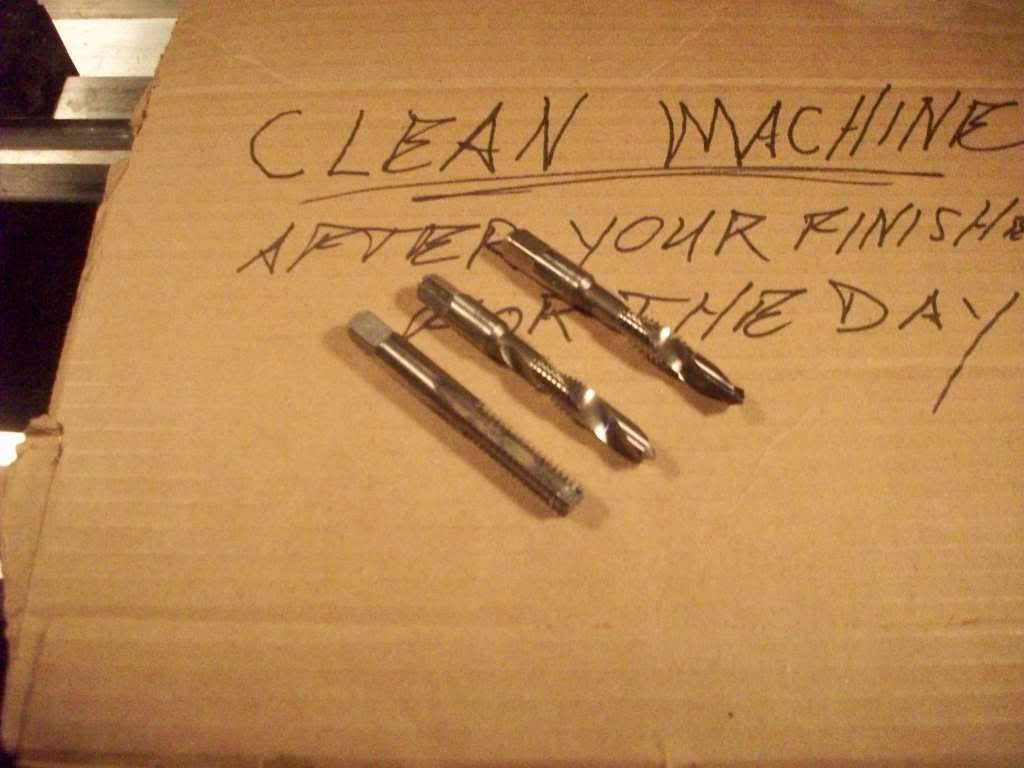
CNC Drill Taps and Bottom Tap - Far right ground down .004, center standard, left is bottom tap
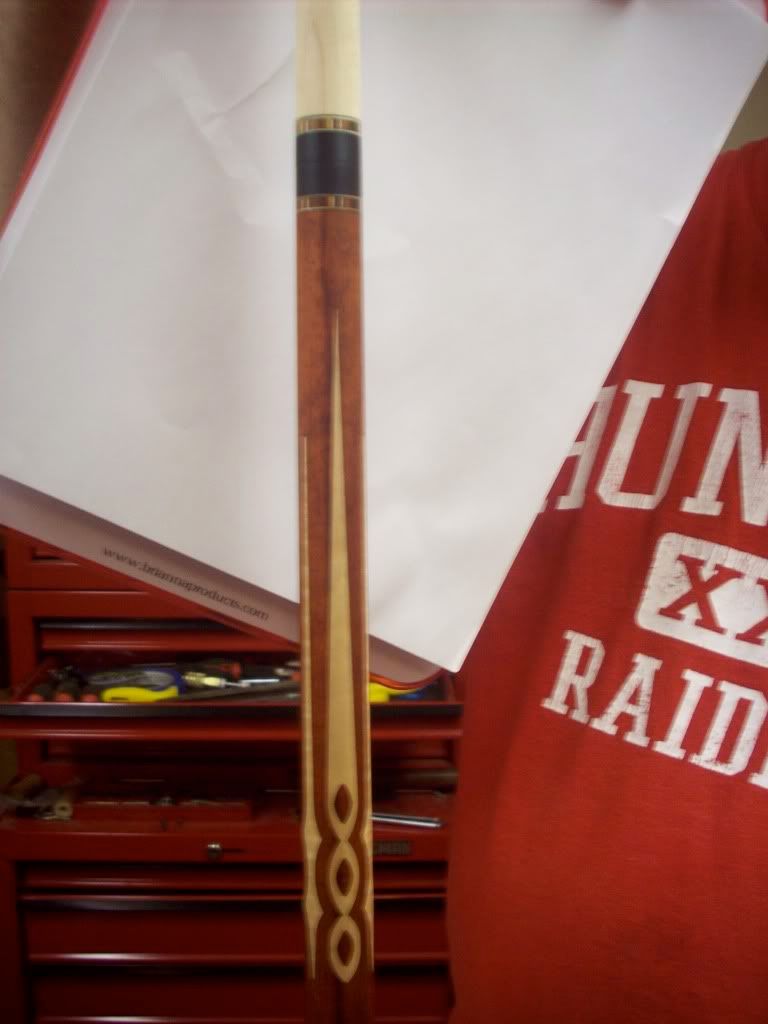
Pin driver installed and in action
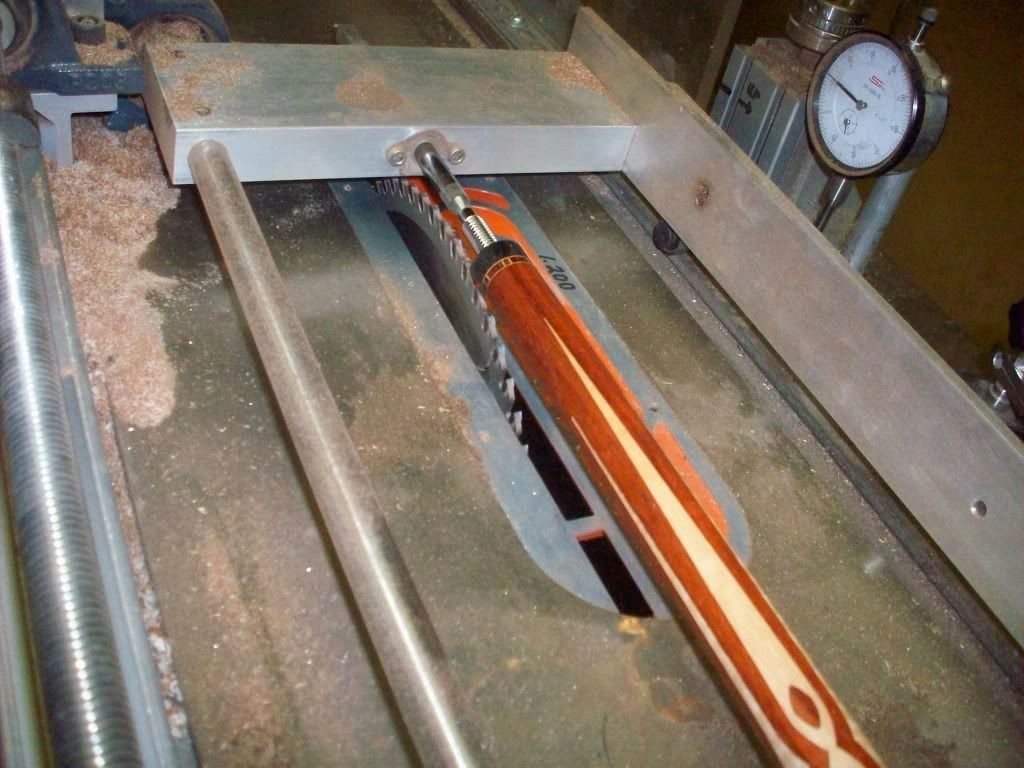
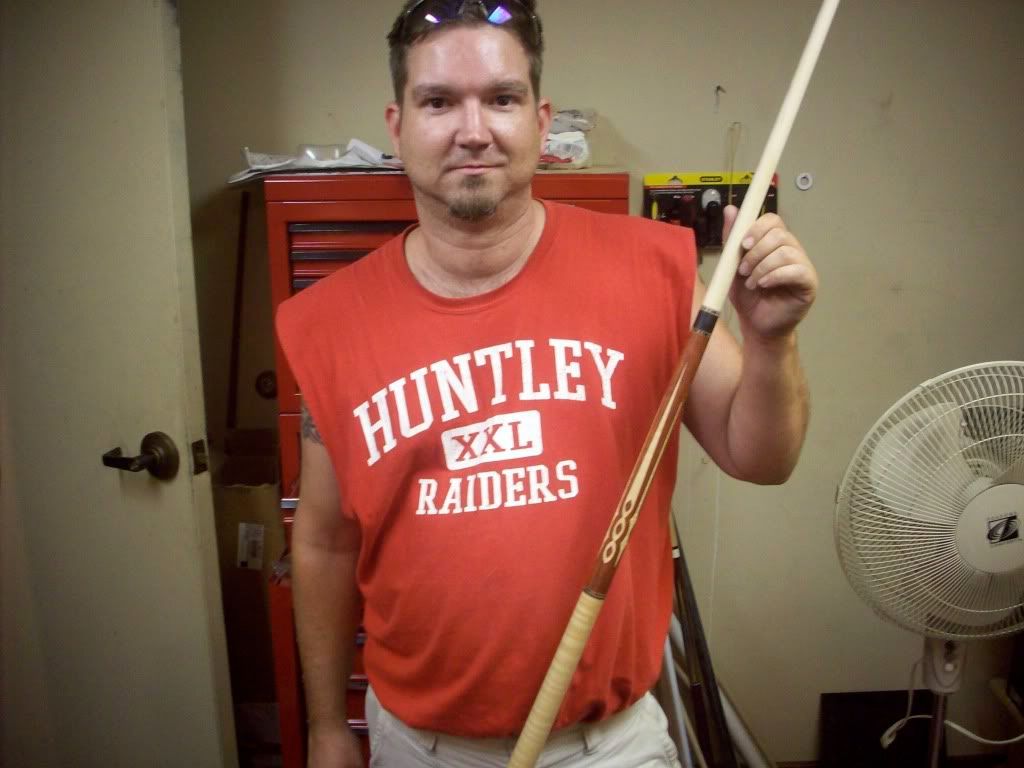
Tapering the butt between centers from the beginning to the end of the process

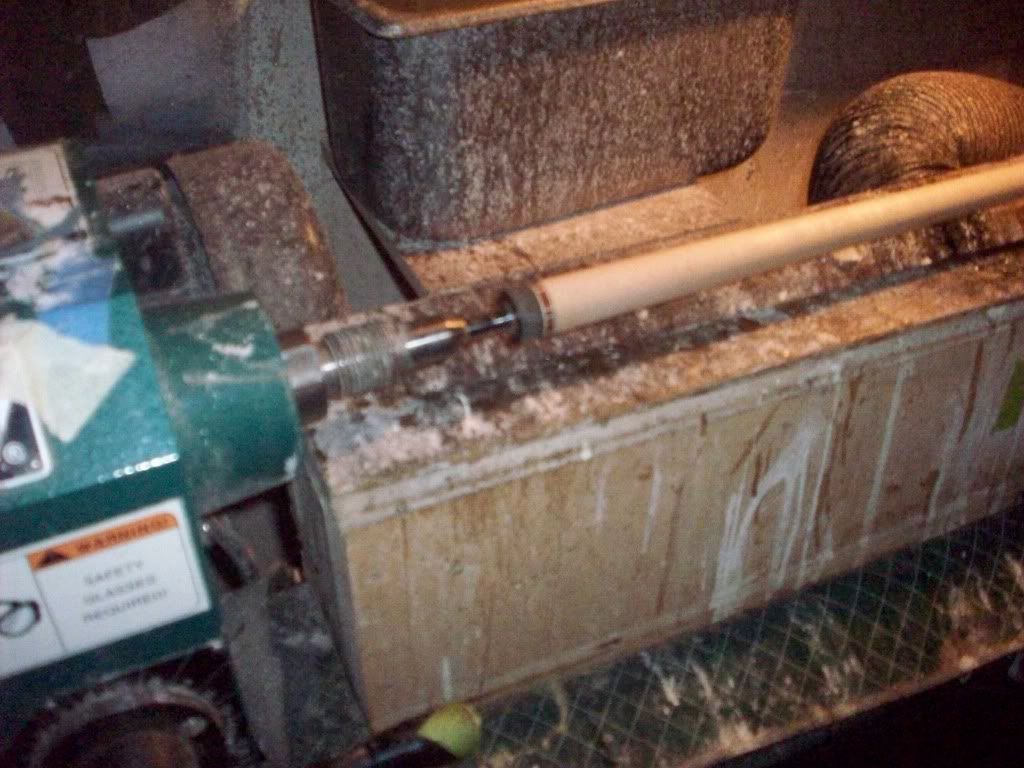
Leaving the pin in for all coatings, sanding, wet sanding and buffing.
Sorry about the bad pics, my good camera is on the fritz.
Thanks to all who wanted to know more about our process for obtaining almost perfect joint concentricity while using different machines during the overall process without turning the shafts in on the cue butt in the lathe or using sanding mandrels. I have been working with this for about 2 years now and think I have tweaked about 95% of the efficiency out of this procedure.
The heart of this method is the use of one of our pins that have been parted in the center barrel area, then faced and then a 60 degree center is installed to create a business end (custom drive pin). This will act as the driver in the shaft tapering machine and the wood lathe for final sanding and burnishing between centers. By engineering a very tight fit of the threads to the pin via a stepped minor dia. we obtain a condition whereby the out side taper diameter is always concentric to the centerline axis of the work piece. "In Theory".
During this explanation, some of these details described may seem a little over the top at first but they are all critical in obtaining the end result. At the end of the description I will recap some of the details for clarification purposes.
To start out with, I dowel the 5/4 x 5/4 maple into 1" X 30" pieces. These dowels sit in a open barrel for years as dowels. At some time, I taper them down to .960 on the joint end and store them in a vertical shaft caddy with shaft inserts installed.
Before we drill and tap a shaft unit, we drill a .500 hole to the desired depth of our pin insertion length. A Garolite LE insert is machined to a dia. of .488 and a 1/8 hole is drilled through the center for a glue relief. This unit is epoxied in to the shaft hole and allowed to cure. Having this insert allows a more stable foundation for the taping and very important in this overall process. Without the insert it works most of the time but not all of the time because the wood hardness varies when viewed on a 360 degree basis within the hole dia.
When we decide to make a shaft we chuck up the tapered unit in the jaws of our lathe while holding it centered on the back chuck. My 6 jaw is adjusted to less than .001 run out and I check it a lot. My back chuck is not as accurate but it is close.
We do not use a collet on the wood and take a pretty firm grip on the wood with the jaws for pin installs and shaft taping. I have found that this is the most accurate way for me to perform the facing, drilling and taping of the shaft. Once you face and tap your threads the centerline axis will automatically go perpendicular to the face after the outside taper gets established. A collet can introduce a error to the mix. After I center drill, drill a.287 hole to my desired depth for pin insertion I bore the hole to about .312 + or minus .003.
At this point I use a 3/8 x 14 CNC Drill-Tap to drill out the bored hole to a depth of only .375. The drill size on the drill-tap is the correct minor dia. (I think it's .320 or so) for this 3/8 x 14 tap that is part of the spiral fluke of the tool. At this point I don't allow the tap to engage as I just use this drill part of the tool to create the .375 hole depth.
I remove the drill-tap and replace it with an exact duplicate tool that has had the drill dia. precision ground down to a dia. that is - .004 from the stock size. This tool is used to tap the thread into the wall of the hole but it also creates a stepped minor dia. within the insert due to the slightly ground drill part. After the cue is finished and ready for sale a bottom tap is used to chase the threads as a final step. Note, only the drill part dia. is ground, not the tap part. If I just use the standard Drill Tap you don't get that very tight fit needed for repeatability.
The end result of all of this reveals a threaded shaft insert that is 5 times stronger than wood that will thread onto the pin in a normal fashion for the first .375 and then become a very tight fit for the next .600 + until facing occurs with the butt joint. The insert material has a ductility and tensile strength that lends itself to a better taped thread and will not allow the thread to distort or fail like wood fibers ofter do when over torqued by the player.
Our custom drive pin is then screwed in to the shaft. Because of the tight fit, we have to use a hand adjustable drill chuck to hold the pin to turn it into the shaft. If the pin can be put into shaft by hand, you won't get the concentricity you are looking for with a repeatable end result.
The shaft is placed in the tapering machine between centers with this pin acting as the driver. The shaft is then tapered in the desired cut dia. in a sequence with sanding sealer applied between cuts.
Observation: Before putting the shaft in the machine that is set with a spring weight calibrated for 30" your must correct the for the length because the pin is sticking out. I cut our shaft to 29 and 1/8 and make the custom pin barrel stick out .645 from the end of the joint side. The 1/8 is for facing if needed later or it can be adjusted when the ferrule is installed. By experimenting with different pin shank lengths, I was able to find the optimum spring weight by controlling length rather than changing springs.
My units now have very light spring pressure and when I am making the final passes I don't get any distortions or swirl lines at all, just a very smooth rms finish. This was a very good collateral advantage learned by using this pin device.
I land the joint at +.002 from my finish number. When you put the shaft on the wood lathe to sand you must leave the pin driver in to creat the same concentricity on the new machine. In fact, I leave the pins in all of the shafts during the epoxy coats, sanding, finish coats, wet sanding and buffing processes. I have made a lot of the pin devices as they are on many shafts that are being worked on in the shop.
As for the butt tapering, I believe that for this concentricity process to work 100% of the time that the pin must be installed when the cue is a dowel rod so as the 60 degree center on the nose of the pin creates the axial centerline of the cue with the butt center and needs to be there sooner rather than later. In fact when doing CNC floating point cues, we build the entire cue with a 29" dowel at the center of all of the cored components. After the entire cue has been taken to 1 3/8, we install our pin while the cue is a 29" rod at 1 3/8 dia. Then off the the tapering machine for a hogging of the initial taper.
Clarification:
By holding the following details as a discipline, I have got the cues to mate up with fantastic concentricity before any coatings are applied:
1. The shaft and the butt must be chucked on the bare wood while facing, drilling or taping is being performed in the early stage of production. If you take out the cue or shaft from the chuck you can't go back and re chuck it again. You must put in a new insert and start over. When I was using a collet I did not get the same results and they varried. After chucking hard on the wood before facing and taping the results changed to great repeatable concentricity.
2. After you tap your hole put a 60 degree chamfer on the edge face of the hole so your can face later between centers using the drive pin if you have to whisker face for decor ring alignment. Also to let the repair man drive the shaft for maintenance. After the coating you can lose the cocentricity a little if you spray more material on one side than the other. Another reason to make sure you wet sand clear coat in the wood lathe with the pin in place.
3. I believe that using an insert is also critical because the material machines so much better than wood and also will be stronger without distorted or failed threads down the road from over tightening by the player. By using the the stepped tighter minor dia. the threads and the wall interface are so closely aligned that the concentricty can't be denied with the taper OD. The insert and the tight minor also assures that once the facing has been contacted when joining the cue, you can't make it rotate any further. After the cue is finished a rolls perfect on the table we use the bottom tap for the final tap pass clean up.
4. The pin must be installed early on in the process so that you have concentricity with the OD from the get go. When I make veneered point cues with an A- Joint, I put the pin in when the forearm wood is is a 1 3/8 dowel. I then take tapering cuts between centers with the pin center of the live side to create a geometry where the pin and the other center is aligned on the axial centerline with the joint at .925. When I cut the v grooves the piece is mounted on a 5c collet chuck and my pin is tightened into a special 3/4" OD maintenance pin centered in the collet. Because the points don’t move on the floating point CNC cues the cue is assembled and tapered down without worrying about the critical A-joint fit up.
5. Before we ground the drill part of the CNC Drill-Tap we were getting good results but they were not always consistent. Making that slight change in the minor dia. was like magic as the cues started to have almost perfect concentricity.
Note: This pin driver system was not easy to control and took me a lot of time trying different things. It works even though these shafts and butts are made on two separate table saw tapering machined, one metal lathe, and one wood lathe. The fact that these parts are made and moved from one machine to another with predictable concentricity is the payoff for the credibility of the process.
Thanks to Ray: Although I have painstakingly developed this process, I give all the credit to my partner and mentor Ray Hernanzez who was a tool and die engineer for 40 years. He thought of the idea and came up with the grinding of the Drill Tap which was the milestone that made this repeatable. His thoughts created the process, my sweat and trial and error refined it to to a procedure.
If any of you guys try this stuff and come up with a new twist that will make it work better, I would appreciate your feed back, peer check and review.
Sorry for this very long description but I wanted to express all the things that we did to bring this concentricity ship into the harbor.
Disclaimer: Just so everyone does not think I am some kind of internet loser who has nothing better to do with my time:
I am addicted to cue making and I know most of you guys share the same passion. I do have a life and all of this text I have spent two hours composing will be taken apart and used in my written QA/QC Procedure concerning this phase of the total process. So sharing this info and asking for peer check and review is and integral part of my Procedure guidelines overall. I am killing 2 birds with one stone!
I look forward to any suggestions or comments as I know we can always raise the bar.
Thanks,
Rick Geschrey
See pics below:
Chucking without a collet
Pin driver made from our joint pin - OD of the barrel looks bad as it has been exposed to schellac and clear coat overspray
CNC Drill Taps and Bottom Tap - Far right ground down .004, center standard, left is bottom tap
Pin driver installed and in action
Tapering the butt between centers from the beginning to the end of the process
Leaving the pin in for all coatings, sanding, wet sanding and buffing.
Last edited:
")