My Latest Creation!

And a few more!

Not a lot of pictures for the 4+ hours I was turning this, but taper passes on a full length butt are not the most exiting thing to see...

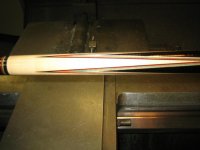
Anyway, it is 0.050" oversize now, and sealed with Cyano to keep it clean and stable as I get ready to do some inlay work...

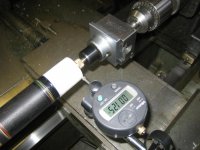
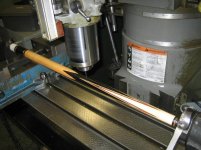
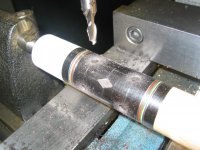
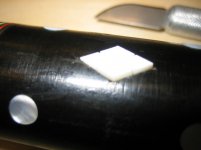
First photo is verifying my taper is where I want it

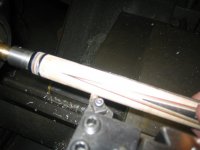
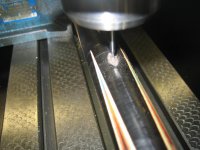
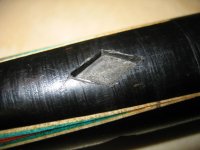
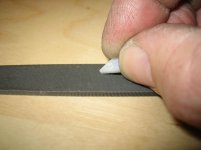
Second is a sample of the hours of cutting I did last night... Note that tool was not used for all the turning; just the 'roughing' as it has too much radius on it ans chatters too much. I went back to my small radius cutter later.

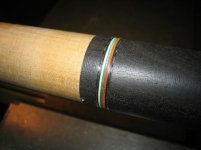
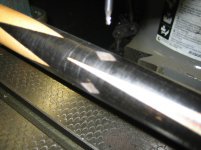
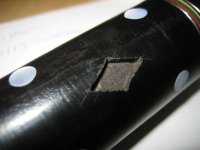
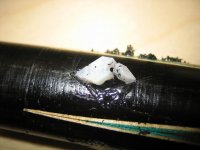
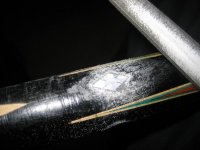
Third is a close up of the ring work in the butt. Note chatter which made me change the tool. I should have just stuck with the one I normally use...

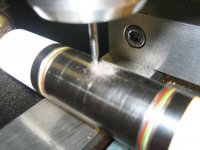
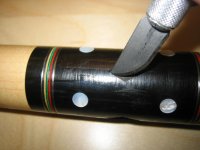
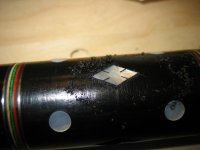
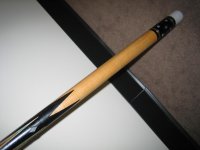
Fourth is the cue as it is now- with a coating of Cyano to keep every thing clean and stable. That will be cut off when I do my final taper after inlays.
 

Attachments

  • IMG_4169.jpg
    IMG_4169.jpg
    91.4 KB · Views: 475
  • IMG_4170.jpg
    IMG_4170.jpg
    89.4 KB · Views: 480
  • IMG_4171.jpg
    IMG_4171.jpg
    96.7 KB · Views: 468
  • IMG_4172.jpg
    IMG_4172.jpg
    93.8 KB · Views: 472
I have tapered cues using a single point tool. Those that have not done it can't appreciate it.

Back then I did not offset the tail stock. My SouthBend had a 10" taper attachment so I would taper about 8", move the taper bar, pick up the cut and carry on. Once I decided that I liked building cue I made a longer taper bar and replaced the single point with a dremmel tool.
 
Coming along very nicely. This has been a very interesting thread for someone who is not a cuemaker, but still interested and appreciative of what processes drive the end result. I'm able to "feel" the effect of at least some of the differing construction techniques & spec parameters, but it's cool to see some of the steps along the way and look directly at the integral parts before assembly.
Thanks for this.
 
I have tapered cues using a single point tool. Those that have not done it can't appreciate it.

Back then I did not offset the tail stock. My SouthBend had a 10" taper attachment so I would taper about 8", move the taper bar, pick up the cut and carry on. Once I decided that I liked building cue I made a longer taper bar and replaced the single point with a dremmel tool.

Thanks for the kind words, Murray.

I agree, it is a tedius hair-pulling experience, except you have to keep both hands busy, so it's hard to actually get a hand full to pull out...

I would not want to pick-up the taper on a piece of wood... Even on polymer, or even Aluminum for that matter, sucks!

I may have to rig up a router (or dremel) for the final taper, although I have a certain comfort level with a single point now...:confused:
 
Coming along very nicely. This has been a very interesting thread for someone who is not a cuemaker, but still interested and appreciative of what processes drive the end result. I'm able to "feel" the effect of at least some of the differing construction techniques & spec parameters, but it's cool to see some of the steps along the way and look directly at the integral parts before assembly.
Thanks for this.


Hey, Chris! Glad you are enjoying it.

I wish I had something like this 15 (or so) years ago when I was up to my elbows in glue trying to figure out how to make a full splice blank with Burton's book in hand...
 
Yeah, it sucked but you have to make do with what you have.

I found these pictures. The first one is the dremmel and the second is when I upgraded to a foredom machine. I thought I was in high cotton. I still have the foredom 10 years later) and it is used for live threading.


attachment.php


attachment.php


Thanks for the kind words, Murray.

I agree, it is a tedius hair-pulling experience, except you have to keep both hands busy, so it's hard to actually get a hand full to pull out...

I would not want to pick-up the taper on a piece of wood... Even on polymer, or even Aluminum for that matter, sucks!

I may have to rig up a router (or dremel) for the final taper, although I have a certain comfort level with a single point now...:confused:
 
I have a very nice DeWalt plunge router I was considering for this job. It is 1.5 HP and variable speed (it cuts a round-over on purple heart like yellow pine).

Do you think that would be suitable for tapering, or would a Dremel (which I also have) be a better choice? How about stainless joints? Although the single point is horrible on the wood, I have to imagine on the steel it will be a bit less chaotic... Maybe use an end mil in the router as opossed to using a carbide router bit? The spiral flutes should be easier on the steel than the straight flutes of a router bit I'm sure, and a sharp end mil cuts wood just fine.

Thoughts?
 
I'm really digging this thread. I wished more cue makers would do something like this. When Jim did mine I asked for every pic possible from all pieces to final product. If everyone could do it, it would be nothing but you guys have special talents and I dig that.

I would have went with just the diamonds in the butt sleeve and the diamonds in the points w/dot on top and two on bottom.
 
The Dremel is way underpowered for the job. A router with at least a 4 flute slot cutting bit would be much better. My current cutter had 20 teeth but it cost almost 200 bucks.

With your setup I would single point the joint.

I have a very nice DeWalt plunge router I was considering for this job. It is 1.5 HP and variable speed (it cuts a round-over on purple heart like yellow pine).

Do you think that would be suitable for tapering, or would a Dremel (which I also have) be a better choice? How about stainless joints? Although the single point is horrible on the wood, I have to imagine on the steel it will be a bit less chaotic... Maybe use an end mil in the router as opossed to using a carbide router bit? The spiral flutes should be easier on the steel than the straight flutes of a router bit I'm sure, and a sharp end mil cuts wood just fine.

Thoughts?
 
Another Update...

This thread has been a bit stagnant here for a while, but here's some update photos.

I was FINALLY able to get time on the CNC mil, with a (working) program to finally get the diamond pockets cut. I was about to give up and just finish it with only the rings in the butt...

Although I properly found center, and then lined up the cutter with the tip of the first point, I still seem to be slightly off with the placement... Oh, well. It looks hand-made now!

Anyway, while I had it in the head, I also popped in some holes for dots in the butt sleeve. So, at the end of the day, I went with my original inlay pattern!
 

Attachments

  • IMG_4225.jpg
    IMG_4225.jpg
    96.7 KB · Views: 470
  • IMG_4226.jpg
    IMG_4226.jpg
    89.3 KB · Views: 464
  • IMG_4227.jpg
    IMG_4227.jpg
    92.2 KB · Views: 465
  • IMG_4228.jpg
    IMG_4228.jpg
    90.7 KB · Views: 447
  • IMG_4229.jpg
    IMG_4229.jpg
    98.6 KB · Views: 468
Yeah, sorry for the delay...

First I had the program written, and then it was lost.

Then it was found again, but the machine was not open long enough for me to get on.

Last night I planned to block and buff the Titlist, but instead did the pockets on this cue because I had the program, the time and the machine open all at the same time!

So, it looks OK; not perfect. Last night was spent on the couch watching "Hang 'em High" and sharpening the corners of the pockets with an x-acto knife.
 
And now the diamonds (and dots) are glued in!

I lost one diamond (broke it) but not too bad all things considered.

Note my little trick: breaking the sharp points on the back side makes them slide in a LOT easier...
 

Attachments

  • IMG_4230.jpg
    IMG_4230.jpg
    92.3 KB · Views: 390
  • IMG_4231.jpg
    IMG_4231.jpg
    86.8 KB · Views: 412
  • IMG_4232.jpg
    IMG_4232.jpg
    87.4 KB · Views: 402
  • IMG_4233.jpg
    IMG_4233.jpg
    81.5 KB · Views: 395
  • IMG_4236.jpg
    IMG_4236.jpg
    91.1 KB · Views: 409
More pics...
 

Attachments

  • IMG_4237.jpg
    IMG_4237.jpg
    90.7 KB · Views: 404
  • IMG_4238.jpg
    IMG_4238.jpg
    90.3 KB · Views: 396
  • IMG_4239.jpg
    IMG_4239.jpg
    85.1 KB · Views: 423
Thanks for taking the time to document the build. I know a lot of guys on here will find it entertaining & enlightening. I have.
 
Once the epoxy had set up, I filed the diamonds flush so the tool bit does not catch and edge and (possibly) shatter the inlay...

I might be doing some passes on this tonight; and I might get the wrap and pin on the Titlist...:confused:
 

Attachments

  • IMG_4246.jpg
    IMG_4246.jpg
    94.1 KB · Views: 373
Back
Top