My table is higher by 5.5" - How I did it

iusedtoberich

AzB Silver Member
Silver Member
IMG_3303.jpg

IMG_3814.jpg


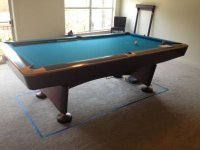
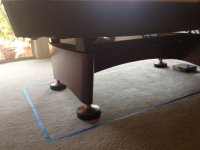
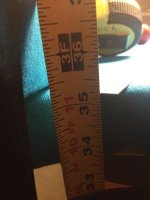
I made my GC4 higher by 5.5", or 35.25" final slate height.

I'm a tall player, with a bad back, and decided I wanted to try this. I've had the table for a couple of months now. Not a single roll off, and the table feels as sturdy as the GC's at the pool halls. So, no detrimental table affects of the additional height.

It is more comfortable playing most shots. However, longer shots are no longer reachable, due to the added height. My back still hurts playing, but I think I can play longer periods of time before it gets too bad.

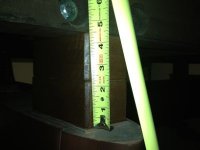
The blocks added 4.5" of height. The feet added 1". See This Feet Link for more details on the feet:

Thanks to the mechanics who answered a few of my obscure questions this past year so that I could design these, without the table in front of me.

The below posts has more info on the riser blocks.
 
IMG_3203.jpg
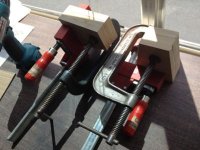
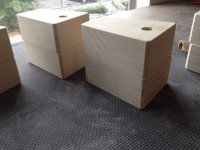
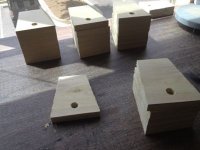
Each block is made of 2 sets of 3 boards. I used poplar to have the best chance of matching the GC wood in color.

IMG_3204.jpg
The boards are all rough cut, then glued together oversized.

IMG_3233.jpg
After the glue has cured, the assembly is belt sanded to a consistent size. A reveal chamfer is added between each set of blocks, as I knew it would be impossible to belt sand them all exactly the same, and also to line them up perfectly while assembling the table.

IMG_3249.jpg
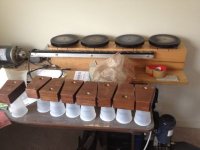
The blocks were stained with a rag, then cleacoated with a spray finish from Home Depot.

IMG_3252.jpg

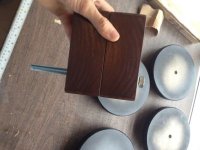
Not visible in this pic, but there is a lockwasher and washer under the head of the 1/2-13 bolt.

I made the blocks into two sections, mainly because if the table turned out to be too high, I could take one of the blocks out. There really is not a great way of trying a higher table. I placed phone books on the surface of the pool hall's table for an idea. But, now that I have the real deal, the feeling is definitely different than the phone books gave me.

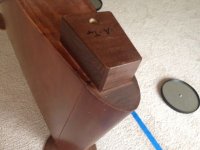
One thing to note in this picture is the blocks look like one solid piece of wood. This is because I was careful to order the blocks one on top of the other in the same order they were cut from the long board. This makes the grain lines match across the face of each individual component.

Continued next post.
 
Last edited:
IMG_3254.jpg
I'm colorblind and did my best matching the color. I'm told my stain needed more red. Oh well, I can't tell:)

I did not own my table yet when I made these. I wanted them to be ready for the table delivery. So I took many careful measurements from my local pool hall, and did the best I could. If I were to do it again, I'd probably make the exposed edges of the blocks slightly rounded in shape, to better match the contour of the GC pedestals.

IMG_3819.jpg
Here you can see the two blocks in action, and how the reveal chamfer hides any mismatches.

IMG_3303.jpg
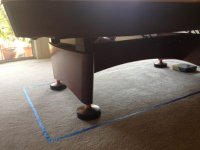
When you are eye level with the table, you can see the gap caused by the blocks. The gap has grown on me. I think because its so wide, it almost looks on purpose. If it was narrower, it would look more like a mistake, imo. I knew this gap would be there, and one idea was to put a thin piece of plywood attached to the blocks, to try to follow the lines of the pedestal. I've decided I like the way it looks now, and I'm not going to mess with it further.

IMG_3302.jpg
From a standing position near the table, you can't tell there is a gap under it.
 
Last edited:
Very nicely done!
If it allows you to enjoy the game more, then mission perfect.
Craig
 
I think that's the first lifted table I've ever seen. Well designed and very functional. :thumbup:

I hope it allows you to enjoy your game more.

I'm not color blind and that stain looks like a good match...at least in the photos.
 
I cannot for the life of me think of the logic of doing it that way instead of just putting some round blocks under the feet. Not saying you didn't do a nice job of what you did but why?

JC
 
I cannot for the life of me think of the logic of doing it that way instead of just putting some round blocks under the feet. Not saying you didn't do a nice job of what you did but why?

JC

I did consider doing it that way. The reasons I chose not to:

1. I felt it would not be as sturdy. If there were a way to securely bolt the extension to the bottom of the foot, maybe it would be ok. But if the existing foot rests on top of the extension, I feel the height to width ratio of the extension would not be very favorable, and there would be potential for the table to be wobbly. Now, if the extension was something like 1 foot in diameter, and 6" high, I feel it would be sturdy enough (not wobbly). But then, that leads to reason #2.

2. I thought it would look goofy like that (that is my subjective opinion, as of course lots of people would say it looks goofy now).

I did start a thread a while back asking the table mechanics how they have raised the tables. Some did it the way I did, but only an inch or so. I don't believe anyone has raised it as much as I did, so I was on new ground (as far as I know). That said, I wanted to make it as sturdy as I could, since I did not have anyone to consult that made it super high like I did.
 
Well, I had the table for about 3 months now, playing on it almost every day. Over the Xmas break, I went to the pool hall for the first time since I got the table.

"Did they saw the legs off these tables?!" That was my first reaction. lol.

Quite a difference. Even chalking my cue was different. I kept dropping the chalk on the floor, because when I'd open my fingers to put the chalk on the rail, the rail was not where I expected it to be, lol.

In about half an hour, however, I was playing just fine on the normal height tables.

If you are crazy like me, tall with a bad back, and have the means to do what I did, my personal recommendation is to do it:)
 
Back
Top