Restoring '46 Brunswick Anniversary - Castings Concern

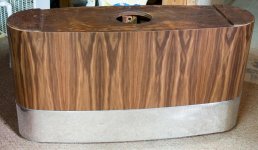
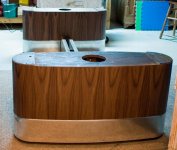
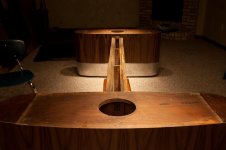
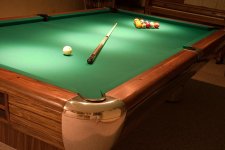
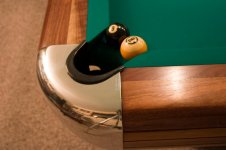
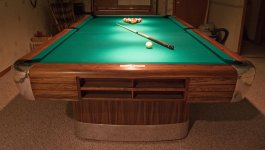
GC the oval's came fantastic, glad to here your table rebuild is coming to a finish, post up some pictures of the assembly .

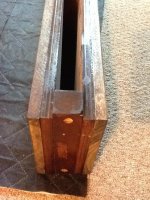
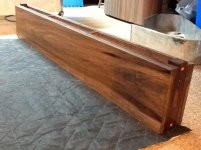
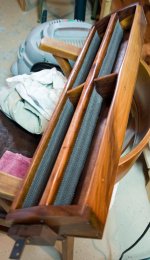
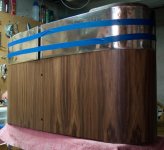
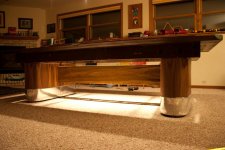
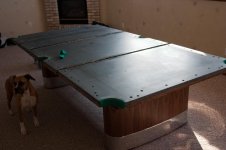
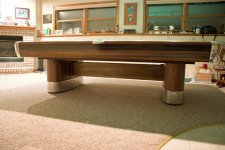
So... my neighbor who helped with some crucial rail work had some walnut veneer for the stretcher... he went to measure it and it turns out it is too short by a few inches. Rather than having a noticeable seam, looks like i'll be putting stain/oil on 5 ft poplar planks for a veneer. I can get all 10 feet needed for $3.09/ft. It's either that, or I wait even longer to buy walnut veneer to cover the stretcher, another $80. The stretcher sits mainly in the shadows anyway. At least if it's poplar, it will match the apron skirts for the most part. I hope this is a plausible compromise. I pick up the wood tomorrow morning. I may plane it down to 1/2" so I can use adhesive instead of fasteners.
 
on the home stretch for this very heavy table

AZ forum wiped out all my text so I have to start over. When will I learn to first highlight everything and "copy" before submitting, just in case it happens again.

I bought a 12ft poplar plank to "veneer" the stretcher. It's 3/4" thick and makes a beefy stretcher that much heavier. It's quite the arm-curl to maneuver. It has been sanded, oiled and has one coat of poly. I used Varathane pre-stain conditioner, and applied Watco's dark walnut Danish Oil, but it wasn't dark enough, so the second coat included 2 ounces of Minwax's Antique Walnut stain blended in with the oil. It turned out to be a close match to the poplar apron skirts.

The ovals have 2 coats of oil on them, and one coat of poly at this point. I expect to re-install the aluminum banding this week, and begin the table re-assembly process. I filled 16 bags of gallon-sized ziplock bags with sand (1/2 full only or they wouldn't fit into the oval leg holes). I have more sand but won't know how many bags the oval cavities will hold until I'm ready to re-connect the stretcher to the ovals.

My cousin practiced wood burning tiny patent numbers after creating a to-scale stencil (he works as a graphics designer for a sign company) and determined they would burn-bleed over each other resulting in illegibility so we're going with plan-b instead... but have to wait until the last coat of poly is dry.

I spent a lot of time with all those finishing fumes this weekend. Though my basement was well ventilated (including the use of an $800 air purifier), I wonder how many brain cells disintegrated. :cool:
 

Attachments

  • Stretcher with poplar planks.jpg
    Stretcher with poplar planks.jpg
    99.8 KB · Views: 667
  • Stretcher with poplar planks2.jpg
    Stretcher with poplar planks2.jpg
    94.2 KB · Views: 660
The photos were taken with an iPad, and look so much better on its screen... but terribly grainy above. I'll be shooting only with the Canon DSLR from here on out. I may also video-record the entire re-assembly process, starting with the aluminum banding, if I can get some help holding the camera. If i just put it on a tri-pod and let it record, I'll wind up doing hours of digital video editing... something I loathe to do.
 
GC4 that's what I plan on doing to mine except I will be using 1/4 in. stock, your about to the end of your journey I know you will be glad. Looking good.
David
 
Final coat of poly is drying on the stretcher and legs. Bandings will be carefully installed... maybe tonight yet.
 
Re-Assembly Progress - Day 1

The first few photos will show a before-and-after of the ball rack. I realized today I never adhered the walnut veneer backing to the back. They had been cut and finished months ago. You might notice that I lined the carve-outs. They are brown colored non-slip shelf liners, cut to fit. I did this only to protect the genuine walnut's wood finish. The four slices of grippy are held in with a minimal amount of rubber cement on the ends, just enough to keep them tight and in their place. They could be removed at any time.
 

Attachments

  • CRW_8406 c.jpg
    CRW_8406 c.jpg
    102.3 KB · Views: 595
  • CRW_9574 c.jpg
    CRW_9574 c.jpg
    96.9 KB · Views: 603
Re-Assembly Progress - Day 1 continued

The next photos will simply show the aluminum banding "mop protectors" back in place. I was going to use a cargo strap to hold the bandings in place but went with painter's tape instead. It worked fine with two racetracks worth.

I purchased stainless steel machine screws, and sheared 4 of them without applying much pressure at all. Apparently two layers of aluminum caused too much binding pressure and snap! I had pre-drilled holes, but realized I used too small of a diameter bit and had to go up a size. And of course, after each snap caused the philips driver to slip and scratch the connector plate.

The last photo in this series at least gives me a sense of "ALMOST DONE!" Now if I can get the accumulated toys piled in the billiard room to vanish, I could move these items up one level, and start putting sandbags in the leg cavities that are ready to go in my garage.
 

Attachments

  • CRW_9573.jpg
    CRW_9573.jpg
    87.9 KB · Views: 596
  • CRW_9579 c.jpg
    CRW_9579 c.jpg
    90.8 KB · Views: 599
  • CRW_9579.jpg
    CRW_9579.jpg
    90.4 KB · Views: 601
  • CRW_9578.jpg
    CRW_9578.jpg
    85.6 KB · Views: 611
  • CRW_9580 c.jpg
    CRW_9580 c.jpg
    77.5 KB · Views: 596
I'm a bit ovErtired at the moment and the fact that it has been 8 months since I've taken anni apart, I cant remember if the apron skirts can be attached without the slate on the frame. I have the legs and stretcher in place and the legs are filled with sand, frame is bolted down. That is as far as I could get today. Pics tomorrow.
 
blinds

I'm a bit ovErtired at the moment and the fact that it has been 8 months since I've taken anni apart, I cant remember if the apron skirts can be attached without the slate on the frame. I have the legs and stretcher in place and the legs are filled with sand, frame is bolted down. That is as far as I could get today. Pics tomorrow.

Hey there GC,
Things are moving along. It's looking good!
You'd figure this out in short order, I'm sure. But .....
I think you have the later figure 8 plates on your rails.
In that case, blinds attach with short machine bolts through that blocking on the backside. The plates on the rails have two female threads one for the rail bolts and one for the blinds.... now ya just have to find those suckers.... " I know there around here somewhere".
I'm close to doing a run of the blind molding in Walnut.
There is some interest by others... stay tuned.
The good news is that the blinds are a stand alone thing. I can set up my table and do the blinds at any time. I hope to have mine set up within the month. Truth is , I really don't want to do the remedial work on my aprons.

I hope you're well.
Dave
 
@Dave... can't wait to see those walnut aprons! As for me, I'm too tired to continue working on the table. Had 21 guests over for dinner (including 13 kids) and am wiped out. Gracefully, two of them helped lift the slates onto the frame. I keep thinking (and bare with me, I'm deliriously tired, but still typing coherently) the slates will need to come off again to level the frame before the slate, but at least the padded carpeting is getting fully compressed now so leveling slates should only need to happen once. I have pics, but won't post now until tomorrow.
 
Re-Assembly Progress - Day 2+

Not sure if this is technically day 2 or day 3, but posting the latest. The pics pretty much show what I last described. Last night the slates were lifted into place. Tonight I cleared away the old beeswax amongst the seams; later will be filled with bondo. The boys are getting as anxious as I am.
 

Attachments

  • CRW_9583.jpg
    CRW_9583.jpg
    63.6 KB · Views: 816
  • CRW_9582.jpg
    CRW_9582.jpg
    45.8 KB · Views: 815
  • CRW_9584.jpg
    CRW_9584.jpg
    89.1 KB · Views: 803
  • CRW_9587.jpg
    CRW_9587.jpg
    94.4 KB · Views: 815
  • CRW_9590 5x7 150ppi.jpg
    CRW_9590 5x7 150ppi.jpg
    97.6 KB · Views: 826
The third picture above shows the table elevated. The reason for this was due to the length of the only wrench I had that fit the square bolt head. I had to stick it thru the bottom in effort to have enough room to turn it at all, much less tight.

These pictures have the slate sitting on top showing the slate pins, and one image of the Anniversary Model D-C lettering that was done this evening (both ends received this treatment). My cousin wanted me to mention that if anyone else needs the digital template to attempt this themselves, he can provide it. Just PM me. (In case anyone is wondering, the wood burning practice veneer board he worked with resulted in illegible patent numbers so the attempt was scrapped in favor of this more tedious approach.)
 

Attachments

  • CRW_9598.jpg
    CRW_9598.jpg
    71.3 KB · Views: 826
  • CRW_9599.jpg
    CRW_9599.jpg
    73 KB · Views: 813
  • CRW_9611.jpg
    CRW_9611.jpg
    96.2 KB · Views: 806
The table looks really good....and the slates look to be in very good condition.... Not trying to nit pick.....but why didn't you paint the frame and change the backer boards on the slates......seeing as far as you went with everything else?
Then you could say you left nothing that could have been done on the table out.....I know nobody is going to see the frame....and the backer boards look fine.....but looks like you went over everything with a fine tooth comb.....and the table shows how much hard work you have put in it......love the pic with the dog.
 
....but why didn't you paint the frame and change the backer boards on the slates......seeing as far as you went with everything else? ...

Well, it's not toooooooooooo late. Months ago, I considered stripping the paint/stain from the frame. Seems that it was very spotty from the manufacturer, or, some previous owner started and stopped. I didn't see any real benefit in doing so, other than as a wood protectant.

As for the slates, I didn't want to remove the frames... my frame of mind 8 months ago was to do as little as possible to disturb the ol' rock since they were in such good condition. I felt I'd put them at too much risk. I did check the fastening screw tightness this morning, and two were unexpectedly loose. There was a time when I wanted to replace all fastening hardware with new stainless bolts/screws, etc. I did just that with the screws holding the casting/corners together, and some rail bolts (some were missing altogether).

Take a quick look at the label my cousin did for me. Right above that on the frame there is a distinct rectangle, like something is supposed to be there... though it's not centered in any way. Would that have been where the union sticker used to be? And speaking of which, where did the original red Anniversary decals get ahdered to?
 
Did I read in the thread that you put sand bags inside the legs? If so why?

Another forum contributor had made the suggestion a few months back. Makes sense to me, as in, the more stable the better. Certainly doesn't need it because the table is in no way wobbly. Another reason I like the idea is the extra weight compresses my padded carpeting... before the slates were moved back onto the frame. Of course the slates will come off to level the frame, but having the carpet fully compressed has its benefits. A cousin of mine used to install these old tables back in the day and told me if the slate is leveled too soon, it might require re-leveling a couple of weeks later once there is nothing more to squish under it. :cool:
 
98% finished... her clothes are on and Anni is gorgeous!

Unfortunately, I was unable to photograph a step-by-step process today. Too much running around. I need to digest the day to provide a more thoughtful monologue that could be considered useful for those restoring an Anniversary. Here are the latest photos of the assembled table with bed and rail cloth, etc.
 

Attachments

  • CRW_9635.jpg
    CRW_9635.jpg
    95.6 KB · Views: 758
  • CRW_9639.jpg
    CRW_9639.jpg
    86.7 KB · Views: 767
  • CRW_9644.jpg
    CRW_9644.jpg
    98.3 KB · Views: 750
  • CRW_9647.jpg
    CRW_9647.jpg
    97.3 KB · Views: 761
  • CRW_9654.jpg
    CRW_9654.jpg
    85.1 KB · Views: 765
Back
Top