This is going to be my next restoration project

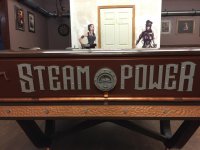
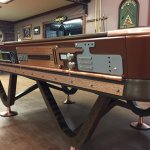
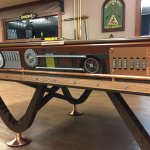
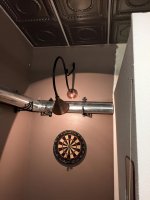
Latest additions to the man cave.

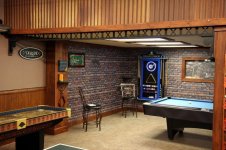
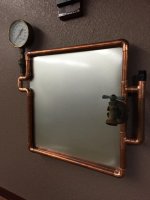
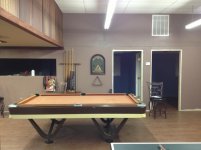
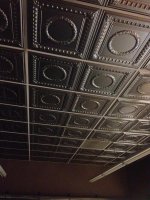
Update on the man cave project. Here's the finished stove restoration along with the new goose neck lamp to light the dart board. Also a shot of the stamped tin ceiling although I still have to paint all of the white grid black. Not looking forward to that project.
 

Attachments

  • Peninsular 414 Parlor Stove-02 after.jpg
    Peninsular 414 Parlor Stove-02 after.jpg
    98.5 KB · Views: 1,091
  • Goose Neck Lamp.jpg
    Goose Neck Lamp.jpg
    53.1 KB · Views: 1,087
  • Tin Ceiling.jpg
    Tin Ceiling.jpg
    80.8 KB · Views: 1,083
You skill amazes me...both the sense of design and the hand skills to pull it off.
 
Doing more research, I found this old Simonis logo that I plan to carve a 3 dimensional version of and paint for another wall piece. And I found this steam punk warrior chick that I made into a lifesize stand up.

I'll eventually get to the inside of the bathroom and the last pic is sort of the direction I want to go. I'll put my own twist on it. Also, if it's not too much trouble I want to include a proper wall mounted urinal. Gotta have a urinal in a man cave!
 

Attachments

  • simonis-crest_sldetail.jpg
    simonis-crest_sldetail.jpg
    94.8 KB · Views: 1,042
  • SteamChick.jpg
    SteamChick.jpg
    101.5 KB · Views: 1,037
  • great-steampunk-architect.jpg
    great-steampunk-architect.jpg
    83.7 KB · Views: 1,035
One last photo I forgot to add. I had some scrap 1/2" black PVC and made these fake trusses. Purely cosmetic.
 

Attachments

  • Truss-02.jpg
    Truss-02.jpg
    63.8 KB · Views: 1,100
  • Truss-01.jpg
    Truss-01.jpg
    82.7 KB · Views: 1,104
Two tables! You are my hero.
Now I will reference your photos when I break the news to my wife that I want a diamond table, but can't break away from my gold crown. Why not both? This guy has two! Haha.

Love the steam punk vibe, and that sink and faucet is killer. Awesome and congratulations.
 
your man cave is bigger han my apartment. what the hell kinda propertythey got in florida? jeez
 
Did you ever steampunk the Viscount? If so, I hope you remembered to put some rivets where the diamonds go...

pj
chgo
 
your man cave is bigger han my apartment. what the hell kinda propertythey got in florida? jeez

LOL... My house is small, 1400 s.f. but my shed out back is 6,000 s.f. At the moment I'm only using 2k s.f. for what you see in my pics. But I plan to expand the man cave by another 2k s.f. down the road so I can put in a driving range for my golf practice. I'd like to put up one of those really slick golf simulators with the big screen you hit balls into that show all the nice golf course fairways!

After that I'm thinking about a small grand prix race track either for electric go carts or segways :))))

I thought this would take a few years but it looks like it may run a lot longer.
 

Attachments

  • New Shop Building.jpg
    New Shop Building.jpg
    43.5 KB · Views: 1,067
Last edited:
Another weekend project to add. I have a separate lounge area for relaxing. I painted the walls and found some cool galvanized metal letters to spell out cave. And an old friend of mine found the rusty old scrolls that I used to enhance the lettering on the wall.

I have a leather couch, fridge, and entertainment center for the tv in this same room which will all get the steampunk design treatment. Almost three years into this project and probably another three before I'm close to being done.
 

Attachments

  • Cave wall lettering.jpg
    Cave wall lettering.jpg
    97.7 KB · Views: 1,033
Right now I have a wireless bluetooth speaker streaming music from my media server. But I do have some ideas for a really cool steampunk version of a jukebox. Too many ideas and never enough time!
 
So these are just small projects, but they're the easiest to make. Made two steampunk dry erase scoreboards. One for the shuffleboard table and one for the dart board. Any day now I'm going to start on the Brunswick table.
 

Attachments

  • Dart Scoreboard.jpg
    Dart Scoreboard.jpg
    88.4 KB · Views: 950
  • Shuffleboard scoreboard.jpg
    Shuffleboard scoreboard.jpg
    98.5 KB · Views: 983
Steampunk

Great looking table, I'd leave the top rails alone and if you want to mess around with it, put a veneer overlay over the sides and modify that. I think it looks pretty good as it, a very Jetsons looking table.

I love the steampunk/distressed metal/Road Warrior idea... make all your chairs and accessories 'found object' funky... but I agree with the other posters, I'd leave the rails
OG, and the cloth and rails standard Simonis green. Love the funky legs on that table..
heavy?
 
Started on the Brunswick this week. Made some design changes from my original vision. I believe it will be even better. Hoping to complete it in a week or two!

Removed the legs, sanded back down to bare wood. Stained them and clear coated them. The old leg levelers were toasted, so I ordered a brand new set of polished brass ones from Classic Billiards. After I replaced the new legs, I removed the wood skirts from the table. They needed quite a bit of body work which we finished today. They just went into the paint booth to get primer coats.

Tomorrow the rails are coming off and I'm dropping them off on Saturday at the Billiard Fitter in Tampa, where he will rebuild the cushions and rails with the Diamond K55 rubber and Simonis 760 dark green. I heeded the advice of a few here and will leave the tops in the original wood grain. I am however swapping all the aluminum corners with polished brass to match the feet. The side skirts are getting my sculpted 3D steam punk design treatment as simulated here.
 

Attachments

  • Bruns-01.jpg
    Bruns-01.jpg
    97.1 KB · Views: 815
  • Bruns-02.jpg
    Bruns-02.jpg
    96.9 KB · Views: 805
  • Bruns-03.jpg
    Bruns-03.jpg
    94 KB · Views: 812
  • Bruns-04.jpg
    Bruns-04.jpg
    90.3 KB · Views: 809
  • Bruns-05.jpg
    Bruns-05.jpg
    54.7 KB · Views: 812
Last edited:
Oh found out the bronze counters from the GC will not fit due to different size opening. So I may take mine to somebody and have them plated. The aluminum will clash with the rest of the brass.
 

Attachments

  • Bruns-06.jpg
    Bruns-06.jpg
    13.4 KB · Views: 814
  • 2015-10-28 14.44.43.jpg
    2015-10-28 14.44.43.jpg
    81.8 KB · Views: 812
Well I found the time to finish the Brunswick Viscount. I'm happy with everything about it. By far this is the most involved project in the man cave "so far".

The important thing is, it plays excellent. Wes Burden the Billiard Fitter out of Tampa put it all back together for me and did a fantastic job. He is quite meticulous about his work and taught me quite a lot in the process.

I replaced the levelers and pocket metal with polished brass that I purchased through Classic Billiards. Ken is another very knowledgeable man when it comes to pool tables.

I put new Diamond K55 cushions and Simonis 760 dark green cloth on the table.

I know some of the purest will hate my choice to do this but I'm not a fanatic. I'm a good recreational pool player and this table is about art for me. I will love and enjoy this piece until the day I die. It was fun, and inspires me to create more steampunk art for my man cave. I've been on this project well over two years now and will easily be adding to it for another 3-5 years.

Hope you enjoy this out of the ordinary pool table!
 

Attachments

  • brunswick-01.jpg
    brunswick-01.jpg
    88.7 KB · Views: 850
  • BW-00.jpg
    BW-00.jpg
    92.3 KB · Views: 766
  • BW-002.jpg
    BW-002.jpg
    96.9 KB · Views: 765
  • BW-02.jpg
    BW-02.jpg
    93.2 KB · Views: 770
  • BW-03.jpg
    BW-03.jpg
    94.8 KB · Views: 760
The rest of the photos
 

Attachments

  • BW-04.jpg
    BW-04.jpg
    91.9 KB · Views: 759
  • BW-05.jpg
    BW-05.jpg
    89.1 KB · Views: 753
  • BW-06.jpg
    BW-06.jpg
    87.8 KB · Views: 763
  • BW-07.jpg
    BW-07.jpg
    87.8 KB · Views: 767
  • BW-08.jpg
    BW-08.jpg
    89.8 KB · Views: 756
Back
Top