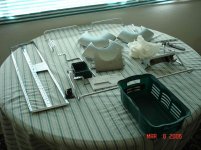
bought a gc. need info on moving. please help!

I found a shade of copper that matches the GC III pretty close.......and on the cheap. Amazing what some good prep work, metal etch primer, and a can of Rustoleum hammered copper paint can do ;).

12-24-11002.jpg
 
you did that yourself???

wow! that looks fantastic!

Yes sir I did. The prep work is very important. The pot metal has to be sanded down to virgin metal with a finish of around 120 grit sandpaper. Then coat with a good metal etching primer.

To achieve the hammered(fish eye) look the Rustoleum has to be sprayed on in two or three passes, medium thick, one time only. Let it sit untouched until it dries. This paint does not like to be re-coated after drying or sanding between coats. The fish eyes do not appear until about 5 minutes after spraying and they continue to grow and multiply as it dries.

You need to get it right the first try or you'll have to sand it back down to primer and start over. The paint needs a smooth and flat surface to properly fish eye, so that's why it does not do well with multiple coats. It is best to buy an extra can and practice on some scrap metal until you get it right.
 
Last edited:
I did not clear coat mine, although you could if wanted. As for durability, I have about 6 months of play on my GC III and no chips yet. This probably would not be a good finish for a pool hall table that will see a lot of abuse. I take care of my equipment, so it should last me a long time.

After hearing the stories of failed attempts to powder coat pot metal, I decided to just paint them. I can touch up any chips as they appear and if the finish fails I can redo them pretty quick and cheap.
 
man, i am really impressed with the way that came out. looks very nice. did you consider doing the rail trim metal with the same stuff?
 
I decided to live with the rail trim as is, but mine was pretty nice. I'm not sure how well paint would hold up well on that edge.
 
mine is a little rough so im doing it while i have everything apart.

The rail trim on GC-1, 2 and 3 is extruded AL so it can be striped, polished and clear anodized. The corner castings on GC-1 is also AL. The corner castings on GC-2 and GC-3 is a zinc alloy (pot metal). Best thing to do is find a plating company. Step 1 is to dip the metal parts in the stripping tank. Step 2 is to polish the castings on a buffing wheel. Step 3 is to re-plate the castings. When I refinished my hybrid GC-1 / 2 I used electroless nickel on the corner castings and chrome on all other parts, (feet, bridge holder, counters, etc).
 

Attachments

  • DSCa00941.jpg
    DSCa00941.jpg
    97.4 KB · Views: 242
  • DSCa00968.jpg
    DSCa00968.jpg
    87.3 KB · Views: 248
This is a picture of my future pool table light. looks rough now, but i think it will come together ok. it's leftover oak plywood from when i built my bar.

The light is going to be 2.5 x 5 feet and house 4 t38 bulbs.


100_3353.jpg
 
and btw, all scratches and scrapes were mostly in the clear coat finish on the pool table. The ones that weren't only in the clear coat have been repaired, and look good as new. amazing what some wood glue and sawdust will do!
 
got some more work done. all the wood is stained and i took a shot at 1 of the corner casters. here are some pics. still need to put a clear coat on top of everything.

100_3358.jpg


100_3359.jpg


100_3360.jpg


100_3361.jpg


100_3362.jpg


100_3363.jpg


100_3364.jpg


100_3365.jpg
 
Looks good. Regarding the pocket castings, find a plating company and I bet they would dip those in the stripping tank for you for cheap. One quick dip and the old Finnish and corrosion is removed. I'ts real quick. The hard work is buffing out the scratches. But if you dip them in the stripping tank first it makes for a much better finish.
 
Looks like it is coming along nicely. Have you decided how you will handle the cushions and pockets?


Sent from my iPhone using Tapatalk.
 
DON'T DO THIS! Take the advice you're being given here! If you truly want a good table that will play well, take the time to take it apart - CAREFULLY! Note where all the bolts and screws go, and don't lose anything (put all the hardware in a separate bag). I would strongly recommend hiring a local table mechanic to set it up for you. You don't need him to tear it down, that you can do yourself, if you're careful. Also it is much easier (and safer) to move this way!

You asked, so we are telling you. You have the benefit of HUNDREDS of years of collective experience on this forum. Take advantage of it. Don't be penny wise and pound foolish. Yes, you can save the cloth. Remove it carefully as well!

Best post yet. I'm not trying to be an arsehole but, it's clear to me that you haven't acquired the knowledge or skills to attempt this safely. Please seek professional mechanical help.

Sent from my Droid using Tapatalk
 
Back
Top